Today was pretty much all spent (as was yesterday) trying to make a holster. And basically, this thing doesn't holster well. That big fancy dish at the front end means the holster has to be big at the top end, and that means it rattles around.
I started my experiments with soft holsters. I had purchased some clear vinyl for that (as seen on trial #3 above). But soft-side holsters had two fatal flaws; it was difficult to get the dish in, and it was difficult to get the dish out. Even with two hands it tended to hang up.
So I moved to a hard-shell holster. Built out a shape in cardboard and duct tape around my prototype gun, checking frequently to see that it moved correctly. Then slathered up the form with Bondo.
This was a very fast way to rough up the form, and I knew it would stand up to the rigors of the vacuum forming machine. The downside to this sort of additive layering is the dimensions are increasing; if you want a snug fit, you need to reinforce on the inside of the form, then strip away the skin. If I'd had a bunch of plaster, and the time to let it cure, I would have gone that way instead.
A coat of primer for luck, and my new secret weapon; baby powder. I was able to get three clean pulls and got the buck back in one piece, too.
But then the nightmare ensued. I spent hour upon hour trying to fit white pleather around the shell I'd made. On the pleather side, you can't iron the seams to make them lie flat, every stitch leaves a permanent hole (so you can't baste and rip out), and it seems indifferent to many adhesives.
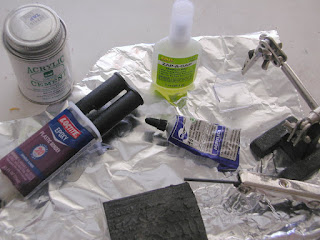
Worse for the PETG. But fortunately I had an epoxy that seems to get a decent bond on it.
While various glues were setting I took a quick file and sandpaper to the CNC'd buckle. I will probably be using that. I had a fun idea to dress up an Altoids tin with some of the various odd indicator lamps and knobs I have lying around, but I got far too hooked on the idea of using a laser-cut faceplate; that would save me from having to punch through the Altoids tin (which never goes well) and also would let me do a cute speaker grill.
But, alas, the lasers are booked solid. And that's too many cuts to want to by hand. So at least the glues finally dried:
Pity the holster is just too loose. Oh, and another smallish problem; the prototype had a shorter emitter. But the way it rattles around in the bucket, it hardly matters. Well -- tomorrow (we've moved final delivery to 5:00 tomorrow) I'll make another run to the fabric store for some batting, and do a quick quilt on the inside of the holster.
And maybe there will be enough time to finish the buckle, and stitch a length of belt. And if I for some reason had more time than that...I thought of putting gear pouches on the belt as well for that full Space Patrol look. Which would be simple boxes stitched up out of the remaining pleather.
With Atomic Tiki buttons -- because I did waste the time running a half-dozen of those off on Sunday night when the 3d printer become mysteriously available despite all expectations.
Oh, yeah. And here's a silly video with the various behaviors illustrated. Perhaps one day I'll make a proper recording of the sounds themselves...


No comments:
Post a Comment