Tuesday, July 28, 2015

Perspective

I have this recurring ideal that keeps coming to me; a really difficult, mentally challenging task, but in a situation where my basic needs are being taken care of; so I'm eating well and sleeping well, and can devote full concentration.

Reality too often is when I'm up against a deadline, shows to be built without enough time or material in places with difficult access...I'm also more often than not, it feels like, at the end of my financial rope.

I'm there right now. Painting all day out in the hot sun is physically challenging, trying to work fast enough for the opening night deadline yet neat enough is mentally challenging, as well as physically challenging in its own way; I'm struggling just to keep the tremors down from near-heat exhaustion, yet having to make extremely precise moves with an unfamiliar brush.

But, of course, I'm doing this hungry -- can't even afford lunch anymore, and there's not enough gas in the tank to get me to work through the end of the week, either.

This was among the tasks for today (well, actually -- we ended up doing the stairs differently. This was me working in Carrara to see if I could problem-solve how to translate the desired pattern on to the surface of a flight of stairs. The ones I did today were done with ruler, and once again I felt like I was trying to trisect the circle or something as I worked out the geometry.)

(And, yes. It's one of the two well-known musicals that requires swastikas. Makes you wonder if there are musicals that require, say, the Japanese W.W.II "Meatball." Well...if you want dangerous symbols, I know of one musical that might require the Elder Sign...)

Today, I felt okay after work. I could have actually eaten something quick and ran off to the City to put in a couple hours on the Raygun. But, alas -- I can't afford to purchase food so I'm left trying to cook something with whatever is left in the kitchen and not too rotted, I can't really afford the transit fares to the City...and, oh well, I probably couldn't get a machine reservation anyhow.

The Shapeways order arrived, at least. The parts all look plausible, and I am really happy now that even if I do go on to make a metal one some time in the far future, I will have been able to problem-solve the CAD files on a simpler 3d print instead.


I've tried a light test fit and so far nothing is critically wrong. The parts also seem firm enough to do at least a PETG "pull" (aka make a vacuum-formed duplicate) but this isn't necessarily a good idea.


The parts I printed at TechShop don't fit quite so well. I need to re-print the donuts, probably. Which is a pity; I did a nice job of smoothing them out -- chucked them in my drill press and held sandpaper up to them.

And of course I still need several other parts, both printed and (preferably) milled. Which is basically going to have to wait until next week. About the only things I can really do this week is sand smooth the print and prime it, as well as install the electronics (and get started on programming.)

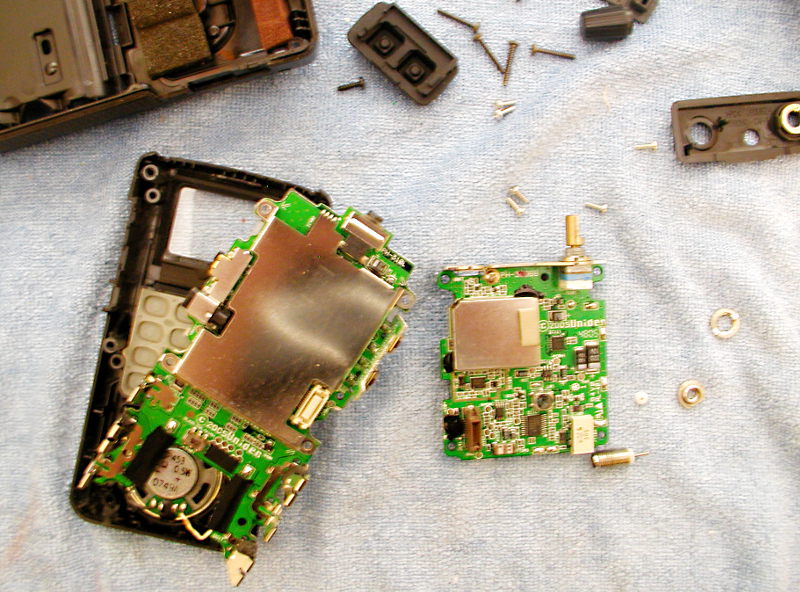
Among other compromises to meet deadline, I'm skipping trying to make the Atomic Energy Cell work properly. As of the moment, it will have to be pried out, and the connector to the Lithium Polymer battery fished out of an inconveniently small hole in order to recharge the thing. Well, it beats the Morrow Project CBR -- a failure in the lid latch meant I had to glue the box shut around the batteries!


Also for next week is any plan to run off this thing:


Yes: it's the Acme Disintegrating Pistol. And yes; in the original cartoon Duck Dodgers holds it with one finger inside the trigger guard, as shown here. I am somewhat tempted to just fire up my scroll saw and knock this thing out this week out of 1/4" MDF, but some parts are so thin I am afraid it might actually disintegrate (like its namesake, if not quite as completely) unless I make it from better wood or something like acrylic.

And besides -- as much as I want to turn this thing in to the client on the same due date as the Raygun, the latter must take priority in my efforts. At least once this week is over I will be a little bit freer of immediate financial worries.

If I can somehow stretch one day of gas and two days of food to cover from Wednesday through till Friday....

Sunday, July 26, 2015

And soon back to props

Have a few more days of painting (they offered me a full week but I'm not sure how much more I can take right now). We think the majority of the wagons are done now, so the bulk is the remaining drops and the floor.

Floors can take a big chunk of time. Because of course they are a big chunk of material. And few things in theater just get one overall color; it is usually as long (if not significantly longer) coming back over the base coat with various detail/texturing/glazing techniques.

We pretty much finished backdrop and proscenium. Made good progress on the first of three full-stage drops. The first one is a semi-realistic alpine scene and may take a while in detail painting. We'll see how good the lead scenic is at the Bob Ross routine.

Second drop is a roofline which may take a little time to layout. Third is signage -- which means more hand lettering.

I love doing lettering. It is a pain to cut in letters with a brush, and with a lot of paints you have to do multiple coats, but I like working out approximations of various fonts and the typographical details thereof. Thursday was very Zen that way; we free-handed a bunch of signs, lettering without even making guides first.

I also like the mechanical/mathematical aspect of laying out; of figuring out how to map what is on the drawings or the painter's elevations to the real material. Up there on the ladder with lining stick and plumb bob and measuring tape makes me feel a little like Archimedes and his circles (only without the latter's fatal interruption).

What makes this one more challenging than many is that the designer has given us watercolor renderings. Which in itself is not a critical problem (especially if samples or chits are included) but this is also very loose. The Painter's Elevations are not accurately scaled. They aren't even square.

So it took me a while at the first layout. The second one, I'd figured out what to do; create arbitrary reference points on the elevation, drop points to within the nearest three inches -- by counting panels or going from known landmarks so I didn't have to run a tape measure out 20' every time I took a measurement -- and then adjust by eye to correct his perspective and plumb his lines whilst maintaining the overall massing and flow of the rendering.

So, drat... with that many drops to go, plus there's a lot of exposed material which is going to need to go black, I think there might be a full week still to go. Not that the money is a bad thing, mind you!


On the props side, though, I'm waiting on deliveries. Between Grainger and UPS they messed up and I won't get the end mill I ordered until tuesday. If I'm lucky. Shapeways hopes to have the majority of the raygun parts in my hands some time monday. I left the trigger and guard, decorative swooshes, the plate holding the potentiometer and the sounding board/diaphragm for the speaker to be done in metal, but it makes more sense to fit them to the actual print dimensions anyhow.

Was reminded of a delayed CAD project -- the Commando Cody flash suppressor (not to be confused with Commander Cody). Need to borrow a Luger and CAD up the front end before that part will be ready for printing, and I still don't know how to properly lathe it. I need to put that pot back on the stove.

Holocron is basically waiting on me to finish lasing the new panels, assemble and paint, and go into Eagle again to create a new PCB. I've been sort of holding off on assembling the parts I have already because I want to record the entire process to make instructions.

Priority projects after the Raygun are another raygun (rather, the Morrow Project Laser) and a few sections of Imperial Road (Dragon Age). And I have a rather strong desire to knock off an Acme Disintegrating Pistol for the same deadline as the Raygun. I do wish I could put several copies of the raygun into production, but the best viable option at this point is to take a cast or a couple of pulls off the one that's getting printed for me, and quickly make up some (probably non-firing) resin or vacuum-formed ones.

Much as I hate to turn down paying work, some of those deadlines are tight enough I am really hoping we can blow through the rest of the painting and free me up again to work on props. Oh; and I wore my Tomb Raider pendant to a party and got a couple nice comments....including one person who wanted to order one for herself! (and she doesn't even know Tomb Raider...)


Saturday, July 25, 2015

Painting

Like several similar tasks, the actual act named in the verb takes only a portion of the time. For painting, there's layout, there's mixing, there's setting up ladders and shifting things around to get access (and laying out drop cloths over the things you don't want paint on), and there's clean-up.

I finished off the week with six hours on my feet with my hands in cold water, cleaning brushes and buckets. I'm still sore this morning.

A significant part of technique -- a big part of what I've been learning on the metal lathe over the past few months -- is achieving two somewhat paradoxical goals in regards to the verb; to increase the relative proportion of time spent in which tool edge is actually touching work piece, and to increase the rate at which material is removed (or in the case of painting, added).

I've been introduced to a new paint technique and I like it a lot. I've done speed-roller painting for floors before, and used rag rollers and die-cut texture rollers, but I've never done an entire set using dry-roller and roller feathering as the primary shading and texture method.

There are downsides. It takes concentration, slip-ups are inevitable, and their correction is difficult. It takes only a fraction of an inch of too much wrist rotation, or an ounce too much pressure, to put a hard roller-edge line in the middle of a softly feathered gradient. And it can't be corrected without going back and extending the entire gradient. Rollers also take a lot longer to clean, and can't be put back into service immediately.

Unlike, say, brushes, which can be put back into service damp, and can in a pinch be wiped off on a scrap or a rag and used on the spot. Which means roller feathering shines when there is a small number of colors, but gets labor intensive when there is a large number of colors happening at the same time. Among other things, the sheer effort in juggling multiple roller pans begins to add up.

The upside is of course speed. Rollers hold a lot more paint than brushes, meaning fewer trips to the paint pot or roller tray, and when you are using an extension pole this can be a significant saving in arm motions. In the right places of the work, you have the full width of the roller available, so it is like feathering with an 8" wide brush.


For smaller sets and detail work I'm not going to give up my 2" sash brush. This is a tool I found after several years of experimentation. It is a generalists' tool; it doesn't carry as much paint as a 4" layout and it isn't as easy to get in tight as a detail brush, and it is too clean to make a good dry brush (the best dry brushes are old, fuzzed-out brushes of just the right level of hairy disorder. Like a clarinet reed, they take a while to be broken in to this perfect state, and you struggle to keep them there as long as possible). But the 2" sash will basically do everything.

This was my previous time-saver; the 2" sash and a rag, meaning I could keep moving without having to change brushes, wash brushes, etc. All I had to do was change the amount of paint captured on it and the way I applied it to the work, shifting without any perceptible pause from laying in a patch of fresh color to feathering out a detail to cutting in hand lettering.

Theater techniques are, unsurprisingly, about speed. They are also about coverage; a typical regional theater seating 400-2000 will have a proscenium width of forty to sixty feet and a height upwards of twenty-five. A full-width drop, then, is easily 1,800 square feet. If it is new material it could take four gallons of paint to just cover it once. Fortunately most theater drops are recycled, but it will still take a couple of gallons to get some color on it.

Also fortunately, theater is about scale; in many cases we are trying to simulate real materials, in most cases we are adding extra texture and shadowing and detail just in the same way and for the same reason the actor accentuates their natural features with make-up (so the people seated sixty feet away can see something), and in many cases we aren't trying for realism anyhow.

So there are innumerable texturing and detail techniques to bring in wood grain, grime, marble, wall paper. And these are almost all techniques that are done with large, sweeping motions with the biggest tool we can use. Probably the subtlest and slowest technique that has common application is spattering, the poor man's airbrush. This is done quite literally by hand (or on a aptly-named Spatter Stick); you carefully get just enough paint on a brush, then you slap it repeatedly to send out a haze of fine droplets of paint.

Needless to say, with two weeks and a crew of three to cover four full-stage drops and three wagons on a 100' foot apron with 20' high walls, we are not doing any spattering.


Wednesday, July 22, 2015

Paint Your Wagon

Third day down on my new (temporary) job as a scenic painter and I'm exhausted. The last gig I clearly remember working all day in the sun was the load-in of the NFL Experience at Chrissy Field, which is more than a decade ago.

Great hourly pay, though. Best I've had since that emergency lighting load-in at a local high school. I've made rent already. If I stick through until opening I'll have next month's bills paid as well.

I'm rusty as heck and I was never a scenic to begin with. Like a lot of things, it is a skill most techies can claim the rudiments of, and skilled techies can fake if pressed. (The difference being, "most" techies can do basic carpentry and hang lights. "Skilled" techies can also weld, and they can design the lights as well.) There is a whole language of methods and techniques, from gridding (to transfer painter's elevations to the flat or drop), to scumbling and rag-rolling and feather-dusting and wet blending. And then there are all the skills in identifying kinds of paints and mixing colors from scratch and really, really knowing how to take care of brushes, and that's the point at which even this skilled techie has to back off and make sure he had made clear to his prospective employer that he is no scenic.

I've painted sets. I've painted my own sets (functioning as essentially the lead scenic artist). So I can stumble through it. But I'm rusty now and there's a heck of a lot I never knew.


For all of that, and all of the near sun-stroke heat and long hours with cold and swelling hands washing paint rollers, the only real bubble in this week is knowing I've passed the preferred delivery date on the Raygun and I'm going to be pushing hard to hit the final, drop-dead deliverable.


Sunday, July 19, 2015

Water Boy

Looks like I have work. The summer stock kind; just signed on to put up a set in at an outdoors theater I've worked at before, sweltering in the heat and mostly (from the sound of it) pushing paint. Hopefully I'm not too rusty there.

It will be just my luck if the sit-down inside assembly job calls now. But I think I can schedule that. The only question is getting enough time to keep the Raygun on schedule. And other things. I finally tracked down the correct diffuse layer files from my new Holocron but I've had the devil of a time trying to get out of the house for most of this week. By the time I have files prepped and am ready to go out and do them, all the machine reservations are snapped up.

Well, you push where it gives, right? The fanfic -- for all that it earns me no money and a dishearteningly small amount of feedback -- started moving briskly. I just this morning put down 1200 words about a book signing in Berlin. Helps that I only had to look up a few things here and there and could basically just write from memory of my own trip there. Unlike the Prague chapters, which were open-book essays involving up to forty browser tabs at a time.

Well. The final Prague chapter was stalled for weeks because I couldn't figure out how to recover from the chapter break. Restarting the inertia with a recap or a long camera shot wasn't working, starting in media res wasn't working, and cutting away to Sam's adventures on an abandoned Goa'uld mining world wasn't right, either.

At last I pretty much stumbled on how to do it. Come in hard with the somatics. Which is generally great advice. A lot of writers forget to put anything other than sight and sound in. Smell, kinesthetics...all of those I think help ground the reader more strongly in the world you are building.

In this case, I started with the cold of the underground room, and pretty much free-associated a synopsis on Lara's early and life-shaping experience in Nepal. With my own spin, which I think explains a number of things and makes her an even more interesting (but conflicted) character.

Oh...I was on a roll, and was able to finish off Sam's adventure in the next 7,000 words. Which was practically straight-to-the-page from my own experience in the military and, I suspect, a wee bit too much recently-read military science fiction. In fact, I'm damned if Sam didn't get just a wee bit too Honor Harrington on me there. I really, really have to back off, take the idiot lectures and info dumps way down, and pay way more attention than I have to capturing the distinct voices of these various characters.

Saturday, July 18, 2015

Carrying Buckets

Still no luck in finding work for the month. All I want is a little hourly to put me over the hill. All I've been finding is stuff that's a two-hour drive away...even if my car was up to it (which it isn't, without some likely expensive repairs).

The horrible thing is that sort of worry always makes me slow down myself. I have less appetite, less energy, and thus I move slower on the stuff I could be doing to make a little extra cash. I have people ready to order a Holocron now, but it is taking forever to prep the new graphics, schedule the laser sessions, and assemble a sample of the latest version.

I feel frozen on the Raygun also; main parts are at the printer now, and I can't keep from feeling like I want them in my hands before I solder up the electronics. Or more, schedule the machine time to cut/print the rest of the pieces. Doesn't help that I keep running into those minor niggling expenses...a new end mill here, some spray paint there, all of which I have trouble keeping myself from putting off...because of course I'm worried about not having work!

So I took a break, and finally pushed through the last "Prague" chapter of my Tomb Raider story.

Tuesday, July 14, 2015

How do you fix fic?

I've complained quite a bit about how Tomb Raider 2013 starts with some interesting ideas but ends up foundering on the crass and rote machinery of contemporary AAA games. I am not sure how you would "fix" the game, given as many of the potential ideas it introduces are of a sort that no-one has yet figured out how to turn into a proper game mechanic. And if you removed the cover-shooter combat fest, the remaining game would be too short.

You could, however, re-tell the story in a form that does allow better use of the archaeological problem-solving, and survivalism that goes beyond simply hitting a few quick-time events (let's put it this way...starting a fire to survive her first night is given in a cutscene. Period. There isn't even a QTE to react to. Your involvement as player in this basic act of survival is quite nill.)

So given that, what would change?


Sunday, July 12, 2015

And it's no, nay, never, no nay never no more

I've been applying for work-work. Cable repair, speaker assembly, that sort of thing. The only scene shop looking for a carpenter this week is a long commute away, unfortunately. I'm not giving up on the freelance life. But I need a cash infusion to keep on with living expenses...and prop-building expenses.

Basically I'll be waiting around for the next week or two for the major elements of the Raygun to come back from Shapeways. I can mill a few parts in the meantime (once I get a new end mill) and work on the electronics, but this is a pretty good time to veer off and do something else. Like earn a little money.


Went into the shop yesterday; printed out the "donut" insulator ring at the lowest resolution the printer could deliver, and also as an experiment (and because I had time left on my machine reservation), the energy cell assembly that sits in the grip and contains the battery:


Always good to do a sanity check. There are a couple spots where this part could be improved. Also printed out in under an hour so not a real problem to go out and print another.

Really, isn't much of a chore watching a printer. I take my laptop and I work on other files while the print is going (it is the sorry truth of this new computerized, software-driven, micro-fabrication age; more and more computer work that needs to be done. Unlike what some people seem to think, going CNC and 3d print and all doesn't mean the computer does all the work for you. It just means it looks different while you are doing it.)

This is what that part looks like in CAD, by the way:


The main work I was doing while the printer was spooling out Zen Toolworks PLA a millimeter at a time was cleaning up the new Holocron design. I was even able to get a very subtle texture into the diffusion layer (basically, acrylic is either frosted by the laser, or not. There's no equivalent to the range of tones you get when you burn wood.)


And, no, I don't really care for the big Jedi symbol. And I was working off the wrong cutting vectors for the inner pieces anyway -- they were slightly large, and the snap-fit wasn't tight enough. I'm sure I've got that data somewhere, though, since I cut a whole set for the "Jedi Master" (who vanished into hyperspace after I shipped him a full kit to try out.) So I have at least one more trip out to play with the lasers before I can start a Project Run thread on this and start collecting money for materials.


Today was a semi-productive day as well. Finally got around to opening up my Uniden Bearcat scanner to confirm that, yes indeed, the bulkhead jack for the antenna was cracked in two places:


A trip to the Sprint Shack and I have a new connector in there and can use it as a radio again. But the jack I purchased is too short so I'm leaving most of the screws off until I can get the right part from Digikey. Might replace the speaker, too -- it has been sounding weak.

Also picked up some fabric and leather, Ritt dye and a couple pieces of poster board to use as seamless backdrops for model photography. Which is overkill for the size of most of my props these days:


That's my very first 3d print, BTW. Found the file on Thingiverse, printed it off in my new roll of pink SLA, then sanded the heck out of it. Tried three or four times to get a nice color on it. What seemed to sort of work was a primer coat of (bright yellow!) Rustoleum Super-Coat, followed by Tamiya Olive Drab2, then wet-sponging with a mixture of mostly pthalo green and burnt umber, with a couple of coats of gloss to cover.

The artists were inconsistent -- not only do promo pics not resemble the in-game prop, not only do neither resemble the official collectable shipped with the pre-order game, but it is rendered several different ways in game! That said, this is a pretty poor approximation of any of the versions, but it was fun to make.

And after all of that seamless-backdrop stuff, I still find I prefer taking prop pics with all sorts of random garbage in the image:


(That's a nautical clock, actually. And real charts, although I think they are Chesapeake Bay. And a far too modern and clean-looking reproduction firearm as well. I used to throw handfuls of NATO 5.56 crimps into the background, but I gave those away...)

Friday, July 10, 2015

Oops

Logged on to the Tormach CNC mill today.

On the plus side, I figured out how to use the software "wizards" to face a piece of stock on the Tormach itself (these are tiny sub-programs made available in many CNC tool drivers that allow semi-automated, semi-manual operations to be performed).

On the minus, my G-Code was bad. The code I'd sent from Fusion 360 wasn't useable. And the code from Cut3D -- well, despite being within the recommended tolerances, the moment I made my first machine pass it ramped down steeply and snapped my good end mill clean off.

Oh, yes. And the setscrew was completely stripped on the quick-collet when I got the machine (fortunately -- maybe fortunately -- I knew how to install a regular collet), and someone had left a stop secured to the vice...and it took fifteen minutes of searching the shop to find the right allen key to remove it.

This is the problem with a rental tool facility. The Tormach has the problems above. One of the two lathes is still out. Three of the 3d printers are dead. And the reservation calendar is starting to stretch for two weeks in advance.

I'm getting a real case of buyer's remorse here. I chose to pick up a year's membership at once because it was much cheaper. But that was a lump sum I really can't afford this month. I'm down to too little to pay bills. And nothing lined up to cover next month's rent.

Which is another reason to seriously rethink the Raygun prop. I think I need to turn to projects I know will earn money (I'm basically doing the Raygun at a loss) and come up with the cash to have the body printed at Shapeways instead of trying to machine it out.

(And, yes -- I could print it at TechShop, but it would take a week's worth of reservations and the tolerances wouldn't be as good. I've rather rethought the usefulness of being able to print there, as well. Printing is just too time consuming, and the lack of available machines and the short reservation period makes that a big problem.)

Thursday, July 9, 2015

Keeping Tabs

The CAD file is complete and I have the CNC mill reserved for tomorrow. And I've run into two critical problems while setting up the actual tool paths.

The first is the growing realization that I won't be able to achieve the shapes that are on the CAD. Not, at least, without significant hand-work. There are too many curves and angles to make traditional milling possible, and the contour milling leaves too many fillets behind. So there is going to be time-consuming clean-up.

The critical one, at this moment, is a seemingly tiny problem. I can't set up support tabs in Fusion 360. Within, say, Cut3D the available tabs are primitive but they do the job:


Fusion 360 doesn't have that easy option. There are tabs in some of the milling operations, but they aren't global. And there are also some operations that can be instructed to stay clear of objects that could be part of a support structure. It may even be possible to define a set of tabs as a "fixture" -- I'm looking into that now.

But basically, I'm at a point of crawling through forums and watching endlessly slow, fatuously self-pleased instructional videos hoping that one of them may happen to mention this essential work-holding issue, and that it will be appropriate to the version of the software that I'm running (a perennial issue with Fusion 360, as they are re-writing it faster than anyone can document it).

Fortunately my fall-back is looking more plausible.

Cura (which is a freeware multi-platform "slicer" for 3d printing) estimates 1:58 to print the largest of my pieces. Which based on experience is about 1/2 the time the printer will actually take, but that still makes it just possible within a single machine reservation.

Even better, they all fall into the "within the density where calculations are performed on the bounding box" at Shapeways, to the point where all the major parts can be printed for under a hundred bucks total! If I had any spare cash at the moment, I'd probably put an order out right now just to be on the safe side...


I'm also depressed because I'm working sixteen hours a day trying to complete this commission and I'm flat broke. Can't even go look for work because, well, sixteen hour days trying to complete an existing commission. And the thing is really scaring me now. I don't know if I will be able to complete it (and it is already well behind on the delivery date I wanted.)

Well, maybe. If this thing gets done, I'll move on to the Jubal Early (which will be a lot easier based on what I've learned now). Heck..from what I've learned already, a PPG would be straight-forward. Perhaps even more straight-forward! If I can just survive a few more months, I just might be able to move on to some of the machined props people have been asking for. And one or two of those would pay my way for a considerable period...

Wednesday, July 8, 2015

Tool Cycle

TechShop has a lot of tools. Each tool has a class which is part orientation, part safety lecture, with a short hand's-on. Each tool also has a reservation calendar.

So the trick is to get back on that machine before the lessons of the class entirely wear off. I had to bring manuals with me when I went back to the metal lathe and it took two solo sessions before I really grasped the basic principles. I've put in over a hundred hours on that tool since, and I am finally at a comfort level with simple operations.

I'm still at the manual-in-hand stage with the CNC mill -- and it has been long enough since I returned to the tool and took a solo flight that I'm still going to need a little help. But I'm at the point with that tool to begin production work.

Yesterday was the first solo at the 3d Printer. And just in time, as the class I'd taken was now two or three weeks old in my memory. Type A machine, 12x12x12 build area, and I purchased a roll of PLA downstairs as a starter set. The only problem I had was remembering that the printer driver is a browser-based software (thus no-where near the Start Menu. Or whatever Windows people call it).

I didn't have any production work ready to go, so I printed two random models; an unmodified XR-311 wheel (downloaded direct from my Shapeways shop) as a comparison check. And a simple model of Lara Croft's pendant I'd found at Thingiverse.

I documented all my settings and experimented a bit. The pendant, a flat disk 33mm in diameter (according to the software, 2.59 cm3 plus raft) took 42 minutes to run off and again according to the software ate 1 meter of filament (from a 333 meter roll that cost me a bit under $50, so with wastage and error less than a quarter's worth of material). Dimensional error was on the order of .2mm; worst on the Z axis.

I gave the XR-311 wheel two shots. It was never designed for this kind of print and lacked sufficient support for the hub or detail scaled appropriately for the .4mm nozzle. Each took in the range of fifteen minutes (the second time I also increased to maximum resolution). Based on that, I could print the whole vehicle in one reservation. A look at the spec sheet from Type A shows it will print at a draft mode (thicker layers) that would be over twice as fast as my first print; I could probably finish a body half of the raygun within that same four hours.

I also note in passing that the bed on the Series 1 is really underbuilt; it is visibly sagging and warped, to the point that no leveling of the machine is ever going to clear it up. Other than that, the machine worked smoothly.


Of course, I took the class on the ShopBot (2.5D wood router) last week as well....

Monday, July 6, 2015

Raygun XIII.II

So still haven't started cutting metal.

Been working hard to get there...pretty much exhausted myself; ended up crashing early on the evening of the 5th and sleeping over ten hours.

Where I am now, is where design for function, design for assembly, and design for manufacturing all butt heads. The shape of the gun is fairly fixed now; it's been through too many stages of prototyping and approval for me to make significant changes in dimension or shape. So I have to design the actual milled parts to support that shape.

Which also, of course, have to fit together. And it has to be possible to assemble them (not the same thing; this takes into account assembly order, tool access, and so forth). And they have to be manufacturable. Which is to say; I need to be able to create those shapes on the mill.

So one of the things I've been pushed into over this past week is to generate all my GCode in Fusion 360. There's one obvious utility; this means I can tweak the GCode right on my laptop during the actual milling session.

The stronger necessity, however, is to have better selection over which operations are performed on which part using which tool.


The CAM software I learned (and cut with) previously looks like this:


It is a friendly-looking interface, with helpful pictures. Fairly powerful, and even more advantageous, it has already made a lot of the more complicated decisions for you, presenting a simplified pallet of choices that is easy to navigate.

The CAM interface for Fusion 360 (which apparently is based around a fairly mature existing CAM package they licensed) looks like this:


There are a lot more options.

The advantages here are several; first, you have more algorithms (such as the spiral finishing path above) that can optimize speed and final finish. Even more importantly, there is a lot more choice in what you cut. In the above, the finishing pass is restricted to just the object itself; it isn't attempting to make passes through the entire bounding box.

But beyond that -- for several of the parts I have, I need to make sharp corners in order for them to fit together. But these same parts also have compound curves that need to be gone over in contour passes with a tiny ball-end end mill. Fusion gives me the opportunity to create specific operations that will place the flat end mill right into those right-angle corners, whilst leaving clearance for the finishing passes on the rounded bits.

More or less. It takes even more work to set all this up in the files. In a number of places I am better off re-thinking the mating surfaces so I don't have to do these passes this way.

And the big downside is I don't know what a lot of the options actually do. Which means I have a lot more work in setting up feeds and speed and clearances to make sure I'm not going to crash the head or do something else nasty and expensive.


Oh, yes. And I spent a while worrying about whether I could even get the end mill down into some of the deeper features (especially on the main body, which is over 1.5" wide). I looked up various end mills at Grainger and other companies, pulling down lots of numbers on available flute length (the real key to cut depth), as well as other numbers for stick-out and collet clearance.

And I'd forgotten that when I ran off my first test part, I'd already purchased my own starter set of mills. And the primary one has a nice generous flute length that is at least 1/8" larger than any of the ones I'd been looking at. Long enough, in fact, to have no trouble at all reaching down into the deepest pockets on my workpiece.

That still doesn't solve everything, though. There are still spots where the cut is going to end up rounded over, and I have to compensate for that in the mating surfaces. And there are still a few spots where I didn't think out the geometry properly and some of the cuts are actually impossible (as in, overhanging material). So I still have a few days of tinkering before the files are really ready.

And then when I hit the machines, I expect to find out a great deal more.

Thursday, July 2, 2015

Raygun XIII.I

The worst of the CAD is done:


That's the right side of the main body. About all I have left is putting the screw holes in the mating piece, finishing the "energy cell" release on the bottom of the grip, and doing a last pass to add slop and tolerance where possible. Pity many of the cuts are not at right angles; makes it hard to do clean-up with traditional machining.

And I may still add an overlap for visual effect.

I'm liking Fusion 360 more and more. Once you get used to the program flow, it moves very quickly. Shapes -- primitives or what they call "sketch" shapes -- snap to existing edges and faces making it really simple to line up near-seamless additions or cuts. Faces are intelligent; you can drag them around and they remember what they were trying to do based on the geometry they were originally a part of. For instance, if I were to select one face of the sounding board and drag it, it would re-fit itself to the inner curve of the body shell as I dragged it. Within reason, of course!

And the CAM section is very complete, with lots of choices in path and work setup. I may actually CAM from Fusion, instead of from Cut3d. And just in case that wasn't enough, they also throw in a pretty decent ray-trace render!

So why is the piece above so complicated?


Because almost all of the components fit into it. This is the keel of the gun; all the parts screw down to it so I can finish and test the electronics before closing the other half of the body over it all. And, yes, there's rather a lot of compromise here. The surface transducer, especially, is facing a 1/16" aluminium panel that is split in two pieces to allow the gun to come apart. I have no idea how it is going to sound.

The Cree also lacks the heat sink I wanted to add; it is nested on the face side (meaning I'll have to protect the wires) instead of making contact with bare metal. And as I said there's barely room for even the wiring between the parts.

And there's way too many screws that need tapping (not in the model; the screws holding the switch down, pegging the spring, and as part of the pivot for the trigger.)

Since the CAM software will attempt to cut everything that is presented in the file, I'm leaving the screw holes out (except for the large holes the heads sink into). So if I go with 3d printing I'll need to fork the file or duplicate the parts that need screw holes printed into them. And I might make another pass for holes, with a bit change or two, but I'm going to be pushing just to get a full piece run off on the Tormach before each day's reservation runs out.


Wednesday, July 1, 2015

Raygun XIII

I've finally hit the part of the CAD I thought might take a little time. Just as I'd reached the point in project scheduling where I was hoping to blow through and not take a lot of time, of course.

To wit; not just getting all the parts connected, but fitting all the internal mechanisms in there:


There is surprisingly little space. I thought, since I was creating the shell from scratch instead of depending on the vagaries of slush-casting, I'd have a lot more wiggle room. But there's not even room for the battery capacity I want. 

At least I'd foreseen having issues with the trigger. I was smart enough to make a scaled mock-up, complete with spring and stop pins:


If I'd been at the shop I would have laser-cut these pieces from the actual file. As it is, they were achieved through the high-tech method of tracing directly off the computer screen. And then I wasted more time figuring out how joints work in Fusion 360 so I could test the completed action in software.

Notice how many iterations I had to go through before I found a working compromise between room for the finger, a decent take-up, and a comfortable action.

Of course getting all the other parts into CAD took a little time with calipers (I actually ran down to the hardware store to make sure I was measuring the exact hardware that would be available at assembly time):


The electronics are from both Adafruit and DigiKey, with a last-minute replacement of the limit switch with one with a stiffer action from, of all places, "Sprint-Shack." Oh, and yes; that's a quick CAD mock-up of my own DuckNode LED controller. Which only barely fits -- this thing really is tight inside.

Of course all these complicated shapes do no-one any good if they can't be manufactured. So as another sanity check, I set up several simulated CNC runs in Fusion itself (I'll probably be working up the actual G-code in the simpler Cut3d). There were various issues with fouling the tools, but with end mills at the longer end of the range I was able to get all the cuts completed -- and get a sense of how much the final aluminium is going to vary from the CAD version (and important question when there are so many pieces fitting so tightly together!)


And maybe CNC isn't the answer. Besides the way that all the corners will be rounded over (unless I spend even more effort with pencil mills and hand files and so forth), there's the matter of time and the cost of tooling. So...will Fusion 360 export in a file format Shapeways will accept, and what is the cost of printing these parts there?


It will, and, oddly affordable. Using the aluminium-powder infused SLA as rendered by Shapeways, above, that piece alone is $40, meaning the entire gun could probably be run off for around $160. And the only real change to the files is to put the bolt holes in, but set them for the self-tapping qualities of sheet metal screws.


So it will work. If I can't CNC it, I can print it. And although it is a tight fit, there's nothing critical about the electronics. Well, except maybe for the speaker. I'm also having a lot of questions about whether that surface transducer is actually going to work. I flirted for a number of hours today (I guess this was a long day!) with having a separate "sounding board" that was fit into the gun and secured with JB Weld, but the theory is really that the whole gun becomes a vibrating surface, and there really wasn't room anyhow. 

Lastly -- this has been a rather busy week, really -- I made it out to TechShop for a class on the ShopBot. So now I'm checked out on a machine that can rough a 3d shape out of MDF very quickly, working off a good 3d model. Which was all along a possible approach for this thing; do an MDF master, then use it as a buck to pull ABS on the vacuum-former, or mold it up and slush-cast in plastic.