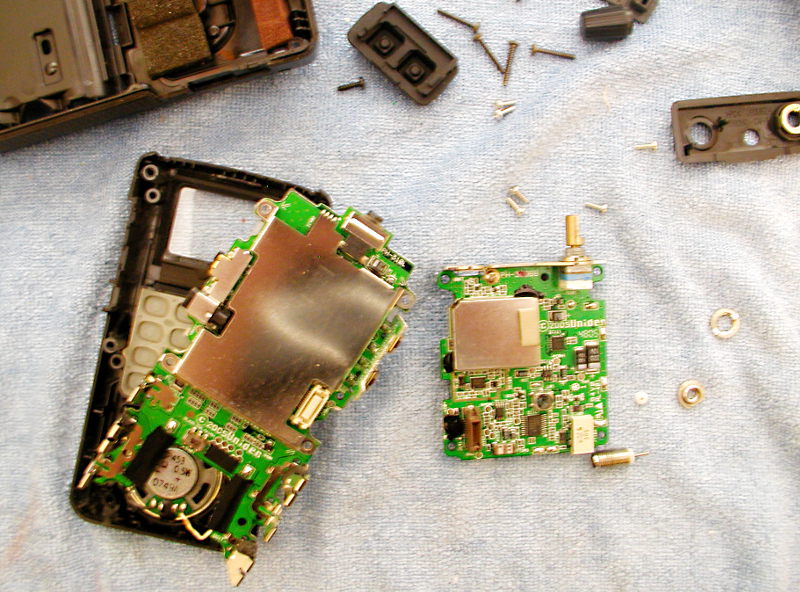
So I went to TechShop -- sorry, "TheShop." (Idiots). And despite the calendar showing it was open, and even the tool reservation calendar showing tool reservations being made....it was actually closed. No, there wasn't any notice. Closest they came was a question asked by a member on the private Facebook group that was answered by another member.
Yeah, great communications. Why am I paying membership to these idiots?
Wasn't a total waste. I went over to MOMA and looked at art (I get in free all year -- more benefits of the full-time job).
Was kind of tired after closing night anyhow. Had a light go out. I have five front lights so I really, really needed it. Corroded socket of course, so all I could do is scratch out the worst of it with a nail file. On closing night the instrument dropped out right at the top of the show...fortunately it hangs right in front of the light booth so I was able to tap it back to life with a broomstick and then I spent the whole show carefully never turning it all the way off (because it would never turn back on).
So I still don't have anything I need at TheShop. But I'm eager to get checked off on the machines I've used in the past so when a future need comes I can go in and start bending metal. (Well, not bending metal...I didn't do the Safety and Basic Use classes on the brake and sheer yet).
What I have for the moment is random fun-to-do projects. Chief among which is making a mini loom. Honestly, for what I want in a loom I can tinker up something at my workplace. The only reason to do a laser-cut version is to, yes, get my permission in order for future lasering.
Could also cut some guitar picks, again just for the fun of it. Weaving tools gives me a few other excuses to unlock tools; 3d print a spindle whorl. Or even lathe one up on the wood lathe. Or could even CNC a spindle whorl out of aluminium but...
Oh, right. Haven't ordered the churro yet (did order some deerskin scraps and rawhide to make a tool roll for my traditional flint-knapping kit). Found a 1oz pack of wool roving in the embroidery supplies at my favorite local fabric store but my first attempt at hand spinning did not go swimmingly. Mocked up a quick drop-spindle from a bamboo chopstick and some red clay. Did eventually get a short two-ply that doesn't look horrible, but I went back another 2,000 years down the tech tree to create that one; I rolled it on my thigh.
Yeah, looms. Sure, I might make a ukulele strap with a tablet loom, but it is primarily for historical research. Even if I don't even know if my Cretan weaver is using a fixed heddle. Or any heddles. Certainly not tablets. Well, probably not. Remember what I said about adoption? It is a tech that is of limited use in that time and place, and I can defend that it might have arose here, been known to a few people but never documented or achieved any prominence.
As for prop projects: after I've gotten some cleaning done I'll dust off the Holocrons and see if anyone at the RPF still wants one. Unfortunately I haven't been able to think of anything that really leverages the kinds of equipment I have available at TheShop. There's always Aliens grenades, but they are a finicky machining project that takes way too long to be profitable. Or interesting.
Unfortunately top of my prop list right now seems to be re-doing the "Yamatai" necklace. This is actually a good lead-in project for the Wraith Stone as I intend to do the same sculpt-and-scan process to make a 3d file. Which I'll then have printed at Shapeways for the fine detail available there, clean up and hand-detail the print, then cast it in resin. Then make the 3d file publicly available.
References are of course poor. I'm almost tempted to play the game again to see if I can get a better screen shot. There are some visualization and promotional artworks, but they look rather different. In fact, there's almost reason to go with two necklace designs (at least in part because the artwork version has a clearer link to real existing traditions -- chiefly Maori -- and to my eye is a more pleasing design anyhow).
And actually, that might be a quick laser project too. Would make the sculpt easier if I created a flat "armature" out of some thin, stiff material like 1/16" acrylic...
Tricks of the trade, discussion of design principles, and musings and rants about theater from a working theater technician/designer.
Showing posts with label TechShop. Show all posts
Monday, May 28, 2018
Sunday, May 27, 2018
Inkle Dinkle Do
I've mentioned that I rather dislike when a character in a historical novel starts going around inventing modern technology. I mean the sort of stuff that seems obvious in hindsight, like the stirrup or paper clips. I don't think it works. It doesn't really make the character seem smart and insightful, because we have paper clips. It does make the society they are in look dumber, because if it was so obvious, why didn't they have it already?
First there's context. Stirrups do you no good in an age of chariotry; you need horses and the horsemanship to fight from horseback before the extra stability is helpful. Then there's development; there were a thousand variations of paperclip (and even more, the zipper); the trick was figuring out how to manufacture it economically. Inventing a technology is nothing if you can't get it adopted.
And lastly there's a nasty little observation, and that has to do with the subsistence trap. The people who kneel over a floor loom for generation after generation don't invent the standing loom, because they don't have the spare time. They can't take a chance on something that might work when it takes every waking hour just to put food on the table. It is the same economic trap every poor person in the developed world falls into.
So, no, I don't want my Cretan weaver to invent a tablet loom.
Yeah...there's an academic paper which I'm currently trying to track down, which apparently argues convincingly that a certain embroidered belt belonging to Rameses II could not have been constructed on a tablet loom. The best evidence for them is 800 BCE Europe -- and most textile and metal technologies seem to have spread from Europe to the Aegean.
Pity, in part because this means I need to learn what the actual technology for decorative strips was. So more research.
Also pity because tablet weaving just seems like so much fun (well....for a certain level of fun; you really have to grade this one on a curve because weaving and spinning are almost defined by being monotonous and extremely time consuming.)
I'm very much going to try hand-spinning on a drop-spindle. I found a place called The Woolery which has wool top from Navaho Churro -- the most similar thing to Bronze Age sheep I've found so far, although I remember reading somewhere there is a breed that definitely comes close (the distinction is, bronze age sheep shed instead of being sheared.) And the Woolery has Dew-Retted Flax, for when you want to get really crazy.
I've also found some plans on Thingiverse for simple laser-cut looms. I am thinking of lasering at least some tablets and shuttles, and possibly design up a mini fixed-heddle loom. And perhaps 3d print or even wood lathe a spindle whorl.
Because even more than doing a little historical recreation bronze-age weaving, what I rather need to do now is get checked back in on as many tools of the reborn TechShop as I can.
First there's context. Stirrups do you no good in an age of chariotry; you need horses and the horsemanship to fight from horseback before the extra stability is helpful. Then there's development; there were a thousand variations of paperclip (and even more, the zipper); the trick was figuring out how to manufacture it economically. Inventing a technology is nothing if you can't get it adopted.
And lastly there's a nasty little observation, and that has to do with the subsistence trap. The people who kneel over a floor loom for generation after generation don't invent the standing loom, because they don't have the spare time. They can't take a chance on something that might work when it takes every waking hour just to put food on the table. It is the same economic trap every poor person in the developed world falls into.
So, no, I don't want my Cretan weaver to invent a tablet loom.
Yeah...there's an academic paper which I'm currently trying to track down, which apparently argues convincingly that a certain embroidered belt belonging to Rameses II could not have been constructed on a tablet loom. The best evidence for them is 800 BCE Europe -- and most textile and metal technologies seem to have spread from Europe to the Aegean.
Pity, in part because this means I need to learn what the actual technology for decorative strips was. So more research.
Also pity because tablet weaving just seems like so much fun (well....for a certain level of fun; you really have to grade this one on a curve because weaving and spinning are almost defined by being monotonous and extremely time consuming.)
I'm very much going to try hand-spinning on a drop-spindle. I found a place called The Woolery which has wool top from Navaho Churro -- the most similar thing to Bronze Age sheep I've found so far, although I remember reading somewhere there is a breed that definitely comes close (the distinction is, bronze age sheep shed instead of being sheared.) And the Woolery has Dew-Retted Flax, for when you want to get really crazy.
I've also found some plans on Thingiverse for simple laser-cut looms. I am thinking of lasering at least some tablets and shuttles, and possibly design up a mini fixed-heddle loom. And perhaps 3d print or even wood lathe a spindle whorl.
Because even more than doing a little historical recreation bronze-age weaving, what I rather need to do now is get checked back in on as many tools of the reborn TechShop as I can.
Sunday, April 22, 2018
TheShop.Build Pre-Mortem
TechShop died without notice, leaving all the members in the lurch; instructors unpaid, people's personal equipment trapped behind locked doors, "lifetime" memberships in the tens of thousands of dollars left unhonored.
After half a year of fumbling around a fellow named Dan Rasure picked up the leases -- buildings and equipment -- and re-opened under the name "TheShop.Build," with lots of promises about improved maintenance, improved training, and above all more openness.
Dan's blog hasn't been updated since Feb 15. The member's forum stops showing activity in December, similar for the shop blog, the subforum on Reddit, etc. So much for keeping lines of communication open.* But then, this is the guy who dreamed up "TheShop.Build" -- it's practically unsearchable, as the only way to keep from getting results on every shop ever is to constrain the search to a level of capitalization and punctuation unusual within social media.
So much for openness. But maybe there's a reason for it.
Here's a picture from the official website, one of a set which has been used for all announcements to media and blogs:
I took a site visit today. Here's what that tool actually looks like:
Okay...Lathe #2 is down for service, is listed as such in the equipment reservation calendar. It also has no sign, no tag-out, the power was still on, and according to the calendar it's been down for five weeks -- so much for Dan's written promise that tools would be returned to service within a day or two!
Now, I'm not going to fault some chipped paint and merely cosmetic rust. Someone looks to have played with the gibs recently as the backlash is minimal on the cross-feed, but at the same time - on the one working lathe -- the tailstock won't clamp down and the handwheel still has a stripped nut; basically, it shows no evidence of the tear-down and rebuild it desperately needed.
That agrees with the rest of the shop. Everything was dirty, nothing looked like it had been adjusted more than the minimum to get it working after the last crew abandoned it, and a significant amount of the support materials...hex keys, clamps, coolant bottles, parallels, even shop vacs and rags...are missing.
I'd be surprised to find there's still a maintenance contract on the laser engravers. They were dirty inside, the tables battered, grime on the ways. The electronics area has yet to be organized, with random and possibly broken gear jumbled onto shelves, not the neat little stations the lying slide show would have you believe. Heck, even half the computer stations upstairs had issues and wouldn't open.
Look, I've run a shop. I know about fair wear and tear, and I know how fast grime accumulates. This, though? This is shit.
If there was some sign they were aware it needed work...some information about what is upcoming in terms of repair and replacement...someone even in the building aside from two nice-enough lads manning the desk (I saw one other guy in the woodshop and as far as I know that was it for staff). Some, in short, COMMUNICATION.
* There is minor activity on the official Facebook page, but it is all fluff; announcements about the San Jose shop opening and advertisements for STEAM classes.
After half a year of fumbling around a fellow named Dan Rasure picked up the leases -- buildings and equipment -- and re-opened under the name "TheShop.Build," with lots of promises about improved maintenance, improved training, and above all more openness.
Dan's blog hasn't been updated since Feb 15. The member's forum stops showing activity in December, similar for the shop blog, the subforum on Reddit, etc. So much for keeping lines of communication open.* But then, this is the guy who dreamed up "TheShop.Build" -- it's practically unsearchable, as the only way to keep from getting results on every shop ever is to constrain the search to a level of capitalization and punctuation unusual within social media.
So much for openness. But maybe there's a reason for it.
Here's a picture from the official website, one of a set which has been used for all announcements to media and blogs:
I took a site visit today. Here's what that tool actually looks like:
Okay...Lathe #2 is down for service, is listed as such in the equipment reservation calendar. It also has no sign, no tag-out, the power was still on, and according to the calendar it's been down for five weeks -- so much for Dan's written promise that tools would be returned to service within a day or two!
Now, I'm not going to fault some chipped paint and merely cosmetic rust. Someone looks to have played with the gibs recently as the backlash is minimal on the cross-feed, but at the same time - on the one working lathe -- the tailstock won't clamp down and the handwheel still has a stripped nut; basically, it shows no evidence of the tear-down and rebuild it desperately needed.
That agrees with the rest of the shop. Everything was dirty, nothing looked like it had been adjusted more than the minimum to get it working after the last crew abandoned it, and a significant amount of the support materials...hex keys, clamps, coolant bottles, parallels, even shop vacs and rags...are missing.
I'd be surprised to find there's still a maintenance contract on the laser engravers. They were dirty inside, the tables battered, grime on the ways. The electronics area has yet to be organized, with random and possibly broken gear jumbled onto shelves, not the neat little stations the lying slide show would have you believe. Heck, even half the computer stations upstairs had issues and wouldn't open.
Look, I've run a shop. I know about fair wear and tear, and I know how fast grime accumulates. This, though? This is shit.
If there was some sign they were aware it needed work...some information about what is upcoming in terms of repair and replacement...someone even in the building aside from two nice-enough lads manning the desk (I saw one other guy in the woodshop and as far as I know that was it for staff). Some, in short, COMMUNICATION.
* There is minor activity on the official Facebook page, but it is all fluff; announcements about the San Jose shop opening and advertisements for STEAM classes.
Tuesday, December 5, 2017
Watch this (Maker) Space
TechShop may be having a Mark Twain moment.
However, far from there being a "rumor" of its demise, it was the CEO who sent a mass emailing and open letter to the Maker community in which he stated Chapter 7 had been filed, the company was dissolved, and the assets were now in the hands of the court.
As of a week ago there's a new email drifting around (which much smaller circulation*) in which that same CEO says they've sold the company and it will arise anew as TechShop 2.0. And oh yeah; they didn't actually file the Chapter 7.
However, far from there being a "rumor" of its demise, it was the CEO who sent a mass emailing and open letter to the Maker community in which he stated Chapter 7 had been filed, the company was dissolved, and the assets were now in the hands of the court.
As of a week ago there's a new email drifting around (which much smaller circulation*) in which that same CEO says they've sold the company and it will arise anew as TechShop 2.0. And oh yeah; they didn't actually file the Chapter 7.
Thursday, November 16, 2017
TechShop RIP
I can't say I didn't see it coming. When I gave them a thousand bucks for the current year's membership I did so reluctantly aware they might not last the year.
What I didn't expect -- what no-one expected -- is that one Wednesday morning their loyal members would find the doors locked, no-one answering the phone...nothing but a (belated) email later that afternoon explaining that they had filed Chapter 7 and no longer existed as a company.
Yes, I understand why the members were kept in the dark. They were still hoping to find an investor or strike a bargain. But on sober reflection I don't sympathize. The above translates as, "We were in such dire financial shape we had to hide our books from the suckers we were trying to entice to give us more money, so of course we had to lie to our own members lest they give the truth away."
So, yeah. I feel betrayed.
It was a useless effort anyway. When I realized TechShop was in trouble I went web surfing and everywhere I found future investors hanging out, they all knew damn well (and in better depth and detail than I did) how bad off TechShop was.
It might have been smarter to be open and lay out exactly what they were dealing with. The kind of help they needed went beyond finding some random guy in Dubai to send them an infusion of cash. They needed a restructuring, they needed a better business model.
But I have to wonder if this wasn't almost implicit in shape of the very thing we were trying to preserve. TechShop was Maker. It ran on the philosophy of throwing it together. A sort of laissez-faire approach to building where doing it the right way or even the safe way was de-emphasized in favor of experiment and originality and the freedom to fail.
I loved the hands-off approach. TechShop gave you just enough instruction to get started and at least know the obvious ways to cut your own hands off, then let you alone to study, learn, and make your own mistakes. The alternatives I've looked at are much more about the "community," with a touchy-feely atmosphere so strong it makes you look around for the Kool-aid. If you wanted to come in at ten at night, speak to no-one, log into the machine and make a few cuts TechShop was the place to be.
The thing that I will miss most is the multitude of options. Sure, I can get access to many of the operations and some of the machines. I can send away to Ponoko to laser. I can get printing done at Shapeways. I can build my own mini vacuum-former and I can do some machining at the machines at work. But this isn't the same as having all those tools right there to hand.
When TechShop was open I could laser off a little bit bit of material or even a stencil or whatever. Now it is either wait two weeks for Ponoko or use hand-cut with X-acto knives and what-not or simply find some other (probably less efficient) way of achieving the desired effect. I was just that day contemplating using the Brother CNC embroidery machine for a possible project -- that's how I found out within a few hours of the closure.
It is a more flexible, nimble, exploratory way of working. Having daily access also better supports iteration; you can try out ideas knowing that you can run off an improved part the next day. Having to mail off a file and wait two weeks for delivery (plus paying the money for the service) seriously constrains that.
The part I regret most is all of the leveling up. I found all the collectables, I finished the side quests, and I unlocked so much. Which is to say, I took (and paid a lot of money for) a great many Safety and Basic Use classes. CNC mill, CNC router, 3d printer, laser scanner, laser engraver, metal lathe, wood lathe... That is all waste. The classes are far too introductory to be considered worthwhile general instruction in that tool, and they are too site-specific to save me anything at somewhere like, say, Crucible -- meaning more time and more money to get back to having full access to the same tools.
What could they have done differently? Well, for one thing they were badly organized and badly managed. And their crisis response was to do more of the same. When they saw budget shortfalls they spent less on maintenance and salaries and started shorting their own instructors. Which is to say; they removed value from the thing they were trying to sell in the first place. They also ran endless promotions, which besides bringing in short-term cash at the cost of long-term income (membership specials that over the long run brought in less than the cost of maintaining that membership) raised a pervasive odor of desperation.
I would have gladly paid more. I'm not sure how many other members would agree, but perhaps if they had been open about their books we might have. I'm also not sure it would have been enough.
Let me attempt a back-of-the-envelop here. Assume capital investment in the actual machines on the order of 20K per "machine," a half-dozen machines in four generalized groupings -- call it 20 and apply another 20 worth of smaller tools and supplies. So that's 800K to be amortized over ten years of service life before you need to spend an equivalent amount in replacement or repair. Double that annual cost to 160K to cover staffing, utilities, etc. (And that's probably an understatement; even with the expense of these tools I could easily see their amortization working out to only a quarter of the total annual costs).
I'd say there were fifty people there most times I've visited, with capacity say a hundred. That allows a standing membership of 400-800. Being generous, the latter 800 members would have to pay...$2,000 annually. Which isn't that far off (their Makers Fair specials ran that number down to just below $1k, but to compensate monthly members pay about %140).
I suspect strongly my numbers are far too low both on ongoing maintenance costs for the equipment and staffing costs. So...would I have spent 4K for a membership? Perhaps.
I'm going to also assume that classes are a wash; they money they bring in should go into decent pay for the instructors, because you want quality instructors but the class prices are about as high as anyone wants to go. Also, quality instructors means you could expand past the SBU's and start offering proper in-depth instruction for those that wanted it.
But here's where the model that works for me stumbles into the question of the actual market. And I have some deeply pessimistic ideas about that. I've noticed at other corners of the generalized Maker sphere that the emphasis is on "getting your feet wet." Everyone is offering introductory classes, introductory kits, first-time user specials.
Which is great, and also links into STEAM and the focus on getting more young people started into actually building things again. Leaving aside the gripe that so many of these kits and classes seem more about the illusion of building things -- the Arduino equivalent of a Paint-By-Numbers kit -- I keep getting the sensation that the biggest problem the Make movement faces is retention.
By which I mean I suspect a great many more people are "getting their feet wet" than who actually end up swimming. So that model of yearly members bringing in a steady cash flow may be wrong. It may be that many of the people at TechShop come in for a month, a week, even a single class. Or send their kid there on a STEAM outreach program. And maybe print something or do a couple name tags on the laser printer but don't stay.
And, sure, the typical cycle for the serious user/entrepreneur is to go three to five years during development and growth: until they can afford their own machines and don't need to continue paying membership. I suspect particularly the generalist (like me) is very much the minority. I made "props." Most people coming in on a regular basis are making "product" and they rapidly narrow down to just one or two machines that they do most of the work on (and can as their business grows afford to own themselves).
There's also the impression among some that there are members thriving on the atmosphere. Like investment bankers soaking in the artsiness of live-work loft spaces, they come to park on a table with their laptops and the free wifi and coffee like a more tech-centric Starbucks. Like the Paint-By-Numbers above, I keep getting this impression of people doing the sizzle and not the steak. Of putting on the beret but never actually touching paint.
Because, honestly, if you are young and hungry what you want is investors. Looking like the next Steve Jobs is a lot more important than actually soldering anything. So TechShop functions in this way as a combination meeting ground, bullpen, source of inspiration and photogenic backdrop.
And myself? I don't know. This is a music week -- I did complete my bass case and post up a new Instructable (which already got Editor's Pick) but basically I'm playing, not building. The only reason I even looked in on TechShop yesterday was about an idea I had for a Bodhran case.
Am I phasing back out of prop work? Am I going to go in different directions? I don't know. About the only thing I'm sure of is none of the other maker spaces in the Bay Area look that attractive. They almost all seem small and ingrown and very clubby, with a sort of shipping pallet and cinderblock earnestness that only really works for the young and hip and at least slightly delusional.
The only offering that exudes any kind of professionalism is the Crucible, and they take it to the other extreme; serious fees, serious classes, and the pervasive impression I get from them is you don't dare think about doing your own machining until you've done five years of apprenticeship under the eagle gaze of the senior members. Plus they are mostly about fire and glass and metal and although I've flirted with the idea of casting it isn't enough to draw me there.
Really, I miss my lasers. (And the vacuum-form machine, and a lathe I didn't have to fight over).
What I didn't expect -- what no-one expected -- is that one Wednesday morning their loyal members would find the doors locked, no-one answering the phone...nothing but a (belated) email later that afternoon explaining that they had filed Chapter 7 and no longer existed as a company.
Yes, I understand why the members were kept in the dark. They were still hoping to find an investor or strike a bargain. But on sober reflection I don't sympathize. The above translates as, "We were in such dire financial shape we had to hide our books from the suckers we were trying to entice to give us more money, so of course we had to lie to our own members lest they give the truth away."
So, yeah. I feel betrayed.
It was a useless effort anyway. When I realized TechShop was in trouble I went web surfing and everywhere I found future investors hanging out, they all knew damn well (and in better depth and detail than I did) how bad off TechShop was.
It might have been smarter to be open and lay out exactly what they were dealing with. The kind of help they needed went beyond finding some random guy in Dubai to send them an infusion of cash. They needed a restructuring, they needed a better business model.
But I have to wonder if this wasn't almost implicit in shape of the very thing we were trying to preserve. TechShop was Maker. It ran on the philosophy of throwing it together. A sort of laissez-faire approach to building where doing it the right way or even the safe way was de-emphasized in favor of experiment and originality and the freedom to fail.
I loved the hands-off approach. TechShop gave you just enough instruction to get started and at least know the obvious ways to cut your own hands off, then let you alone to study, learn, and make your own mistakes. The alternatives I've looked at are much more about the "community," with a touchy-feely atmosphere so strong it makes you look around for the Kool-aid. If you wanted to come in at ten at night, speak to no-one, log into the machine and make a few cuts TechShop was the place to be.
The thing that I will miss most is the multitude of options. Sure, I can get access to many of the operations and some of the machines. I can send away to Ponoko to laser. I can get printing done at Shapeways. I can build my own mini vacuum-former and I can do some machining at the machines at work. But this isn't the same as having all those tools right there to hand.
When TechShop was open I could laser off a little bit bit of material or even a stencil or whatever. Now it is either wait two weeks for Ponoko or use hand-cut with X-acto knives and what-not or simply find some other (probably less efficient) way of achieving the desired effect. I was just that day contemplating using the Brother CNC embroidery machine for a possible project -- that's how I found out within a few hours of the closure.
It is a more flexible, nimble, exploratory way of working. Having daily access also better supports iteration; you can try out ideas knowing that you can run off an improved part the next day. Having to mail off a file and wait two weeks for delivery (plus paying the money for the service) seriously constrains that.
The part I regret most is all of the leveling up. I found all the collectables, I finished the side quests, and I unlocked so much. Which is to say, I took (and paid a lot of money for) a great many Safety and Basic Use classes. CNC mill, CNC router, 3d printer, laser scanner, laser engraver, metal lathe, wood lathe... That is all waste. The classes are far too introductory to be considered worthwhile general instruction in that tool, and they are too site-specific to save me anything at somewhere like, say, Crucible -- meaning more time and more money to get back to having full access to the same tools.
What could they have done differently? Well, for one thing they were badly organized and badly managed. And their crisis response was to do more of the same. When they saw budget shortfalls they spent less on maintenance and salaries and started shorting their own instructors. Which is to say; they removed value from the thing they were trying to sell in the first place. They also ran endless promotions, which besides bringing in short-term cash at the cost of long-term income (membership specials that over the long run brought in less than the cost of maintaining that membership) raised a pervasive odor of desperation.
I would have gladly paid more. I'm not sure how many other members would agree, but perhaps if they had been open about their books we might have. I'm also not sure it would have been enough.
Let me attempt a back-of-the-envelop here. Assume capital investment in the actual machines on the order of 20K per "machine," a half-dozen machines in four generalized groupings -- call it 20 and apply another 20 worth of smaller tools and supplies. So that's 800K to be amortized over ten years of service life before you need to spend an equivalent amount in replacement or repair. Double that annual cost to 160K to cover staffing, utilities, etc. (And that's probably an understatement; even with the expense of these tools I could easily see their amortization working out to only a quarter of the total annual costs).
I'd say there were fifty people there most times I've visited, with capacity say a hundred. That allows a standing membership of 400-800. Being generous, the latter 800 members would have to pay...$2,000 annually. Which isn't that far off (their Makers Fair specials ran that number down to just below $1k, but to compensate monthly members pay about %140).
I suspect strongly my numbers are far too low both on ongoing maintenance costs for the equipment and staffing costs. So...would I have spent 4K for a membership? Perhaps.
I'm going to also assume that classes are a wash; they money they bring in should go into decent pay for the instructors, because you want quality instructors but the class prices are about as high as anyone wants to go. Also, quality instructors means you could expand past the SBU's and start offering proper in-depth instruction for those that wanted it.
But here's where the model that works for me stumbles into the question of the actual market. And I have some deeply pessimistic ideas about that. I've noticed at other corners of the generalized Maker sphere that the emphasis is on "getting your feet wet." Everyone is offering introductory classes, introductory kits, first-time user specials.
Which is great, and also links into STEAM and the focus on getting more young people started into actually building things again. Leaving aside the gripe that so many of these kits and classes seem more about the illusion of building things -- the Arduino equivalent of a Paint-By-Numbers kit -- I keep getting the sensation that the biggest problem the Make movement faces is retention.
By which I mean I suspect a great many more people are "getting their feet wet" than who actually end up swimming. So that model of yearly members bringing in a steady cash flow may be wrong. It may be that many of the people at TechShop come in for a month, a week, even a single class. Or send their kid there on a STEAM outreach program. And maybe print something or do a couple name tags on the laser printer but don't stay.
And, sure, the typical cycle for the serious user/entrepreneur is to go three to five years during development and growth: until they can afford their own machines and don't need to continue paying membership. I suspect particularly the generalist (like me) is very much the minority. I made "props." Most people coming in on a regular basis are making "product" and they rapidly narrow down to just one or two machines that they do most of the work on (and can as their business grows afford to own themselves).
There's also the impression among some that there are members thriving on the atmosphere. Like investment bankers soaking in the artsiness of live-work loft spaces, they come to park on a table with their laptops and the free wifi and coffee like a more tech-centric Starbucks. Like the Paint-By-Numbers above, I keep getting this impression of people doing the sizzle and not the steak. Of putting on the beret but never actually touching paint.
Because, honestly, if you are young and hungry what you want is investors. Looking like the next Steve Jobs is a lot more important than actually soldering anything. So TechShop functions in this way as a combination meeting ground, bullpen, source of inspiration and photogenic backdrop.
And myself? I don't know. This is a music week -- I did complete my bass case and post up a new Instructable (which already got Editor's Pick) but basically I'm playing, not building. The only reason I even looked in on TechShop yesterday was about an idea I had for a Bodhran case.
Am I phasing back out of prop work? Am I going to go in different directions? I don't know. About the only thing I'm sure of is none of the other maker spaces in the Bay Area look that attractive. They almost all seem small and ingrown and very clubby, with a sort of shipping pallet and cinderblock earnestness that only really works for the young and hip and at least slightly delusional.
The only offering that exudes any kind of professionalism is the Crucible, and they take it to the other extreme; serious fees, serious classes, and the pervasive impression I get from them is you don't dare think about doing your own machining until you've done five years of apprenticeship under the eagle gaze of the senior members. Plus they are mostly about fire and glass and metal and although I've flirted with the idea of casting it isn't enough to draw me there.
Really, I miss my lasers. (And the vacuum-form machine, and a lathe I didn't have to fight over).
Sunday, September 11, 2016
Holoback
The hypercube works:
I created a 2" cube of white translucent acrylic and propped the lighting circuit inside that. (Actually, the picture shows the cube being illuminated by one of my 3 watt Cree). It looks very nice now. More, the diffusion works so well I'm no longer forced to bend the LEDs around to try to get 360' coverage (although the construction of the cube and support means the underside of the circuit board, where the holocron lid is anyway, is going to be less than properly illuminated).
While I was lasering that, and doing the final tweaks-and-tests for the revised circuit board supports and inner layer pieces, I also ran off a test of an idea I'm calling the Imperial Archives Holocron:
This is actually done with 1/16" translucent white mated up with identically-outlined 1/16" opaque black acrylic. Unfortunately I don't have a holocron-sized white light source, and this photograph is using a Maglight Solitaire propped up on a roll of solder.
The circuit is routed as well. Just needs the silkscreen cleaned up.
Is funny; I felt like hell all week (longest four-day week ever) but after getting some sleep managed to crawl out to the shop for the lasering above, plus put down the next thousand words on my Tomb Raider/SG1 crossover.
Well, I've got some problem-solving to do before the latest chapter is complete. Because I've put Checkov's Concentrator Solar Power Plant up on the Mescalero Escarpment mantlepiece, and I need to figure out why it is about to go off...
I created a 2" cube of white translucent acrylic and propped the lighting circuit inside that. (Actually, the picture shows the cube being illuminated by one of my 3 watt Cree). It looks very nice now. More, the diffusion works so well I'm no longer forced to bend the LEDs around to try to get 360' coverage (although the construction of the cube and support means the underside of the circuit board, where the holocron lid is anyway, is going to be less than properly illuminated).
While I was lasering that, and doing the final tweaks-and-tests for the revised circuit board supports and inner layer pieces, I also ran off a test of an idea I'm calling the Imperial Archives Holocron:
This is actually done with 1/16" translucent white mated up with identically-outlined 1/16" opaque black acrylic. Unfortunately I don't have a holocron-sized white light source, and this photograph is using a Maglight Solitaire propped up on a roll of solder.
The circuit is routed as well. Just needs the silkscreen cleaned up.
Is funny; I felt like hell all week (longest four-day week ever) but after getting some sleep managed to crawl out to the shop for the lasering above, plus put down the next thousand words on my Tomb Raider/SG1 crossover.
Well, I've got some problem-solving to do before the latest chapter is complete. Because I've put Checkov's Concentrator Solar Power Plant up on the Mescalero Escarpment mantlepiece, and I need to figure out why it is about to go off...
Saturday, April 23, 2016
Artefact
I tried out the NextEngine 3d scanner. Confirmed that working up a sculpted prop in 2x scale, digitizing it, then 3d printing it at final scale is a plausible workflow. The NextEngine software is pretty good with stitching and with decimation/retopology, and scanning is relatively fast. There are limitations on size, however; a 4" x 5" window, for instance, for anything using the attached rotary table.
Yet I am still torn on the design of the Wraith Stone. It seems defensible within the information presented in the game that this is a manufactured thing, an item of Atlantean technology like Excalibur or the Galali Key. You could even defend the green blobs as Atlantean blinkenlights (or as some necessary aspect of their technology, like the fiddly bits Howard Taylor puts on everything technological within the Schlock Mercenary universe.)
The first here is a sculpt by DeviantArt user and cosplay enthusiast Very-Crofty. I love the beard on this one; it feels very Green Man or something (whereas the high forehead with markings feels somehow Maori to me -- a nice mix of cultural elements that feels like the real product of a complex cultural heritage)
Reverse image search on this one turned up an eBay seller but I was unable to find any real information about the artist. It is also a sculpt, and I am impressed with the way they've incorporated the "glow-y bits" into it. It also has both that "primitive" aesthetic and the worn-by-countless-hands that gives it a proper feeling of unutterable age.
Even in-game, the artifact looks more like this than it does in the development art (or the derived image that gets used in the title movie for Tomb Raider: Legend).
This is a texture -- possibly from the one-and-only in-game closeup -- ripped from Tomb Raider: Legend by a user posting at the Tomb Raider Forums. Again, the shape is much cruder, although the general proportions are still recognizable. The way this image is strikingly different is that in all the other in-game shots the stone is dark but the face/skull is picked out by being much lighter.
Ah, well, back to the Holocron. I still haven't resolved the glue issue with the "circuitry" layer. The last idea was to push the connection out to the edge and hide it behind the edge of the shell, but that makes that part of the shell too wide to look right in the Stolen Holo pattern.
Also, TechShop just got rid of all of their Epilog lasers. So I need to go back and take and pay for ANOTHER damn class just to be able to keep using the cutters. At least the new lasers are faster at engraving...
Yet I am still torn on the design of the Wraith Stone. It seems defensible within the information presented in the game that this is a manufactured thing, an item of Atlantean technology like Excalibur or the Galali Key. You could even defend the green blobs as Atlantean blinkenlights (or as some necessary aspect of their technology, like the fiddly bits Howard Taylor puts on everything technological within the Schlock Mercenary universe.)
Really, though, the kind of thing I'd like to have (and like to try building), is something that looks more like a proper archaeological artifact. Something old, worn, rubbed smooth around the edges. Something that comes from an aesthetic before the Classical Greeks and their primacy of geometry; something informed by other aesthetics that to our modern eyes looks lumpy, off-center, misshapen.
I mean this with absolutely no insult towards two wonderful renditions in this direction I managed to find.
Reverse image search on this one turned up an eBay seller but I was unable to find any real information about the artist. It is also a sculpt, and I am impressed with the way they've incorporated the "glow-y bits" into it. It also has both that "primitive" aesthetic and the worn-by-countless-hands that gives it a proper feeling of unutterable age.
Even in-game, the artifact looks more like this than it does in the development art (or the derived image that gets used in the title movie for Tomb Raider: Legend).
This is a texture -- possibly from the one-and-only in-game closeup -- ripped from Tomb Raider: Legend by a user posting at the Tomb Raider Forums. Again, the shape is much cruder, although the general proportions are still recognizable. The way this image is strikingly different is that in all the other in-game shots the stone is dark but the face/skull is picked out by being much lighter.
Ah, well, back to the Holocron. I still haven't resolved the glue issue with the "circuitry" layer. The last idea was to push the connection out to the edge and hide it behind the edge of the shell, but that makes that part of the shell too wide to look right in the Stolen Holo pattern.
Also, TechShop just got rid of all of their Epilog lasers. So I need to go back and take and pay for ANOTHER damn class just to be able to keep using the cutters. At least the new lasers are faster at engraving...
Thursday, April 7, 2016
To see the King, to sell the cow, to make the potion to lift the curse...
I've had to push the Wraith Stone back a little.
Did a little more reading up. There is a piece of development art that shows, together, "Excalibur" in a form much like it appears in the game, something that is almost certainly an early version of the Galali Key, and a thing that simply has to be the Wraith Stone, although the in-game version is quite different. And there are a lot of interesting fan theories about all these resemblances! (Me, I see a certain Atlantean influence in the Galali Key, and that fits in oh-so-well with some of the revelations in Tomb Raider: Underworld).
Well, I'm not building the in-game version. It is boring and ugly (although the really ugly one I've seen references on turns out to be the one worn by an otherwise excellent Tonner doll of Amanda.)
I've more-or-less decided to sculpt the thing then either mold it, or 3d scan it (using the NextEngine scanner at TechShop), print that, then probably make a mold off the print after cleaning it up. I still have no idea how to control translucency to get the weird look of glowing inclusions within a matrix of darker stone. But all that takes a back seat to the real problem; the electronics layer has simply become too complex.
Found a cute little chip, the WS2803, which can drive 18 channels at 30ma constant-current PWM from a mere two channels of serial input. (There's also the TLC5940, which takes several more pins to control but hits a whopping 120ma per channel). As another option, SeeedStudio now does PCB assembly at a very, very reasonable rate -- making an ATmega (with the speed to software-PWM those 16 GPIO pins) an even more attractive alternative.
Aka, I could do the whole thing in surface mount. But that, plus the need to build in LiPO charge management, means the engineering on this thing might be too big for a single step. Better to work out some of the kinks on the Holocron fork of the DuckLight circuit.
So I'm back to the Holocron.
I'm to the point where I need to stop designing and start bending metal (which I'm told is aerospace jargon, but I'm unable to find a cite). There are all sorts of wonderful creative ways I could realize a Holocron, but I need to put that exploration aside and complete what I have; a perfectly functional way to realize one that takes the form of an inexpensive kit.
My intended price point is under $50 for a full kit, electronics included. Said electronics being an animated lighting effect, internal power with USB re-charge, and a slot for including a user-provided USB thumb drive inside.
I still haven't traced down why my first circuit (otherwise quite functional) would reset the chip when I went for a full zero-to-full on two channels (aka a Police Car flasher lighting animation). The next PCB is mostly to correct that and some other errors I found (such as one of the programming pins being wrong, and some traces run too close to the edge of the board), and to add on a LiPO charge circuit and the connectors to support the USB and LiPo components.
Otherwise, here's the current gordian knot cutting:
Shell design on the "Stolen Holocron" model as much as possible, with only one USB slot instead of that being incorporated into the design. Giving up on ideas like mirrored acrylic sheet or thin metal or some really clever geometry and go back to using the fact that you need to paint the shell as the way that the seams all get hidden.
Diffusor design sticking with pale transparent color and drafting up a abstract geometrical design of vaguely astronomical/clockwork shapes.
Circuitry layer maintained, using a darker transparent color as before, but designed at the full size of a cube side so that the pieces can be layered together and snapped together as a unit, thus placing any glue (and the seams) at the edges where it gets hidden by the shell anyhow. The only cleverness I'll have here is integrating the "spider" so it fits into tabs on these other layers and requires no glue or other support.
And also (after looking at purchasing Illustrator) going to stick with Inkscape, but draft everything on graph paper first to work out the design elements there instead of wrestling with them within Inkscape.
Did a little more reading up. There is a piece of development art that shows, together, "Excalibur" in a form much like it appears in the game, something that is almost certainly an early version of the Galali Key, and a thing that simply has to be the Wraith Stone, although the in-game version is quite different. And there are a lot of interesting fan theories about all these resemblances! (Me, I see a certain Atlantean influence in the Galali Key, and that fits in oh-so-well with some of the revelations in Tomb Raider: Underworld).
Well, I'm not building the in-game version. It is boring and ugly (although the really ugly one I've seen references on turns out to be the one worn by an otherwise excellent Tonner doll of Amanda.)
I've more-or-less decided to sculpt the thing then either mold it, or 3d scan it (using the NextEngine scanner at TechShop), print that, then probably make a mold off the print after cleaning it up. I still have no idea how to control translucency to get the weird look of glowing inclusions within a matrix of darker stone. But all that takes a back seat to the real problem; the electronics layer has simply become too complex.
Found a cute little chip, the WS2803, which can drive 18 channels at 30ma constant-current PWM from a mere two channels of serial input. (There's also the TLC5940, which takes several more pins to control but hits a whopping 120ma per channel). As another option, SeeedStudio now does PCB assembly at a very, very reasonable rate -- making an ATmega (with the speed to software-PWM those 16 GPIO pins) an even more attractive alternative.
Aka, I could do the whole thing in surface mount. But that, plus the need to build in LiPO charge management, means the engineering on this thing might be too big for a single step. Better to work out some of the kinks on the Holocron fork of the DuckLight circuit.
So I'm back to the Holocron.
I'm to the point where I need to stop designing and start bending metal (which I'm told is aerospace jargon, but I'm unable to find a cite). There are all sorts of wonderful creative ways I could realize a Holocron, but I need to put that exploration aside and complete what I have; a perfectly functional way to realize one that takes the form of an inexpensive kit.
My intended price point is under $50 for a full kit, electronics included. Said electronics being an animated lighting effect, internal power with USB re-charge, and a slot for including a user-provided USB thumb drive inside.
I still haven't traced down why my first circuit (otherwise quite functional) would reset the chip when I went for a full zero-to-full on two channels (aka a Police Car flasher lighting animation). The next PCB is mostly to correct that and some other errors I found (such as one of the programming pins being wrong, and some traces run too close to the edge of the board), and to add on a LiPO charge circuit and the connectors to support the USB and LiPo components.
Otherwise, here's the current gordian knot cutting:
Shell design on the "Stolen Holocron" model as much as possible, with only one USB slot instead of that being incorporated into the design. Giving up on ideas like mirrored acrylic sheet or thin metal or some really clever geometry and go back to using the fact that you need to paint the shell as the way that the seams all get hidden.
Diffusor design sticking with pale transparent color and drafting up a abstract geometrical design of vaguely astronomical/clockwork shapes.
Circuitry layer maintained, using a darker transparent color as before, but designed at the full size of a cube side so that the pieces can be layered together and snapped together as a unit, thus placing any glue (and the seams) at the edges where it gets hidden by the shell anyhow. The only cleverness I'll have here is integrating the "spider" so it fits into tabs on these other layers and requires no glue or other support.
And also (after looking at purchasing Illustrator) going to stick with Inkscape, but draft everything on graph paper first to work out the design elements there instead of wrestling with them within Inkscape.
Saturday, April 2, 2016
Scale
My full-time job just made an interesting offer. Long-term hourly at a 30 hour week. I wasn't expecting that; I thought it was full time or nothing (with perhaps some flex time, as I've been enjoying these past couple weeks with two shows opening at once).
If the pay and bennies are decent I might just take them up on it. Because while I'm doing better at not falling asleep on the couch the moment the work day ends, I could still use a few more hours of me time to pursue, well, all the stuff this blog has been about.
This for one. I've officially started a new run of Aliens M40 grenades at the Replica Props Forum. I have six complete ones, two bodies that need the spring-loaded button installed, and enough metal stock on hand for another four or so. I've got (unconfirmed) orders for ten already, so those should go pretty quickly -- and at $40 a pop, that makes up for some of the work hours I've been missing.
And it makes use of my existing TechShop membership. Regardless of what my work schedule turns out to be, running out to the City in the evening for a four-hour lathe session is (and has been) quite do-able.
I'm also moving on the Wraith Stone. Settled on the Title Movie version from Tomb Raider: Legend but I think I need to CAD it up to experiment with scale. I don't mind it being smaller than depicted; I want it to be wearable!
The internal electronics may not be appropriate for this design, but this is technology I want to explore. It's stuff I need to work on for my Holocron as well (and the DuckLight, for that matter). Something new to the mix is that Seeed Studio is offering PCB assembly at very, very, very reasonable rates (and with practically no minimum order). You have to base your BOM on their stock, but that isn't a huge problem. Besides, I can always solder a few parts myself after the board is shipped.
Big thing here is that this puts the SMD family of AVR chips a lot closer to my reach. ATmegas for more control channels, for instance. Or the USB-native family of AVRs for class-compliant USB devices. And smaller footprints -- but that goes without saying.
The biggest downside to my circuitry plans for the Wraith Stone is that, once again, I've taking a project away from the traditional methods. I would love to hand-sculpt this thing. But unless I add a 3d scanning step to the mix, how does this give me the ability to shape the inner surfaces to accommodate the circuitry? All of my electronic prop experience tells me this is best done in CAD, and that sort of implies that the stone itself gets 3d printed...
Far from lastly, the show I did these crazy improvisations for last year has come around again. At least this time I own two dimmer packs of my own (just arrived yesterday, not yet tested). But I don't own lighting instruments. I could afford to purchase some of my own fresnels, but where would I store them? I have enough trouble finding closet space for my rack of body mics (which is why I love it when they are out on rental, as they are right now).
If the pay and bennies are decent I might just take them up on it. Because while I'm doing better at not falling asleep on the couch the moment the work day ends, I could still use a few more hours of me time to pursue, well, all the stuff this blog has been about.
This for one. I've officially started a new run of Aliens M40 grenades at the Replica Props Forum. I have six complete ones, two bodies that need the spring-loaded button installed, and enough metal stock on hand for another four or so. I've got (unconfirmed) orders for ten already, so those should go pretty quickly -- and at $40 a pop, that makes up for some of the work hours I've been missing.
And it makes use of my existing TechShop membership. Regardless of what my work schedule turns out to be, running out to the City in the evening for a four-hour lathe session is (and has been) quite do-able.
I'm also moving on the Wraith Stone. Settled on the Title Movie version from Tomb Raider: Legend but I think I need to CAD it up to experiment with scale. I don't mind it being smaller than depicted; I want it to be wearable!
The internal electronics may not be appropriate for this design, but this is technology I want to explore. It's stuff I need to work on for my Holocron as well (and the DuckLight, for that matter). Something new to the mix is that Seeed Studio is offering PCB assembly at very, very, very reasonable rates (and with practically no minimum order). You have to base your BOM on their stock, but that isn't a huge problem. Besides, I can always solder a few parts myself after the board is shipped.
Big thing here is that this puts the SMD family of AVR chips a lot closer to my reach. ATmegas for more control channels, for instance. Or the USB-native family of AVRs for class-compliant USB devices. And smaller footprints -- but that goes without saying.
The biggest downside to my circuitry plans for the Wraith Stone is that, once again, I've taking a project away from the traditional methods. I would love to hand-sculpt this thing. But unless I add a 3d scanning step to the mix, how does this give me the ability to shape the inner surfaces to accommodate the circuitry? All of my electronic prop experience tells me this is best done in CAD, and that sort of implies that the stone itself gets 3d printed...
Far from lastly, the show I did these crazy improvisations for last year has come around again. At least this time I own two dimmer packs of my own (just arrived yesterday, not yet tested). But I don't own lighting instruments. I could afford to purchase some of my own fresnels, but where would I store them? I have enough trouble finding closet space for my rack of body mics (which is why I love it when they are out on rental, as they are right now).
Monday, February 22, 2016
All in all, there's just too many kids on the wall
Hold on; let me get my cane so I can wave it over my head while I rant.
My gym has been taken over by kids. In fact, both the places I pay (rather steep!) membership fees at have gone in the same direction; increasingly limited access without any corresponding cut in fees.
And there's no reason for these two businesses to care if members complain, even if the members leave; the businesses are too busy milking the new cash cow.
It's something theater groups discovered a long time ago. Children are money. Offer something that adults can take their kids to...or better yet, drop their kids off at...and you rake it in. This happened a few years back with Makers Faire; it used to be a get-together and networking event for people who, well, made stuff. Now that networking and that sharing takes place in short harried conversations behind the scenes, because the structure of Makers Faire now is to put lots of eye candy out to where it will draw the children, then sell them (rather, their parents) lots of crap that pretends to be about what they just saw.
TechShop has added so many outreach classes and after-school programs and STEM/STEAM auxiliaries it has gutted the originally core business of renting machine time to small business. Entire floors of machines are closed off for weeks at a time with little or no notice so they can do a new round of classes for young people...and nary a whisper of recompense for the wasted membership fees.
And my gym has followed suit. It is nearly impossible to climb there anymore; it isn't so much that it is crowded, but the kids (as great as many of them are) simply aren't mature enough to read a wall. So instead of waiting in, they'll jump on any random route that looks open. I've had to bail multiple times rather than being able to finish a tough problem because some tween couldn't read the wall and jumped on a crossing route after I'd started.
Yeah, sure, children are our future and all that. But adults are our present and sometimes there need to be places for them, too.
But, really, I don't think this is about a generation divide. It is, like so many other things, a class divide. Because the kids don't come themselves. They don't apply for memberships. Their parents take them. Which is to say; people who have "made it," who have achieved relatively comfortable lives and now have disposable income, see something else they can buy for their children.
It is in a way like the loft wars (part of the gentrification wars); people with lots of disposable income and relatively pliant day jobs were attracted to these cool little semi-industrial areas where artists were living cheap by living in their workshops (and vice-versa.) And after purchasing a stake in this Bohemia, the yuppies realized that paint smells and metal workers will hammer at odd hours of the morning, and they chased all the artists out. And then wondered what happened to the charm they had meant to purchase.
So these same walking checkbooks are coming into the places where people like me are hoping to work on the stuff we define our lives around; the self-run businesses, the replica props and cosplay circles, the small theaters, and the places where people like me are trying to keep our bodies in good enough shape to keep doing that kind of work, and they shit a wad of cash across the landscape, destroying most of what was good about it in the first place.
And in this arena, the colonialist troops are children. Like I say, I like the kids. Individually. As a mass, as an effect, they are taking away things I enjoyed and things I thought I needed and things I am really wondering why I am continuing to pay good money for.
My gym has been taken over by kids. In fact, both the places I pay (rather steep!) membership fees at have gone in the same direction; increasingly limited access without any corresponding cut in fees.
And there's no reason for these two businesses to care if members complain, even if the members leave; the businesses are too busy milking the new cash cow.
It's something theater groups discovered a long time ago. Children are money. Offer something that adults can take their kids to...or better yet, drop their kids off at...and you rake it in. This happened a few years back with Makers Faire; it used to be a get-together and networking event for people who, well, made stuff. Now that networking and that sharing takes place in short harried conversations behind the scenes, because the structure of Makers Faire now is to put lots of eye candy out to where it will draw the children, then sell them (rather, their parents) lots of crap that pretends to be about what they just saw.
TechShop has added so many outreach classes and after-school programs and STEM/STEAM auxiliaries it has gutted the originally core business of renting machine time to small business. Entire floors of machines are closed off for weeks at a time with little or no notice so they can do a new round of classes for young people...and nary a whisper of recompense for the wasted membership fees.
And my gym has followed suit. It is nearly impossible to climb there anymore; it isn't so much that it is crowded, but the kids (as great as many of them are) simply aren't mature enough to read a wall. So instead of waiting in, they'll jump on any random route that looks open. I've had to bail multiple times rather than being able to finish a tough problem because some tween couldn't read the wall and jumped on a crossing route after I'd started.
Yeah, sure, children are our future and all that. But adults are our present and sometimes there need to be places for them, too.
But, really, I don't think this is about a generation divide. It is, like so many other things, a class divide. Because the kids don't come themselves. They don't apply for memberships. Their parents take them. Which is to say; people who have "made it," who have achieved relatively comfortable lives and now have disposable income, see something else they can buy for their children.
It is in a way like the loft wars (part of the gentrification wars); people with lots of disposable income and relatively pliant day jobs were attracted to these cool little semi-industrial areas where artists were living cheap by living in their workshops (and vice-versa.) And after purchasing a stake in this Bohemia, the yuppies realized that paint smells and metal workers will hammer at odd hours of the morning, and they chased all the artists out. And then wondered what happened to the charm they had meant to purchase.
So these same walking checkbooks are coming into the places where people like me are hoping to work on the stuff we define our lives around; the self-run businesses, the replica props and cosplay circles, the small theaters, and the places where people like me are trying to keep our bodies in good enough shape to keep doing that kind of work, and they shit a wad of cash across the landscape, destroying most of what was good about it in the first place.
And in this arena, the colonialist troops are children. Like I say, I like the kids. Individually. As a mass, as an effect, they are taking away things I enjoyed and things I thought I needed and things I am really wondering why I am continuing to pay good money for.
Sunday, February 21, 2016
Imperial Highway IV
The first four segments are done.
I'm not happy with the engineering. Basically, I had no real sense of the shape and how it would work (as in, how best to hook them together, how best to be self-supporting, how to mold, whether they would be stackable) until I'd built the masters, and at that point I was loathe to take the time to strike off in new directions.
Which means what I ended up with is casting the side pieces with a supporting ledge, and with both that ledge and the deck pieces having holes sized for the smallest readily available (aka could be bought by the packet at my local hardware store) supermagnet.
The ledge didn't mold well, and the material of the master wasn't well-suited for holes, so the magnets don't fit that well. And they sort of stick out, too. Which along with the ledge makes the things stack quite badly. And superglue is not as strong as supermagnet; it is unfortunately easy to tear a magnet out when dissembling a road segment.
I'm still not sure which alternatives would be strong enough to support themselves safely enough to permit figure miniatures to be placed on top. I think based on my Holocron experiments that snap-fit acrylic might be stable enough. It would be even better if I could design some simple bracing scheme. And I have a feeling I could come up with a way to transfer the detailed texture of the master to vacuum-formed shells that could then be glued to acrylic backing.
If someone asked for a lot more of these things, I'd definitely experiment. As it was, I made about two dozen casting attempts over most of a week just to achieve four complete sets. And painting, as crude as it was, took another three or four days.
When I have some fresh casting compound I'll try to run off a couple more. I'm also still planning to try to make both an access ramp and a tower, both of which it is my intention to make a simple shell mold and slush-cast (the poor man's roto-cast) in one piece. No more fumbling with magnets. Might also desire some of the pillar elements which are used in conjunction -- these I am assuming I can model and 3d-print easier than anything else (although possibly cast instead of wasting the print time making more than one).

Yeah; basically, the lesson of the raygun strikes home; I would have done better making a full CAD aka 3d model first. And possibly printed the master. Pity it seems so difficult to transfer out from CAD to a good EPS file for laser cutting. Working it out in 3d allows you to visualize, and get all the dimensions, and makes it a lot easier to make changes as your design evolves. It does take longer to start with, but the time-savings only get larger as you get further and further into the design and build cycle.
Which means what I ended up with is casting the side pieces with a supporting ledge, and with both that ledge and the deck pieces having holes sized for the smallest readily available (aka could be bought by the packet at my local hardware store) supermagnet.
The ledge didn't mold well, and the material of the master wasn't well-suited for holes, so the magnets don't fit that well. And they sort of stick out, too. Which along with the ledge makes the things stack quite badly. And superglue is not as strong as supermagnet; it is unfortunately easy to tear a magnet out when dissembling a road segment.
If someone asked for a lot more of these things, I'd definitely experiment. As it was, I made about two dozen casting attempts over most of a week just to achieve four complete sets. And painting, as crude as it was, took another three or four days.
When I have some fresh casting compound I'll try to run off a couple more. I'm also still planning to try to make both an access ramp and a tower, both of which it is my intention to make a simple shell mold and slush-cast (the poor man's roto-cast) in one piece. No more fumbling with magnets. Might also desire some of the pillar elements which are used in conjunction -- these I am assuming I can model and 3d-print easier than anything else (although possibly cast instead of wasting the print time making more than one).

Yeah; basically, the lesson of the raygun strikes home; I would have done better making a full CAD aka 3d model first. And possibly printed the master. Pity it seems so difficult to transfer out from CAD to a good EPS file for laser cutting. Working it out in 3d allows you to visualize, and get all the dimensions, and makes it a lot easier to make changes as your design evolves. It does take longer to start with, but the time-savings only get larger as you get further and further into the design and build cycle.
Saturday, February 20, 2016
Gun too long
A question.
If you take replication of specific theatrical creations out of the equation, what is the point of building a prop raygun?
It is straight-forward to carve, cast, assemble, print, or whatever a nice looking raygun. And it is fun to do. But at the end of it, you have a gun-shaped object. And you could spend ten bucks at the local toy store for a NERF or water gun. Or spend a few more bucks to get a nice looking thing -- assuming you either don't care or even, rather like that it is a duplicate of something used by the third Stormtrooper to the left on the second film of the first trilogy.
To my mind, there are a few possible reasons to do your own.
First is that it is fun. You are doing it because you want to do it.
Second is to save money. And this is a "Sort of." You probably can't get something as nice as a quality replica prop for less than it would cost to just order one. But you can get something better than a water pistol for less than you'd spend for a quality replica.
And last is to get something that just isn't out there. Leaving aside, again, the question of wanting a replica of a specific (licensed or unlicensed, historical or fictional, whatever) item, this question narrows into uncommon design elements.
The raygun I made for my sister qualifies; it is a type of retro design that is uncommon and hard to find pre-made (well, hard to find pre-made in semi-realistic form).
A direction I've been tempted in for years is towards the sort of materials and fine detailing of watches and expensive lighters. For that matter, there are few fictional hand-arms (available as reproduction or not) that have the sleek hard simplicity and the look of precision machining of real hand guns. The most typical design form is oversized, rounded, sort of lumpy (pretty much any first-person shooter game with a future setting).
So maybe, there is a value in making prop pistols with high-end fabrication techniques; something showing real metals, real woods, moving parts.
All things, in short, not readily achievable in sculpting, carving, casting, 3d printing...in clay and MDF and craft foam and found objects...in short in any of the materials and methods that are fun and easy to do.
I could probably whip out a nifty-looking laser gun prop in a week using the kinds of traditional materials and methods I have lying around the apartment. But I can't think of any good reason to do so.
If you take replication of specific theatrical creations out of the equation, what is the point of building a prop raygun?
It is straight-forward to carve, cast, assemble, print, or whatever a nice looking raygun. And it is fun to do. But at the end of it, you have a gun-shaped object. And you could spend ten bucks at the local toy store for a NERF or water gun. Or spend a few more bucks to get a nice looking thing -- assuming you either don't care or even, rather like that it is a duplicate of something used by the third Stormtrooper to the left on the second film of the first trilogy.
To my mind, there are a few possible reasons to do your own.
First is that it is fun. You are doing it because you want to do it.
Second is to save money. And this is a "Sort of." You probably can't get something as nice as a quality replica prop for less than it would cost to just order one. But you can get something better than a water pistol for less than you'd spend for a quality replica.
And last is to get something that just isn't out there. Leaving aside, again, the question of wanting a replica of a specific (licensed or unlicensed, historical or fictional, whatever) item, this question narrows into uncommon design elements.
The raygun I made for my sister qualifies; it is a type of retro design that is uncommon and hard to find pre-made (well, hard to find pre-made in semi-realistic form).
A direction I've been tempted in for years is towards the sort of materials and fine detailing of watches and expensive lighters. For that matter, there are few fictional hand-arms (available as reproduction or not) that have the sleek hard simplicity and the look of precision machining of real hand guns. The most typical design form is oversized, rounded, sort of lumpy (pretty much any first-person shooter game with a future setting).
So maybe, there is a value in making prop pistols with high-end fabrication techniques; something showing real metals, real woods, moving parts.
All things, in short, not readily achievable in sculpting, carving, casting, 3d printing...in clay and MDF and craft foam and found objects...in short in any of the materials and methods that are fun and easy to do.
I could probably whip out a nifty-looking laser gun prop in a week using the kinds of traditional materials and methods I have lying around the apartment. But I can't think of any good reason to do so.
Saturday, September 12, 2015
WhatTechWhatShop
The honeymoon is over. SF branch has made no visible progress in repairing the other lathe, and the one remaining one has been booked solid all week. They also have moved like molasses getting two of the original four 3d printers repaired, or hooking up the new donated machines; the one that did get returned got snatched up by the after-school program, and the one remaining printer is now blocked off access this entire week (and weekend) due to some activity or promotion or something using the third floor.
(Which also shuts down the vacuum former, as well as the injection molding machine and the electronics assembly area and even, if I read correctly, the coffee pot! It would be nice to know what exactly this is and why their money trumps the money of us poor regular users. I mean, sure, events are cool and everyone has them, but all week and not even an attempt at accommodation of the needs of the regular users during that time?)
And just to rub it in, no classes are offered this weekend.
Did manage to get out there Saturday. Took ten minutes as usual to find the wrenches, But after that it was all me. Something odd about the stock I was working with, like it had self-tempered too far or was not quite the right alloy. Had chatter with basically every tool. So cut two more buttons, and make one more grenade body, but was feeling so poorly I called it a day after that. Just as well I forgot the springs.
(Which also shuts down the vacuum former, as well as the injection molding machine and the electronics assembly area and even, if I read correctly, the coffee pot! It would be nice to know what exactly this is and why their money trumps the money of us poor regular users. I mean, sure, events are cool and everyone has them, but all week and not even an attempt at accommodation of the needs of the regular users during that time?)
And just to rub it in, no classes are offered this weekend.
Did manage to get out there Saturday. Took ten minutes as usual to find the wrenches, But after that it was all me. Something odd about the stock I was working with, like it had self-tempered too far or was not quite the right alloy. Had chatter with basically every tool. So cut two more buttons, and make one more grenade body, but was feeling so poorly I called it a day after that. Just as well I forgot the springs.
Tuesday, September 1, 2015
Cut Test
Second full week of work. Starting to settle into the routine. Today I meant to go out to TechShop in the eve after work, but the lathe has been booked up since a couple of days ago. If it continues being booked up like this I might have to think seriously about using the one at work. I just don't want to be asking favors this early. A raise is more important to me now than easier tool access.
At least I got a few grenade bodies turned over the weekend. Still have to complete machining them to fill those outstanding M40 orders, though:
Of course, I could get time on the laser engraver, the 3d printer, or the CNC router -- with three of the latter, there's almost always one of them free. But unfortunately, the "CAD" (well, Inkscape files for all but the printer) aren't ready yet. So I guess the trick now is seeing if I can concentrate enough after a long work day peering at serial numbers whilst trying to rationalize the pneumatic tool logbook.
At least it is a little cooler this week. I still think maybe my first project should be a personal cooler I can point at my face for a little spot relief. I just can't sit at my desk and concentrate when it is as hot as it has been.
At least I got a few grenade bodies turned over the weekend. Still have to complete machining them to fill those outstanding M40 orders, though:
Of course, I could get time on the laser engraver, the 3d printer, or the CNC router -- with three of the latter, there's almost always one of them free. But unfortunately, the "CAD" (well, Inkscape files for all but the printer) aren't ready yet. So I guess the trick now is seeing if I can concentrate enough after a long work day peering at serial numbers whilst trying to rationalize the pneumatic tool logbook.
At least it is a little cooler this week. I still think maybe my first project should be a personal cooler I can point at my face for a little spot relief. I just can't sit at my desk and concentrate when it is as hot as it has been.
Wednesday, August 12, 2015
Raygun Postmortem
So what have I learned from this project? How did it go, overall?
In overview, the original commission was much simpler. I talked the client up to more than I should have asked them for, and brought it into new methods which I knew going in were untested. What I hadn't anticipated or evaluated properly is the constraints of grinding poverty through critical parts of the build; being unable to afford components or tools and having to spend weeks at a time unable to work on the project (either waiting on parts, waiting on money to get those parts, or working to earn that money).
Tuesday, August 11, 2015
Raygun XIV.V
Not the final post, not yet. Raygun "ships" today. I might be able to sneak in a Wednesday night delivery if I really have to but the client is packing that night for an early Thursday departure to the land of Tiki.
Deep in to agile micro-fabrication. Went in to the shop yesterday with one hour before I started machining -- and I didn't even have a CAD file. Designed, drafted the thing in plenty of time, but the CAM software was being weird; the computers upstairs were all in use or out of service (I wasted a perfectly good ten minutes trying to find missing keyboards and restore any of them), and the computers in the lab weren't remembering tool settings.
And, yeah. I went in really needing one part. I couldn't get the CAM software to play nice and generate G-code for it. But I could get the software to generate G-code for a part that was a luxury, thought-of-it-at-the-last-minute and if-I-have-time-I'll-make-it. So of course I spent three hours at the CNC mill making that. And barely had the energy left to jump over to the manual mill and do the part I really needed that way instead.
Yeah. So much for the joys of computer-aided manufacturing. The lasers were all booked solid through the next several days (up until Burning Man, basically). So my "this is simpler" is actually more complicated; thirty minutes of CAD drafting and ten minutes of cutting is going to turn into three hours of hand-cutting plastics if I still chose to go down that route.
I lathed the nozzle on Sunday, which was a delight. The acrylic flexed a lot even when I re-ground my custom lathe tool (bought a blank of high speed steel at Grainger and ground it to the profiles recommended on a couple sources for acrylic). And the compound slide was jamming; I couldn't line it up at the five degree angle I needed to cut the taper.
So I pulled out a bastard file and profiled my piece by hand. Applied 220 and 400-grit by hand, with the lathe still turning...and it looked good just like that so I kept it. Wanted to give myself some options so I chucked in the clear acrylic I'd bought but that piece shattered when I tried to lathe it down. Next time, I'll figure out how to make the pieces work with standard stock dimensions!
I would have made more progress with the holster on Sunday but I was a buck short. By at least an hour. Monday morn, I continued working to finish the vacuum form buck, and that was the last thing I did before crawling back to BART. And fortunately I got two clean pulls in PETG.
This morning's first exercise was to see what of the glues I had on hand would actually grip PETG. Loctite Plastic Bonder seems to grip decently (Zap-Gap failed immediately and Weld-On #16 doesn't feel strong). So now I just have to figure out how the various fabric pieces are going to work, then stitch up a belt and finish building a buckle if I have time. And I'm still tempted to make a run down to the fabric store to add some silver edge trim.
Oh...and I have yet to put the last couple screws in the gun. Or glue the flashes on the side. Or upload the new "power up" code I just wrote for it. Or take some pictures before it goes out the door.
No pressure!
Deep in to agile micro-fabrication. Went in to the shop yesterday with one hour before I started machining -- and I didn't even have a CAD file. Designed, drafted the thing in plenty of time, but the CAM software was being weird; the computers upstairs were all in use or out of service (I wasted a perfectly good ten minutes trying to find missing keyboards and restore any of them), and the computers in the lab weren't remembering tool settings.
And, yeah. I went in really needing one part. I couldn't get the CAM software to play nice and generate G-code for it. But I could get the software to generate G-code for a part that was a luxury, thought-of-it-at-the-last-minute and if-I-have-time-I'll-make-it. So of course I spent three hours at the CNC mill making that. And barely had the energy left to jump over to the manual mill and do the part I really needed that way instead.
Yeah. So much for the joys of computer-aided manufacturing. The lasers were all booked solid through the next several days (up until Burning Man, basically). So my "this is simpler" is actually more complicated; thirty minutes of CAD drafting and ten minutes of cutting is going to turn into three hours of hand-cutting plastics if I still chose to go down that route.
I lathed the nozzle on Sunday, which was a delight. The acrylic flexed a lot even when I re-ground my custom lathe tool (bought a blank of high speed steel at Grainger and ground it to the profiles recommended on a couple sources for acrylic). And the compound slide was jamming; I couldn't line it up at the five degree angle I needed to cut the taper.
So I pulled out a bastard file and profiled my piece by hand. Applied 220 and 400-grit by hand, with the lathe still turning...and it looked good just like that so I kept it. Wanted to give myself some options so I chucked in the clear acrylic I'd bought but that piece shattered when I tried to lathe it down. Next time, I'll figure out how to make the pieces work with standard stock dimensions!
I would have made more progress with the holster on Sunday but I was a buck short. By at least an hour. Monday morn, I continued working to finish the vacuum form buck, and that was the last thing I did before crawling back to BART. And fortunately I got two clean pulls in PETG.
This morning's first exercise was to see what of the glues I had on hand would actually grip PETG. Loctite Plastic Bonder seems to grip decently (Zap-Gap failed immediately and Weld-On #16 doesn't feel strong). So now I just have to figure out how the various fabric pieces are going to work, then stitch up a belt and finish building a buckle if I have time. And I'm still tempted to make a run down to the fabric store to add some silver edge trim.
Oh...and I have yet to put the last couple screws in the gun. Or glue the flashes on the side. Or upload the new "power up" code I just wrote for it. Or take some pictures before it goes out the door.
No pressure!
Saturday, August 8, 2015
Raygun XIV.III
In any project, one of the nicest places to arrive is where a cut-out is possible; where you can go to a simpler plan, finish it up and put it in the box.
I took one of these a while back when I dropped the machining to have most of the gun printed. But I'm choosing not to take two others; to go with "good enough" on the programming, and to accept the results of the Rub 'n Buff experiment.
The latter first. I did several pieces in Rub n' Buff before discovering that although it generally wears well, it was coming off the sharp edges. Such as on the grips, with the decorative grooves. So I've gone back to Krylon Premium Original Chrome. Over the black epoxy enamel I'd sprayed earlier (for strength, mostly.)
Paint on the left, Rub 'n Buff in the middle. The trigger guard is real metal; CNC'd aluminium with my M40 Grenade-tested treatment of 220 then 400 grit wet-dry paper, a buff with 0000 steel wool, then a protective film of sewing machine oil.
The picture is a little misleading. The Rub 'n Buff looks better at a distance, and the aluminium piece is at the wrong angle to the light to catch highlights here. And I can see some typical orange-peel in the paint (like a lot of metallics, it doesn't achieve the really good shine unless you put it on heavy enough for it to self-level).
But it works. And, yes; this is another huge advantage to all-metal construction; you can ding that stuff up pretty badly without scratching the "paint." (Would have also helped in some of my mechanical connections -- the e-cell catch, for instance, was really designed around metal-on-metal contact, and it also suffers from the larger footprint required of brass thread inserts over the original plan to tap the aluminium.)
The final details are coming together. I spent another day at the 3d printer. TechShop finally got a second printer working -- which they gave to the classes, but at least that gets those out of the way of making a reservation. And they have at least four of the Zim machines being prepped now. So in the long term printing there will be less of a chore.
Speaking of which. Someone had run nickel-powder PET through the machine I logged into, and perhaps because of that or perhaps because the bed is increasing warped (Type A Machines really need to look into a better print bed) I could not get my prints to adhere. Spent a good hour messing around with the settings (and adding more and more glue to the print bed) until I finally started getting clean prints.
Also oddly -- I set up the first print using the Cura v.15.06 they had loaded on the machines at Techshop, but the subsequent prints I sliced with my own copy of Cura v14.12. And whether it was the software itself, or the possibility that my own tweaked settings had been saved to my copy, but I got nicer prints and a better printing experience with those.
My original idea was a Starburst; a typical Googie design element I really wanted to incorporate (just as the design consciously includes boomerang shapes, jet nacelles, tail fins, etc.) But a last-minute suggest from a friend was another famous bit of Atomic Age design; the atom.
The top is the Starburst idea, but that side is actually where the power setting knob will be. The Atom will be on the other side. And, yes...it should have had three orbits for a proper Bohr atom (which would be Lithium, right?) but I was modeling at warp speed while sitting at the printer with the minutes on my reservation running low.
While I was trying to figure out how many electrons I wanted I had the inspiration to make this the element Tikium, atomic number 12:8 -- with a tiki head for a nucleus. Which is a little easier to see in the Cura display (where I tried and tried to put the quick Carrara model into the quick Fusion model, and after crashing Fusion multiple times finally gave up and did with two prints and some superglue).
Besides re-painting -- and painting up the fresh elements -- the only physical task left on the gun is to lathe out the emitter. Which with luck I'll get to on Sunday.
And finish the wiring harness. All the electronics are mounted now, but it is a good thing I left some of the wiring loose because I had to make several adjustments in how things were wired. I've really fallen out of love with the ATtiny84. I picked that chip for the DuckNode as a compromise between the tiny footprint of the ATtiny45 and the greater number of I/O ports. But there really aren't a lot of ports anyhow. I'm sharing ones I'd rather not share, and at some point I'll be in that ugly little round of having to disconnect the ISP in order to test a pin function properly.
It also only has two hardware timers (not including the watchdog timer, which I'm not about to get into. So my program has ended up taking on certain aspects of RTOS programming again. I have to really watch the operations I perform (modulus is an ugly one on the smaller AVR's -- even though they have a math co-processor it takes them 15x longer to run a modulus calculation than it does to run an "if" statement.)
So within the loops I have to program exceptionally lean. Because the program has to step through everything fast enough to be able to run a software PWM of the light (in order that I can fade it smoothly), and fast enough to not put too much jitter into the audio. And the timing is hyper-critical to where the sound only sounds right with the right number of delaying elements in the loop; meaning there's at least one spot where I have to use modulus just to get the timing to come out right!
Yes, more discoveries. The Arduino "delaymicroseconds" function leverages a timer. So I can't call it without messing up my own timers. And for some reason changing the system clock prescaler on either of the timers makes the "delay" function either run slow or not at all. Don't understand what's going on there.
More so, it appears my stick of ATtiny84's shipped with, instead of the 8 mHz internal oscillator ATmel promises they are supposed to default to, but the 128 kHz low-power oscillator selected! Fortunately, "burn bootloader" from the latest Arduino IDE -- patched with various third-party AVR-duino packages -- reset the fuses. Because I'm not up for trying to remember how to use the avrdude chain right now. (No doubt discovering a broken instal somewhere along the way!)
Thing is, in this kind of micro-computing one doesn't write a program. One writes a "sketch." The idea is you aren't trying to make something bulletproof, and test it before uploading to production. You just throw together whatever pile of code gets the project of the moment working. If Larry Niven's Pak Protectors programmed, this is how they'd do it.
Hence my current code-in-development, a horrible hybrid of Arduino macros and register directives written down so close to the metal they might as well be in Assembly. And of course lots of lines commented out, magic numbers everywhere, a few scrawled notes here and there, function calls done entirely so I can see where I am in the program flow, etc. Sure, your code might look like this when you are coming up with ideas, but I'm quite literally testing this in production; uploading it in real time to the hardware to see what happens.
But with any luck, I won't need to make any more hardware layer alterations, and I can finish the wiring harness and close it up. Today, I'm hoping. I just need to finish writing the Power Selector Knob routines, a nice Continuous Wave setting, and if I get ambitious a Power On hum for when the system boots and a "Phaser on Overload" for when you twist the control knob all the way over.
That is, assuming all the paint has dried by then. I may have to wait until Monday to bolt everything back together (it was all bolted together for the test assembly so I know that part is all good). And switch to working on the holster instead. Picked up a couple yards of white pleather and clear vinyl to play with...
I took one of these a while back when I dropped the machining to have most of the gun printed. But I'm choosing not to take two others; to go with "good enough" on the programming, and to accept the results of the Rub 'n Buff experiment.
The latter first. I did several pieces in Rub n' Buff before discovering that although it generally wears well, it was coming off the sharp edges. Such as on the grips, with the decorative grooves. So I've gone back to Krylon Premium Original Chrome. Over the black epoxy enamel I'd sprayed earlier (for strength, mostly.)
Paint on the left, Rub 'n Buff in the middle. The trigger guard is real metal; CNC'd aluminium with my M40 Grenade-tested treatment of 220 then 400 grit wet-dry paper, a buff with 0000 steel wool, then a protective film of sewing machine oil.
The picture is a little misleading. The Rub 'n Buff looks better at a distance, and the aluminium piece is at the wrong angle to the light to catch highlights here. And I can see some typical orange-peel in the paint (like a lot of metallics, it doesn't achieve the really good shine unless you put it on heavy enough for it to self-level).
But it works. And, yes; this is another huge advantage to all-metal construction; you can ding that stuff up pretty badly without scratching the "paint." (Would have also helped in some of my mechanical connections -- the e-cell catch, for instance, was really designed around metal-on-metal contact, and it also suffers from the larger footprint required of brass thread inserts over the original plan to tap the aluminium.)
The final details are coming together. I spent another day at the 3d printer. TechShop finally got a second printer working -- which they gave to the classes, but at least that gets those out of the way of making a reservation. And they have at least four of the Zim machines being prepped now. So in the long term printing there will be less of a chore.
Speaking of which. Someone had run nickel-powder PET through the machine I logged into, and perhaps because of that or perhaps because the bed is increasing warped (Type A Machines really need to look into a better print bed) I could not get my prints to adhere. Spent a good hour messing around with the settings (and adding more and more glue to the print bed) until I finally started getting clean prints.
Also oddly -- I set up the first print using the Cura v.15.06 they had loaded on the machines at Techshop, but the subsequent prints I sliced with my own copy of Cura v14.12. And whether it was the software itself, or the possibility that my own tweaked settings had been saved to my copy, but I got nicer prints and a better printing experience with those.
My original idea was a Starburst; a typical Googie design element I really wanted to incorporate (just as the design consciously includes boomerang shapes, jet nacelles, tail fins, etc.) But a last-minute suggest from a friend was another famous bit of Atomic Age design; the atom.
The top is the Starburst idea, but that side is actually where the power setting knob will be. The Atom will be on the other side. And, yes...it should have had three orbits for a proper Bohr atom (which would be Lithium, right?) but I was modeling at warp speed while sitting at the printer with the minutes on my reservation running low.
While I was trying to figure out how many electrons I wanted I had the inspiration to make this the element Tikium, atomic number 12:8 -- with a tiki head for a nucleus. Which is a little easier to see in the Cura display (where I tried and tried to put the quick Carrara model into the quick Fusion model, and after crashing Fusion multiple times finally gave up and did with two prints and some superglue).
Besides re-painting -- and painting up the fresh elements -- the only physical task left on the gun is to lathe out the emitter. Which with luck I'll get to on Sunday.
And finish the wiring harness. All the electronics are mounted now, but it is a good thing I left some of the wiring loose because I had to make several adjustments in how things were wired. I've really fallen out of love with the ATtiny84. I picked that chip for the DuckNode as a compromise between the tiny footprint of the ATtiny45 and the greater number of I/O ports. But there really aren't a lot of ports anyhow. I'm sharing ones I'd rather not share, and at some point I'll be in that ugly little round of having to disconnect the ISP in order to test a pin function properly.
It also only has two hardware timers (not including the watchdog timer, which I'm not about to get into. So my program has ended up taking on certain aspects of RTOS programming again. I have to really watch the operations I perform (modulus is an ugly one on the smaller AVR's -- even though they have a math co-processor it takes them 15x longer to run a modulus calculation than it does to run an "if" statement.)
So within the loops I have to program exceptionally lean. Because the program has to step through everything fast enough to be able to run a software PWM of the light (in order that I can fade it smoothly), and fast enough to not put too much jitter into the audio. And the timing is hyper-critical to where the sound only sounds right with the right number of delaying elements in the loop; meaning there's at least one spot where I have to use modulus just to get the timing to come out right!
Yes, more discoveries. The Arduino "delaymicroseconds" function leverages a timer. So I can't call it without messing up my own timers. And for some reason changing the system clock prescaler on either of the timers makes the "delay" function either run slow or not at all. Don't understand what's going on there.
More so, it appears my stick of ATtiny84's shipped with, instead of the 8 mHz internal oscillator ATmel promises they are supposed to default to, but the 128 kHz low-power oscillator selected! Fortunately, "burn bootloader" from the latest Arduino IDE -- patched with various third-party AVR-duino packages -- reset the fuses. Because I'm not up for trying to remember how to use the avrdude chain right now. (No doubt discovering a broken instal somewhere along the way!)
Thing is, in this kind of micro-computing one doesn't write a program. One writes a "sketch." The idea is you aren't trying to make something bulletproof, and test it before uploading to production. You just throw together whatever pile of code gets the project of the moment working. If Larry Niven's Pak Protectors programmed, this is how they'd do it.
Hence my current code-in-development, a horrible hybrid of Arduino macros and register directives written down so close to the metal they might as well be in Assembly. And of course lots of lines commented out, magic numbers everywhere, a few scrawled notes here and there, function calls done entirely so I can see where I am in the program flow, etc. Sure, your code might look like this when you are coming up with ideas, but I'm quite literally testing this in production; uploading it in real time to the hardware to see what happens.
But with any luck, I won't need to make any more hardware layer alterations, and I can finish the wiring harness and close it up. Today, I'm hoping. I just need to finish writing the Power Selector Knob routines, a nice Continuous Wave setting, and if I get ambitious a Power On hum for when the system boots and a "Phaser on Overload" for when you twist the control knob all the way over.
That is, assuming all the paint has dried by then. I may have to wait until Monday to bolt everything back together (it was all bolted together for the test assembly so I know that part is all good). And switch to working on the holster instead. Picked up a couple yards of white pleather and clear vinyl to play with...
Labels:
avr,
electronics,
programming,
props,
raygun,
TechShop
Monday, August 3, 2015
Raygun XIV.I
TechShop is sort of bugging me. One lathe is still busted. Still only one printer, and not only is that reserved most of the time, it keeps getting dragged off to be used in some sort of afterschool outreach they are running. And today...the bandsaw was busted (and like the lathe, the parts may take weeks to arrive, if ever... apparently Jet Tools is not the best at support).
With no bandsaw, I made do with file, hacksaw...and mill. Was actually able to use the mill to cut the pieces I wanted to width and length, then used grinder and file to do the final shaping.
My CNC parts went okay. I seem to have forgotten which corner needs to be set to properly zero the various steps; my G-code had the cuts way off in space. So I eyeball zeroed the CNC mill to where the cuts would land on my stock -- lots of air passes to make sure I was getting it right.
After I broke my old end mill that other day, I've been a lot more conservative in my G-code. So much so I was able to dial up to 100% machine speed over-ride (aka, running the G-code as written) and the mill sounded just fine. 8 ips, by the by, step-over of 30%, and a plunge depth of .04" on a .25" end mill.
V-Carve Pro is not the most complicated software out there, and I didn't want to play with trying to face my stock. So I faced on the manual mill, and exported only the contour cut-off path from V-Carve. That worked fine...but facing with a 1/4" end mill takes a while! If I had really gone through with making the raygun all metal, I would have had to break down and purchase a face mill (well..you can get one for under a hundred bucks on eBay).
Clean-up was the other reason I chickened out on all-metal. There were several notches in the parts I ran off today that the end mill couldn't reach, and I spent a good hour with a file working on that. And these were simple outlines; the main parts with all their compound curves are giving me a hard time just with sandpaper and the soft plastic I got back from Shapeways!
(And, yes, there are several errors in the CAD. I've been having to cut into the plastic in various places, as well as add more material with scrap plastic and superglue. The revised e-cell connector took even more than that; I assembled that with Apoxie Sculpt.)
Well, the metal parts fit. The sound board is a lot smaller than I thought, but jammed up against the housing and fed a strong audio signal from my computer, it seems sufficiently loud anyhow. But that means that, more and more, assembly is bleeding into electronics assembly/final assembly. And that means I have to finish most of the painting.
And painting is currently waiting for the trial piece in epoxy enamel to finish curing so I can evaluate if all the pieces are going to get that treatment. At this point, it looks like the combination of superglue seal on the plastic and epoxy enamel as final coat will give the tough shell I need, and Rub 'n Buff will give a metallic sheen that will look appropriate and last a while.
And oops. Before I put on the final coats of paint I really need to print off the "swooshes" for the side. If and when that last ailing 3d printer at TechShop even becomes available again!
With no bandsaw, I made do with file, hacksaw...and mill. Was actually able to use the mill to cut the pieces I wanted to width and length, then used grinder and file to do the final shaping.
My CNC parts went okay. I seem to have forgotten which corner needs to be set to properly zero the various steps; my G-code had the cuts way off in space. So I eyeball zeroed the CNC mill to where the cuts would land on my stock -- lots of air passes to make sure I was getting it right.
After I broke my old end mill that other day, I've been a lot more conservative in my G-code. So much so I was able to dial up to 100% machine speed over-ride (aka, running the G-code as written) and the mill sounded just fine. 8 ips, by the by, step-over of 30%, and a plunge depth of .04" on a .25" end mill.
V-Carve Pro is not the most complicated software out there, and I didn't want to play with trying to face my stock. So I faced on the manual mill, and exported only the contour cut-off path from V-Carve. That worked fine...but facing with a 1/4" end mill takes a while! If I had really gone through with making the raygun all metal, I would have had to break down and purchase a face mill (well..you can get one for under a hundred bucks on eBay).
Clean-up was the other reason I chickened out on all-metal. There were several notches in the parts I ran off today that the end mill couldn't reach, and I spent a good hour with a file working on that. And these were simple outlines; the main parts with all their compound curves are giving me a hard time just with sandpaper and the soft plastic I got back from Shapeways!
(And, yes, there are several errors in the CAD. I've been having to cut into the plastic in various places, as well as add more material with scrap plastic and superglue. The revised e-cell connector took even more than that; I assembled that with Apoxie Sculpt.)
Well, the metal parts fit. The sound board is a lot smaller than I thought, but jammed up against the housing and fed a strong audio signal from my computer, it seems sufficiently loud anyhow. But that means that, more and more, assembly is bleeding into electronics assembly/final assembly. And that means I have to finish most of the painting.
And painting is currently waiting for the trial piece in epoxy enamel to finish curing so I can evaluate if all the pieces are going to get that treatment. At this point, it looks like the combination of superglue seal on the plastic and epoxy enamel as final coat will give the tough shell I need, and Rub 'n Buff will give a metallic sheen that will look appropriate and last a while.
And oops. Before I put on the final coats of paint I really need to print off the "swooshes" for the side. If and when that last ailing 3d printer at TechShop even becomes available again!
Sunday, July 12, 2015
And it's no, nay, never, no nay never no more
I've been applying for work-work. Cable repair, speaker assembly, that sort of thing. The only scene shop looking for a carpenter this week is a long commute away, unfortunately. I'm not giving up on the freelance life. But I need a cash infusion to keep on with living expenses...and prop-building expenses.
Basically I'll be waiting around for the next week or two for the major elements of the Raygun to come back from Shapeways. I can mill a few parts in the meantime (once I get a new end mill) and work on the electronics, but this is a pretty good time to veer off and do something else. Like earn a little money.
Went into the shop yesterday; printed out the "donut" insulator ring at the lowest resolution the printer could deliver, and also as an experiment (and because I had time left on my machine reservation), the energy cell assembly that sits in the grip and contains the battery:
Always good to do a sanity check. There are a couple spots where this part could be improved. Also printed out in under an hour so not a real problem to go out and print another.
Really, isn't much of a chore watching a printer. I take my laptop and I work on other files while the print is going (it is the sorry truth of this new computerized, software-driven, micro-fabrication age; more and more computer work that needs to be done. Unlike what some people seem to think, going CNC and 3d print and all doesn't mean the computer does all the work for you. It just means it looks different while you are doing it.)
This is what that part looks like in CAD, by the way:
The main work I was doing while the printer was spooling out Zen Toolworks PLA a millimeter at a time was cleaning up the new Holocron design. I was even able to get a very subtle texture into the diffusion layer (basically, acrylic is either frosted by the laser, or not. There's no equivalent to the range of tones you get when you burn wood.)
And, no, I don't really care for the big Jedi symbol. And I was working off the wrong cutting vectors for the inner pieces anyway -- they were slightly large, and the snap-fit wasn't tight enough. I'm sure I've got that data somewhere, though, since I cut a whole set for the "Jedi Master" (who vanished into hyperspace after I shipped him a full kit to try out.) So I have at least one more trip out to play with the lasers before I can start a Project Run thread on this and start collecting money for materials.
Today was a semi-productive day as well. Finally got around to opening up my Uniden Bearcat scanner to confirm that, yes indeed, the bulkhead jack for the antenna was cracked in two places:
A trip to the Sprint Shack and I have a new connector in there and can use it as a radio again. But the jack I purchased is too short so I'm leaving most of the screws off until I can get the right part from Digikey. Might replace the speaker, too -- it has been sounding weak.
Also picked up some fabric and leather, Ritt dye and a couple pieces of poster board to use as seamless backdrops for model photography. Which is overkill for the size of most of my props these days:
That's my very first 3d print, BTW. Found the file on Thingiverse, printed it off in my new roll of pink SLA, then sanded the heck out of it. Tried three or four times to get a nice color on it. What seemed to sort of work was a primer coat of (bright yellow!) Rustoleum Super-Coat, followed by Tamiya Olive Drab2, then wet-sponging with a mixture of mostly pthalo green and burnt umber, with a couple of coats of gloss to cover.
The artists were inconsistent -- not only do promo pics not resemble the in-game prop, not only do neither resemble the official collectable shipped with the pre-order game, but it is rendered several different ways in game! That said, this is a pretty poor approximation of any of the versions, but it was fun to make.
And after all of that seamless-backdrop stuff, I still find I prefer taking prop pics with all sorts of random garbage in the image:
(That's a nautical clock, actually. And real charts, although I think they are Chesapeake Bay. And a far too modern and clean-looking reproduction firearm as well. I used to throw handfuls of NATO 5.56 crimps into the background, but I gave those away...)
Basically I'll be waiting around for the next week or two for the major elements of the Raygun to come back from Shapeways. I can mill a few parts in the meantime (once I get a new end mill) and work on the electronics, but this is a pretty good time to veer off and do something else. Like earn a little money.
Went into the shop yesterday; printed out the "donut" insulator ring at the lowest resolution the printer could deliver, and also as an experiment (and because I had time left on my machine reservation), the energy cell assembly that sits in the grip and contains the battery:
Always good to do a sanity check. There are a couple spots where this part could be improved. Also printed out in under an hour so not a real problem to go out and print another.
Really, isn't much of a chore watching a printer. I take my laptop and I work on other files while the print is going (it is the sorry truth of this new computerized, software-driven, micro-fabrication age; more and more computer work that needs to be done. Unlike what some people seem to think, going CNC and 3d print and all doesn't mean the computer does all the work for you. It just means it looks different while you are doing it.)
This is what that part looks like in CAD, by the way:
The main work I was doing while the printer was spooling out Zen Toolworks PLA a millimeter at a time was cleaning up the new Holocron design. I was even able to get a very subtle texture into the diffusion layer (basically, acrylic is either frosted by the laser, or not. There's no equivalent to the range of tones you get when you burn wood.)
And, no, I don't really care for the big Jedi symbol. And I was working off the wrong cutting vectors for the inner pieces anyway -- they were slightly large, and the snap-fit wasn't tight enough. I'm sure I've got that data somewhere, though, since I cut a whole set for the "Jedi Master" (who vanished into hyperspace after I shipped him a full kit to try out.) So I have at least one more trip out to play with the lasers before I can start a Project Run thread on this and start collecting money for materials.
Today was a semi-productive day as well. Finally got around to opening up my Uniden Bearcat scanner to confirm that, yes indeed, the bulkhead jack for the antenna was cracked in two places:
A trip to the Sprint Shack and I have a new connector in there and can use it as a radio again. But the jack I purchased is too short so I'm leaving most of the screws off until I can get the right part from Digikey. Might replace the speaker, too -- it has been sounding weak.
Also picked up some fabric and leather, Ritt dye and a couple pieces of poster board to use as seamless backdrops for model photography. Which is overkill for the size of most of my props these days:
That's my very first 3d print, BTW. Found the file on Thingiverse, printed it off in my new roll of pink SLA, then sanded the heck out of it. Tried three or four times to get a nice color on it. What seemed to sort of work was a primer coat of (bright yellow!) Rustoleum Super-Coat, followed by Tamiya Olive Drab2, then wet-sponging with a mixture of mostly pthalo green and burnt umber, with a couple of coats of gloss to cover.
The artists were inconsistent -- not only do promo pics not resemble the in-game prop, not only do neither resemble the official collectable shipped with the pre-order game, but it is rendered several different ways in game! That said, this is a pretty poor approximation of any of the versions, but it was fun to make.
And after all of that seamless-backdrop stuff, I still find I prefer taking prop pics with all sorts of random garbage in the image:
(That's a nautical clock, actually. And real charts, although I think they are Chesapeake Bay. And a far too modern and clean-looking reproduction firearm as well. I used to throw handfuls of NATO 5.56 crimps into the background, but I gave those away...)
Friday, July 10, 2015
Oops
Logged on to the Tormach CNC mill today.
On the plus side, I figured out how to use the software "wizards" to face a piece of stock on the Tormach itself (these are tiny sub-programs made available in many CNC tool drivers that allow semi-automated, semi-manual operations to be performed).
On the minus, my G-Code was bad. The code I'd sent from Fusion 360 wasn't useable. And the code from Cut3D -- well, despite being within the recommended tolerances, the moment I made my first machine pass it ramped down steeply and snapped my good end mill clean off.
Oh, yes. And the setscrew was completely stripped on the quick-collet when I got the machine (fortunately -- maybe fortunately -- I knew how to install a regular collet), and someone had left a stop secured to the vice...and it took fifteen minutes of searching the shop to find the right allen key to remove it.
This is the problem with a rental tool facility. The Tormach has the problems above. One of the two lathes is still out. Three of the 3d printers are dead. And the reservation calendar is starting to stretch for two weeks in advance.
I'm getting a real case of buyer's remorse here. I chose to pick up a year's membership at once because it was much cheaper. But that was a lump sum I really can't afford this month. I'm down to too little to pay bills. And nothing lined up to cover next month's rent.
Which is another reason to seriously rethink the Raygun prop. I think I need to turn to projects I know will earn money (I'm basically doing the Raygun at a loss) and come up with the cash to have the body printed at Shapeways instead of trying to machine it out.
(And, yes -- I could print it at TechShop, but it would take a week's worth of reservations and the tolerances wouldn't be as good. I've rather rethought the usefulness of being able to print there, as well. Printing is just too time consuming, and the lack of available machines and the short reservation period makes that a big problem.)
On the plus side, I figured out how to use the software "wizards" to face a piece of stock on the Tormach itself (these are tiny sub-programs made available in many CNC tool drivers that allow semi-automated, semi-manual operations to be performed).
On the minus, my G-Code was bad. The code I'd sent from Fusion 360 wasn't useable. And the code from Cut3D -- well, despite being within the recommended tolerances, the moment I made my first machine pass it ramped down steeply and snapped my good end mill clean off.
Oh, yes. And the setscrew was completely stripped on the quick-collet when I got the machine (fortunately -- maybe fortunately -- I knew how to install a regular collet), and someone had left a stop secured to the vice...and it took fifteen minutes of searching the shop to find the right allen key to remove it.
This is the problem with a rental tool facility. The Tormach has the problems above. One of the two lathes is still out. Three of the 3d printers are dead. And the reservation calendar is starting to stretch for two weeks in advance.
I'm getting a real case of buyer's remorse here. I chose to pick up a year's membership at once because it was much cheaper. But that was a lump sum I really can't afford this month. I'm down to too little to pay bills. And nothing lined up to cover next month's rent.
Which is another reason to seriously rethink the Raygun prop. I think I need to turn to projects I know will earn money (I'm basically doing the Raygun at a loss) and come up with the cash to have the body printed at Shapeways instead of trying to machine it out.
(And, yes -- I could print it at TechShop, but it would take a week's worth of reservations and the tolerances wouldn't be as good. I've rather rethought the usefulness of being able to print there, as well. Printing is just too time consuming, and the lack of available machines and the short reservation period makes that a big problem.)
Subscribe to:
Posts (Atom)