In the past I've compared hanging lights in a theater to moving stuff around in an old attic. It is cramped, dusty, and hot.
After four days of lighting hang I think I can improve on the analogy. Lighting instruments range from 20 pounds up, but as bad as the weight is that they are awkward. They are weird shapes that are hard to get a good hold on, have lots of parts (and sharp edges) that stick out, and have a nasty habit of unfolding or swiveling on you as you are trying to move them. Lighting cable is similar; it is remarkably heavy, stiff, long, and just slippery enough that when you have half of it where you want it it will suddenly slip down the other side of the pipe and yank at you with the weight of forty, fifty pounds in sudden free-fall.
So it is like trying to store bicycles in a dusty attic.
Lots of bicycles. More than will comfortably fit. So when you are trying to carry a bicycle up the ladder and stuff it into the hatch, there are already a bunch of bicycles in the way. And if you aren't careful some of the older ones start to slip and move on you as you are trying to wriggle your way through them.
And the ladder to the attic is thirty feet tall and rickety as hell and there are no handrails.
And the bicycles are hot to the touch; parts of them hot enough to burn you!
It is hard to explain just how the geometry conspires in a theater to make the work exhausting. The places where you can stick a ladder or even a manlift are afterthoughts to the primary purpose of having lights where they need to be to paint the stage picture. So in the vast majority of cases, it isn't like going up one of those bookcase ladders with the book you want in front of you and in comfortable reach of your arm. Instead you have to twist around on the ladder like a yoga exercise and stretch out as far as you can and then shove twenty to forty pounds of metal against rusty fasteners to get it in the right direction.
Your arms are all at bad angles for trying to apply leverage, the focus target is usually behind your head where you can barely see out of the corner of your eye if you twist around uncomfortably, your knees and elbows are in the way, and because your feet are still on the ladder your whole body is twisted around painfully. And all of this conspires against your strong desire to keep at least one foot on the ladder which is saving you from a potentially fatal fall. In practical terms, you often end up with only the friction of your forearm against a piece of gouged-up metal somewhere keeping your body from sliding off the top of the ladder, only your fingertips supporting the full weight of the lighting instrument, and your non-dominant hand turned the wrong way to try to jam a wrench into position to force a rusted, damaged fastener to where it will take the malevolently swiveling load off your fingers.
Repeat this over and over. In the dark. In sweltering heat. Covered in dust. With live wires that sometimes give you nasty shocks and of course the aforementioned bits that are hot enough to burn you in a fraction of a second (one of the gobos I took out last night was orange-hot; glowing so hot you could see the light it was casting projected on to the stage through the optics.
The base rate for lighting technicians in the Bay Area is $15 an hour. Some theaters still offer $10.
Friday, May 29, 2015
Saturday, May 23, 2015
Blinded Me With Science
Just figured out why my cast acrylic eye pieces are so hard to see through, even when I do get a decent surface.
Cast acrylic has an index of refraction higher than that of air!
The outer surface of the helmet is curved, therefor the front surface of the eye pieces describes an arc. And because they were cast in an open mold, the rear is flat. That makes them a lens.
It is always sort of cool when some of the basic physics of the universe pops up in the middle of a construction project like this.
I've been having a lot of trouble getting a good surface anyhow. Went progressively up to wet-sanding with 2000 grit, and followed with Novus #2, but it still leaves a cloudy surface. I don't think the casting resin is quite compatible with the resin polish. (I'd previously tried using a Dremel polishing wheel at low speed but it still gouged holes in the plastic).
This is all surface effect, which is why flame polishing and MEK softening methods (sort of) work for this sort of thing. Which means the surface is a lot more clear when wet. And, as it turns out, when OILED. A little drop of sewing machine oil brought it...well, far from optical quality, but enough to confirm there was a major lensing issue that made it impossible to see anything clearly through the eyepieces.
So I guess I'm back to trying to carve, bend, and shape 1/8" to 1/4" cast acrylic sheet. Which I'll have to do at TechShop because it will be a messy bit of grinding and filing and sanding.
Thursday, May 21, 2015
Less Foam
It is hard to let go of a method (and a skill) that you have been using for years. But I'm coming to realize that foam, at least how I'm using it, is a poor fit for the props I am doing today.
I met foam back in high school theater. It is still a great match for theatrical props, and that's what made it so hard to take a step back and see it in proper context. You see, theater props are meant to be seen from a distance. Forty feet, we usually say. And they don't have to last long or stand up perfectly to rough handling; many is the prop on many a show that finishes more tape and hot glue and hastily spray-painted touch-ups than original surface.
At the heart of most of the prop-making processes is a central paradox; you want a final surface that is hard and durable, but you want a material which is soft and malleable during the process of shaping that surface. Hardwood, metal; they both look great, but need power tools and excessive time to carve. Foam allows you to rough in a shape very, very quickly -- sometimes with nothing more than bare hands.
This flexibility can be a huge drawback, though. Foam is not quite durable enough for the kind of close-up hand props I'm making now. And it can't stand up to the rigors of vacuum forming, either. Yes, you can take a mold off it, and cast either a durable resin copy or make a better vacuum form buck from that. But even then foam is problematic for achieving a good final surface.
It beads, it cracks, it squishes. All those qualities that make it excellent for quick shaping, work against getting the final smooth surface and details you are after. There is a partial way around this; hold the foam back significantly from the final outlines, and coat it with Bondo. Then you can shape that more durable material with more confidence that it won't collapse.
Except you are basically trading away the advantage of foam being there at all. Bondo is further along the graph from "easy to carve" to "solid in the hand," enough that you are back into shaping with power tools. The foam is present in so rough a shape, it might as well be swapped out for cheaper and more durable MDF -- there's no loss in carving time since all the important shaping is taking place on the Bondo surface now.
I had a similar issue with FIMO, but the generally workable solution was to bake progressively; retaining the shapes that were finished so they didn't squash, distort, or get accidentally dented or otherwise mangled while you were sculpting the next element. (As an aside, Sculpey has this problem even worse; it is self-skinning, which is probably great for beads but makes it difficult to properly refine a surface without baking it then resorting to sand paper).
The ultimate along this line, to my mind, is that gift from the prop-making gods; Apoxie Sculpt. Apoxie fits well with my impatient approach and generally iterative workflow; it starts off soft enough to roughly prod into shape, like sticky clay. Then it sets up over about forty-five minutes in a balsa-like state that is generally too stiff to accidentally squish out of shape, but soft enough you can quickly whittle more refined details into. Then, in eight to twelve hours more, it sets to a durable solid like tight-grained wood, that can be drilled and sanded.
There are downsides to the stuff, but, really, the trade-off you get for materials like this, that are both easily malleable during primary shaping and tough and stable during the final detailing, is the cost of the stuff.
None of these "translation" materials are cheap, from Apoxie Sculpt to the silicone rubber used to make a decent mold. Which is why theater often doesn't translate -- it uses the primary carving materials (foam, balsa, foam-core, cardboard) as the final form. And, yes, people get excellent results with hand props and costume pieces with these materials, and similar. But it just isn't the kind of surface and durability I want for my own.
Well, there's a couple places where I can push closer to center. More expensive foams that carve tighter and better support surface finishing, for one. But I may have to give up on expanded styrene foam for all but massive, rough-shaped props.
Wednesday, May 20, 2015
Another annoying day
I knew I couldn't finish the Space Helmet today. But I was hoping to get down to the point where little but the oxygen canister (which will require a TechShop visit) was left to do.

Set up my beloved but sadly under-utilized Bernina and put on all the straps. The pack is a little tight, and the mask straps look a little weird. Works, though. The hose is quite uncomfortable, though, and it only barely fits under the helmet, and all in all I think it may be a better solution to add a hose connection to the helmet instead.
I also may run out for more webbing and re-do the pack. But other than that and the canister, it is just detail painting left. Unfortunately I'm going into a show in the City followed immediately by a load-in in town followed immediately by another show in the City. Busy times.
In fact, it looks like I might actually make rent not just this month, but the next. Each month, heck, each bill, I've been surprised to make. And made only through last-minute work, loans, and outright gifts. Every now and then I think if I could just get my head a little further above water, the props business would start to pick up serious slack. Which is why I've been pushing so hard with the holocrons. But the rest of the time, I am not so certain.
 Times like today, when nothing quite fit or looked right. And even the lentils I put on the stove never quite decided to thaw out into soup.
(And, yeah, doesn't help that I'm only ten bucks shy of making the upcoming TechShop membership. Drat them for raising it $25 this month! There's an equipment rental past due, and a guy I'll be seeing at the next gig who owes me fifty bucks...but I don't see him until the day after my membership is due!)


Set up my beloved but sadly under-utilized Bernina and put on all the straps. The pack is a little tight, and the mask straps look a little weird. Works, though. The hose is quite uncomfortable, though, and it only barely fits under the helmet, and all in all I think it may be a better solution to add a hose connection to the helmet instead.
I also may run out for more webbing and re-do the pack. But other than that and the canister, it is just detail painting left. Unfortunately I'm going into a show in the City followed immediately by a load-in in town followed immediately by another show in the City. Busy times.
In fact, it looks like I might actually make rent not just this month, but the next. Each month, heck, each bill, I've been surprised to make. And made only through last-minute work, loans, and outright gifts. Every now and then I think if I could just get my head a little further above water, the props business would start to pick up serious slack. Which is why I've been pushing so hard with the holocrons. But the rest of the time, I am not so certain.

(And, yeah, doesn't help that I'm only ten bucks shy of making the upcoming TechShop membership. Drat them for raising it $25 this month! There's an equipment rental past due, and a guy I'll be seeing at the next gig who owes me fifty bucks...but I don't see him until the day after my membership is due!)
Monday, May 18, 2015
The exercise nobody does
I like reading fanfic. For all the usual reasons; for more stories about characters I've already been introduced to, for stories that never got to happen in the original, and for a certain amount of snark and deconstruction.
But also as an exercise in writing. I am fascinated in watching how all writers, no matter what the media, take on the challenges of telling the story. Setting up the situations, setting the moods, explaining the back-story, establishing the characters, the whole lot.
And this is why there is one habit in fan fiction I find really annoying. Sure, these are established characters, and an established world. You aren't faced with having to get the audience up to speed with who is who and what they are up to before that audience gets bored waiting for something to happen and wanders off in search of some other story.
Except you should still have to do it.
Here's a little tidbit from a product of the pulp era:
The journalist took a full breath and began to spread enlightenment.
"Listen, old chap, this bronze man is known as one of the greatest surgeons. As a chemist, he has made discoveries that your children will some day read about. The bronze man is rated a wizard in the field of electricity. Furthermore, he - "
The thin man in the coveralls put a bony finger against the scribe's chest. "How many blokes are you tellin' me about?
"One."The above occurs a few pages into "The Thousand-Headed Man," and is introducing, of course, Doc Savage, the Man of Bronze, the leading protagonist whose name occurs on the cover of the magazine. Except the above is from the 17th Doc Savage story, only one of what was over 181 stories in all.
And every single one of them introduced Doc to the reader.
Other serials did the same, though not always with Lester Dent's cleverness (the thin man had donned said coveralls as a disguise in a previous scene, and in fact already knew full well who Doc was, having come to gain his aid.) The Hardy Boys, for instance, made do with a drab recap of who Frank and Joe were in terse and omniscient narrative voice.
Contrast this to fan fiction. In the vast majority, all that you will see of any character is, "Harry was there, and Luna." In a smaller number (and all of the better written ones), there will be a few signifiers here and there; Luna will mention her father and The Quibbler, show off a few bits of her peculiar lunacy, and even possibly get a "...her blond hair" here or there. Extra points if none of these are either plot-important, or the pro-forma Stations of the Cross.
(To explain the above; there are things that are expected by the fandom. Jack O'Neill is going to have to say "For crying out loud" at least once, someone is going to have to mention Buffy Summers dying -- she got better -- and no possible Picard will ever get through a day without his Earl Grey, Hot.)
Point being, few writers attempt explaining who each of these people are in the same way they would have to if those characters were original. Sometimes they will do this for settings and situation, but this is more likely to be navigational aids towards when in the series this particular book is picking up. Or as part of the background of truly new or original characters; the description of Hogwarts, then, is not meant for us, it is meant to inform us of just what this outsider character knows as of that moment.
So, sure, there's reason to dislike this on purely practical grounds. Not all readers will have read all the sources, especially for a massive multi-universe cross-over. Not all readers will remember all the minor character from Harry Potter (there are a lot of characters in Harry Potter), and not all readers will figure out whether you mean movie version, book version, or some version that only shows up in the computer game.
But it is also a loss to the story, and to the writer. For the latter, you are skipping a chance to learn and practice how to slip in all of those details that describe a character. For the former, each story is a unique take, and implicitly will end up with a unique portrayal. By leaving off any attempt to describe anyone, you take away the best lens for seeing this characters afresh and making them your own.
Thursday, May 14, 2015
A depressing lack of progress
The second attempt at an acrylic cast for the eyepieces was better, but still not clear enough. I don't know enough of what went wrong to know what to change, so I just went ahead with a third cast. At least the second mold is holding together well.
I chickened out on dropping forty bucks on a proper tubing bender...and destroyed ten bucks of tubing trying to get a smooth bend without.
The laser-cut side pieces for the mask sort of worked. I did have one clever moment; I cut the final set of paper templates out of graph paper, and by setting a grid in InkScape at the same spacing, I could do a point-by-point translation of the shape into software for the laser. Bending turned out to be a huge pain, although it did work. Except for one bend, which snapped and I had to fill it.
Plus, I decided the lumps and cracks on the PETG from the damaged buck were not really acceptable, so I used filler primer and Bondo spot putty to try to clean up the shape a little. And the primer crackled up when sprayed over the Krylon Fusion for Plastic undercoat. Sigh.
I start each day thinking there's so little left I should be able to finish before sunset. And that's been going on for a week now. Depressing the difference between what I think I should be able to accomplish, and what I actually accomplish.
And in the above, my estimation of what will work is obviously also off. I mean; I expect not everything to work. That is a given. But my expectation is towards a certain percentage of things working the first time, and that percentage has not born out at all recently.
Really, those, these are both facets of a basic problem. See if I can put it simply. If I can do something, I undervalue it. Things I know I can do (or think I can do) I don't give myself a lot of credit for, or ask enough money for, or allow enough time for. If I can do them, then they are too simple, too trivial for much excitement.
I reserve that for the things I can't do yet. Which, of course, as soon as I successfully do one (even in the most limited fashion) become translated instantly to the space of "things I already do." Lather, rinse, repeat.
Well, at least the holocron is moving forward again. I have some hope the Academy will actually order a few before the month is out. Not that I have made much of a breakthrough in the designs I mean to put up at the RPF. There, I am still caught on basically that same dilemma; the shapes I know how to realize, I don't feel are worth doing. The shapes that interest me are the ones that remain an unsolved challenge. And so it goes.
Random thoughts about cross-over fiction
People have been writing cross-overs since, well, before writing. There's something about having your favorite fictional characters meet that has interested story tellers all the way back to the oral tradition.
Monday, May 11, 2015
Micro-Budget Show
I thought a detailed description of the setup for our micro-budget show might be of use to other technicians and designers who are having to make due on a bare minimum.
 The place is a 1914 church turned neighborhood community center. The previous Lighting Designer had left 1" pipes and heavy-duty extension cords already routed into a selection of hanging positions.
We borrowed (for a nominal fee) seven instruments; two Source-4's with 19' lenses (which I frosted to open up), two Source-4 PARs, two 6x9's (so weak I ended up using them for back light) and my personal 6" fresnel as a center spot.
It's no use detailing the specifics as every space is different. It is enough to say I organized my tiny inventory into two acting areas US and DS, using the longer-throw instruments for US of course, crossing the beams for the largest coverage and gelling in that old combination Rosco 02 "Bastard Amber" and Rosco 53 pale lavender.
 Same borrowing got us two "Elation" dimmer packs, here sitting on a chair and plugged into two different 15 amp breakers via more long extension cords to various outlets around the building.
That's part of the fun of doing shows in hotel lobbies and general-purpose rooms; identifying which of the rows of outlets are actually served by distinct breakers, so you don't end up plugging 50 amps of stuff into a single 15 amp service.
 Chairs also did for the speakers -- used for sound effects playback, the music for several dances, and the sound on several videos we played. There was a lot of space up on the mezzanine level behind the audience, and the sound wasn't bad at all.
These are my terribly useful Jolly 5A's; tiny but powerful bi-amped powered speakers with an extra-wide patterns.
 And of course one of the short plays also needed some projections. Because the booth is so high above the stage, I came up with this somewhat scary-looking contraption to hold the projector safely at the right angle.
You can also see the baby Behringer mixer that made it possible to plug in two different laptops for sound effects plus a third laptop downstairs during the movies...and not have to keep yanking live cables in and out of my poor speakers.
 And here's the final booth; my laptop has no ports free, what with DMX512 interface, video connector, audio connector, and MIDI keyboard.
The second laptop only played back sound effects on one of the plays (the most complicated one for sound, and the one that included the video playback).
 And here is all the controller information. Top is the QLC+ window, with a Virtual Light Board layout I created for the show.
Below is a shrunken view of the QLab window. QLab 1, actually. Which is playing back video (complete with video fade in and out), music/effects for the various plays, and...light cues.
Let me unpack that a little further! Okay, first off, a little trick with the projector was to create a solid black image in Gimp and assign that as the desktop image. That means that there is no distracting light or image when the video isn't playing -- even if QLab is shut down.
I always set up QLab for MIDI control. This means I can trigger cues whether QLab is focused or not. It is simple to do; connect any MIDI device, go into the Preferences screen, and capture your selected MIDI events. Remember, if you are using a velocity keyboard, you will have to go back and type in "any" for the velocity. Otherwise the cue will only fire once in every 128 attempts!
QLC+ is a little tricky. It has a simple light board mode, but you'd have to individually click on and move each channel. Not a good way to take a smooth lighting change. Fortunately you can also memorize channel settings into a "Scene," and assign the scene in various ways.
Such as the buttons above. Each of those is a basic useful look. The identical scene is also assigned to the faders directly below, allowing me to roll up groups of lights at a desired level.
QLC+ does recognize MIDI, so you can also assign MIDI events to trigger those buttons. This is the next level; my battered little Korg Nanokey is assigned to control several of these scene buttons, letting me go to several looks from the keyboard (and hit several different things, like back lights and center special, simultaneously). Something like a Korg NanoKontrol or the Behringer B-Control would allow you real-time fader control this way.
But the complicated show was, well, too complicated for buttons. So the next level. QLab can create MIDI events on command. Unfortunately to get QLC+ to see QLab I had to go, once again, through MidiPipe (a lovely freeware application that solves so many of your MIDI hookup needs). In this case, the Korg Nanokey sends a note event to QLab's Remote Control function, causing it to play the next cue. QLab spits out sound, video, or a MIDI note event -- the latter is sent via MidiPipe to the IAC bus, along with a hijacked copy of the MIDI output of the Korg.
According to the manual QLC+ supports cue lists. I couldn't get that to work in the time I had. So for the complicated show, every QLab cue toggles on the next scene button in line, and toggles OFF the scene button prior to it. Not smooth. Fortunately, the other shows were a lot simpler and I could run them from the scene buttons and faders.
Each day started at around noon as I transferred and cleaned up notes from two dozen short plays, then took all the expensive gear out of a locked closet and set up. And ended at midnight. Especially tonight, when I had to strike the whole show.
The borrowed gear is stacked all over my tiny apartment now, and tomorrow, I'll cart it back and finally be done with this show.

We borrowed (for a nominal fee) seven instruments; two Source-4's with 19' lenses (which I frosted to open up), two Source-4 PARs, two 6x9's (so weak I ended up using them for back light) and my personal 6" fresnel as a center spot.
It's no use detailing the specifics as every space is different. It is enough to say I organized my tiny inventory into two acting areas US and DS, using the longer-throw instruments for US of course, crossing the beams for the largest coverage and gelling in that old combination Rosco 02 "Bastard Amber" and Rosco 53 pale lavender.

That's part of the fun of doing shows in hotel lobbies and general-purpose rooms; identifying which of the rows of outlets are actually served by distinct breakers, so you don't end up plugging 50 amps of stuff into a single 15 amp service.

These are my terribly useful Jolly 5A's; tiny but powerful bi-amped powered speakers with an extra-wide patterns.

You can also see the baby Behringer mixer that made it possible to plug in two different laptops for sound effects plus a third laptop downstairs during the movies...and not have to keep yanking live cables in and out of my poor speakers.

The second laptop only played back sound effects on one of the plays (the most complicated one for sound, and the one that included the video playback).

Below is a shrunken view of the QLab window. QLab 1, actually. Which is playing back video (complete with video fade in and out), music/effects for the various plays, and...light cues.
Let me unpack that a little further! Okay, first off, a little trick with the projector was to create a solid black image in Gimp and assign that as the desktop image. That means that there is no distracting light or image when the video isn't playing -- even if QLab is shut down.
I always set up QLab for MIDI control. This means I can trigger cues whether QLab is focused or not. It is simple to do; connect any MIDI device, go into the Preferences screen, and capture your selected MIDI events. Remember, if you are using a velocity keyboard, you will have to go back and type in "any" for the velocity. Otherwise the cue will only fire once in every 128 attempts!
QLC+ is a little tricky. It has a simple light board mode, but you'd have to individually click on and move each channel. Not a good way to take a smooth lighting change. Fortunately you can also memorize channel settings into a "Scene," and assign the scene in various ways.
Such as the buttons above. Each of those is a basic useful look. The identical scene is also assigned to the faders directly below, allowing me to roll up groups of lights at a desired level.
QLC+ does recognize MIDI, so you can also assign MIDI events to trigger those buttons. This is the next level; my battered little Korg Nanokey is assigned to control several of these scene buttons, letting me go to several looks from the keyboard (and hit several different things, like back lights and center special, simultaneously). Something like a Korg NanoKontrol or the Behringer B-Control would allow you real-time fader control this way.
But the complicated show was, well, too complicated for buttons. So the next level. QLab can create MIDI events on command. Unfortunately to get QLC+ to see QLab I had to go, once again, through MidiPipe (a lovely freeware application that solves so many of your MIDI hookup needs). In this case, the Korg Nanokey sends a note event to QLab's Remote Control function, causing it to play the next cue. QLab spits out sound, video, or a MIDI note event -- the latter is sent via MidiPipe to the IAC bus, along with a hijacked copy of the MIDI output of the Korg.
According to the manual QLC+ supports cue lists. I couldn't get that to work in the time I had. So for the complicated show, every QLab cue toggles on the next scene button in line, and toggles OFF the scene button prior to it. Not smooth. Fortunately, the other shows were a lot simpler and I could run them from the scene buttons and faders.
Each day started at around noon as I transferred and cleaned up notes from two dozen short plays, then took all the expensive gear out of a locked closet and set up. And ended at midnight. Especially tonight, when I had to strike the whole show.
The borrowed gear is stacked all over my tiny apartment now, and tomorrow, I'll cart it back and finally be done with this show.
Saturday, May 9, 2015
Pictures soon...
Atrociously slow work on the Space Helmet. I'm worried -- the deadline on the Raygun is getting far too close for comfort, and I really want some Holocrons in the RPF sales section. I need the money!
Took a plaster cast off the fitted eye lenses. Something reacted to the clear acrylic, though. Might have been the mold release, or the cast itself. They came out yellowed and didn't cure properly. The mold, of course, did not survive demoulding, but the casts are good enough (after a test fit) to make another mold off them. Unfortunately the last of my Oomoo-30 set up in the jar, leaving me with nothing but a bit of Rebound-25 to try to take a new cast.
I did use a little of the excess casting resin to coat and reinforce the PETG pull of the mask, though, plus put some divots in a chunk of clay and cast some possible rivet heads. Once I get the side pieces cut out the rest should go fast. Sigh. Been hard enough getting laser time together, I'm tempted to grab a sheet of heavy styrene and hand-cut them from that.
On the Holocron side, Novus #2 appears to restore the clear acrylic panels after flaws (glue spots and melted overflow from the laser cutting) have been sanded down. It takes a lot of it and a fair amount of work, though. Power buffing did not work; even at low speed my Dremel melted right into the plastic and made nasty grooves. It is possible a large buffing wheel would do better, but I'd have to find a clean one that hadn't been used to buff freshly-welded metal (which seems to rule out using the one at TechShop!)
I'm still not entirely happy with the Temple design. Worse, I haven't been able to come up with a new design I really like. So I'm still pretty far away from having samples for any new Holocrons.
On the Raygun, the surface-mount driver I was waiting on showed up and I've experimented briefly with it. Still can't tell if it is going to work. The problem here is the body of the gun is way too large to permit iterative design. I need to figure out everything in the 3d model and cut exactly that, since the CNC machining step is going to take upwards of eight hours of solid machine time.
All I can say right now on the driver is, from experiments putting it inside pots, ukulele, unfinished holocrons, and the like, it will at least make a noise. It may turn out to be necessary to not just mill some speaker slots in the gun, but re-cut the speaker mounting after machining the gun.
I'm also procrastinating on the trigger design. I wish I had just picked a button I knew would be a common stock item, so I could pop that into the CAD. Well, Fusion 360 does allow importing of parts from various sources, but in this case I'd feel better if I could hold the part in my hands and feel how the trigger motion works. Maybe I need to add making a mock-up to my growing list of laser needs?
At least I think I've solved the repro issue. Assuming I am making a limited number of ray guns serially, I will 3d-print them myself over at TechShop. The lower quality of the prints there is fine because the outer surface is all smooth curves anyhow -- no real problem in just sanding the heck out of it.
Wednesday, May 6, 2015
Lighting Lamps
This has been a challenging and sobering time for lighting.
I'm about to go into tech on a micro-budget show, and I've been up for four hours wrestling with drivers before I finally got the dimmer pack to talk to my laptop. Not fun. I did a lot of calling around and pulling favors and so forth, and I've managed to rent a pair of Elation 4x dimmer packs and several lighting instruments to go with them. The sole lighting equipment the company owns is an Enttec DMX512 interface.
Enttec is a good company. A lot of companies would chose to make their hardware proprietary and closed-doc and force you to use only their software. Not only does this company allow third parties to use their hardware, they also understand and accept that companies move on and they are making sure to make the hardware documented enough so it can still be used even when that line has been discontinued.
One wishes Apple would act that way sometimes. Instead of pretending that no other Mac existed prior to the one they are selling now (so much does Apple have this attitude, they make it difficult to even figure out if the model you have is actually different from the model they sell...little details like model number are made purposely obscure.)
Anyhow. There was a very nice project known as QLC, which forked and stuck around a little at SourceForge as QLC+. It is a Max/MSP flavored free-form open source lighting controller.
Apple's craziness with how they support FTDI drivers nearly did me in, but finally through either doing a manual uninstall (typing sudo stuff down at the UNIX core -- always a scary business) or running a nice little helper ap created by one of the Enttec programmers I finally got DMX flowing through the box.
What's also nice is the forensics are clear. Not just what failed, but how it passed the pre-test. Well before the dimmers arrived, I plugged in the interface to see if the software would see it. The software recognized it was connected to hardware and displayed the correct hardware name. I didn't see an issue until I (fortunately!) took the dimmer home with me last night in order to confirm it responded to the upstream hardware. Good thing I forgot my USB cable, eh? Otherwise I would have been at the theater all night struggling with it, instead of home where I have wifi and could look for help.
So what happened? Simple. Hardware name is in the basic USB stack. And the lighting software was only using that as a hardware check (it wasn't actually looking for through data.) The DMX functionality, however, has to pass through the FTDI drivers. And that's why the interface recognized and displayed okay but there was no DMX passing through it.
This is going to be a tough show on my computer. I'll be running video through QLab (or possibly just VLC), sound effects through QLab (likely triggered via MIDI so I don't have to lose focus from the lighting console), and of course lighting. Which meant I also had to juggle video cables, finally finding a mini-DVI to VGA adaptor (for far too much money) after being confused by both the existing DVI connector I had and the mini Firewire connectors I'd also purchased recently. Stupid Apple and their ever-changing connector types!
And what is the lighting? Turns out the lights that came with the rental package are a pair of Source-4's -- in 19 degrees. Oops. I think I can still use them as a long raking side light. Then there's two Source-4 PARS: thankfully with all the lenses still in the box, so with WFLs in them I should be able to get a decent backlight. That leaves two generic 6x9's I picked up at another place (and have to put Edison plugs on, still). And my own little 6" fresnel. With no better choices, those will have to do for all of my front light.
It is a very strangely-shaped space, with pillars in the way, and it is going to be pretty ugly no matter what I do. I do wish I'd managed to score the smart light I was asking for (a Studio Spot 250). Unfortunately, that fell afoul of politics. The theater that owns it would be happy to loan it to us, but the theater that currently has it upstairs and unused in their loft doesn't want to let it leave the building.
I did manage to hoosier another company around to loaning a scroller or two, but backed off when I realized I didn't have any five-pin DMX to spare. I also tried to talk them into letting me have one of their broken ones so I could see if I could repair it. I'll try that negotiation again another time.
One of the eye-openers in QLC+ is seeing just how many automated fixtures, color changers, LEDs, and so forth there are, and how much more evolved the software control of these has gotten since the old 2-scene preset days. But this was already underlined for me; I worked two lighting calls over the weekend, and both spaces had ETC Ions and wireless RFUs (both running on what looked to be Apple products). Even the RFU was confusing to me; it presented lights not just in dimmers and channels but in groups as well, and multiple universes were visible in a way that makes it obvious that multiple universes are expected as part of a standard plot.
I got to talking to one of the techs at the second house. Since I last designed sound there, they upgraded the sound board -- and added full digital snakes on Cat-5 to backstage and the pit. Plus finally installed the new speakers they'd been holding on to when my company was in there. I didn't see a hot controller for them, not even a Galileo (or, pasta forbid, a Drive Rack). But according to the tech they had gone for a full Dante system so maybe that was the controller. It looks like a hot system now, and I wish I was designing shows on it now. With, however, the budget to get some decent microphones!
(This was the company where I was babying a grab-bag of aging body mics, down to such horrible things as old Telex's -- built like a tank with a steel frame, and using a 9V battery -- and even a trio of Sampsons. Oddly enough, the least trustworthy of all these mics was the more recent and expensive Shure SLX. Shure? Unsure! And I'm not talking the T4f pulling out; we had solutions for that. I'm talking multiple RF issues.)
Monday, May 4, 2015
Distressingly Analog
Another TechShop member (who was in the middle of a 3d print), asked me how I liked the vacuum-forming machine. I told him "Distressingly analog." I think he got what I meant.
For all that the high-tech fabrication methods are replete with numbers; for all that they come (often) out of computer models, go through digital positioning; and for all that the knob-setting is replete with numerics and other quantization, the final results still depend too much on the less quantifiable.
Even at the laser cutter; although the beam position may be as accurate as 10 micrometers, and the beam around .001 inches wide, the width of the kerf will depend on not just the laser settings but how good the focus is, how flat the table is that day, even the color of the plastic.
I've been lasering out holocron pieces with an aim to get a good snap fit. But the necessary precision for this is roughly the same as the variation in thickness between different sheets of material from the same manufacturer, and variances in how wide the laser kerf is. I can adjust the latter a little to take up errors in the former, but that still means trial and error. As digital as the process seems, it needs that analog touch, that craftperson's touch, to get the desired results.
This was my first start-to-finish use of the vacuum former as part of the build of a prop. This is the oxygen mask for the pulp "space" helmet. And as usual, half the techniques were chosen because I wanted to learn more about those techniques. And half the remaining decisions were forced by time and availability of materials (I'm trying not to spend much on this particular prop!)
 First step was a duct-tape dummy. This is a well-known budget technique for getting a rough body cast. As it happens, not the best technique for a partial cast like this, or a chest plate; the mold tends to flatten out considerably once off the body.
I reinforced the first try with plaster bandages, and when they started to dry out and come apart, paper towels dipped in white glue. It was heavy and didn't look right and I abandoned it half way through the modeling process.
 The next one, I poured plaster in and carefully propped it up to keep it from flattening out too much. This was closer, but what was more useful, is I was able to pry the plaster out and thus work on the actual inner surface instead of the less accurate top surface of the duct tape.
 There's a lot of discussion about what materials are strong and temperature stable enough to make a vacuum former "buck." Consensus is that there is little competition for MDF for the small props builder. Hydrocal rates a good second -- in the form of a positive mold taken off a garbage mold of the original cast.
The selection of air-hardening clay at my favorite store was poor, so I tried Sculpey for this project. It will never replace FIMO in my heart.
 Unlike other clays, Sculpey seems resistant to smoothing. So I baked it then used sanding paper and spot putty to get the final surface.
Which was an adventure on its own. I used a toaster oven rescued off the street. Those things do not have precise temperature control, and my first cook was a little cold. My second cook burned the material, and because the additions expanded slightly, it cracked the surface. A little Bondo repaired that, but that made sanding an even more onerous task. I'll use clay next time!
 Before finishing off the sculpt I roughed in what the other pieces were going to look like. The side plates will be laser-cut acrylic, but are simulated here with sheet styrene.
Oh, yes -- and after taking this shot, I re-thought how the inlet should work, and built up a different shape on the finished sculpt.
 And here is the last of the three pulls I got in .040" PETG. I mentioned above there were concerns about certain materials holding up to forming? Well, I'd managed to forget since taking the SBU for the machine that the heater hood was not controlled from the front panel. I left the heater running, bubbled the PETG and cooked the buck hot enough to soften the Sculpey.
But I was able to repair the buck with sandpaper and some quick spot putty, and it held up for the pull to the left without collapsing. So it was a good mistake; now I know more about the limits of the material.
 And I like the extra dents. Of course, if I had sculpted them, they would look even better, but oh well. This is rough-trimmed, primed with Krylon Fusion for Plastic, and I'm testing the rubber edging that will go on after it is glued and painted.
Today I picked up webbing and d-rings. Not quite right; I'd like some nice hardware and leather straps, but the only place for those seems to be Tandy, and I'm eager to get this thing out the door. And keep the expenses down on it, too.
In the meanwhile I made a plaster mold from the bits of carved foam and apoxie sculpt I carefully pressed into the eye slits. The mold looks horrible and I'll be lucky to have one good pull from it. I'll be pouring clear acrylic into it tonight.
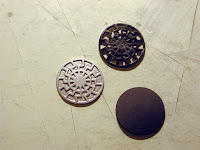
I have several different approached to the insignia on the painting table. The only other major bit for this prop, then, is to create substitutes for the vintage oxygen canisters (which are chemical oxygen generators that we almost certainly do not want to open up). I've been measuring soup and oatmeal cans but it looks like I'll have to fabricate these from scratch as well. There might even be a little vacuum forming for the distinctive top (or I might do as I did for the insignia; heat it up with hot air gun and press it over a form with my fingers).
I need this project to complete and clear the decks. My holocron just got a mention at Adafruit, there's interest at the RPF and the Jedi Master is getting closer to purchasing a half dozen or more for his students. And the "Tiki" raygun needs to start machining before the end of the month!
For all that the high-tech fabrication methods are replete with numbers; for all that they come (often) out of computer models, go through digital positioning; and for all that the knob-setting is replete with numerics and other quantization, the final results still depend too much on the less quantifiable.
Even at the laser cutter; although the beam position may be as accurate as 10 micrometers, and the beam around .001 inches wide, the width of the kerf will depend on not just the laser settings but how good the focus is, how flat the table is that day, even the color of the plastic.
I've been lasering out holocron pieces with an aim to get a good snap fit. But the necessary precision for this is roughly the same as the variation in thickness between different sheets of material from the same manufacturer, and variances in how wide the laser kerf is. I can adjust the latter a little to take up errors in the former, but that still means trial and error. As digital as the process seems, it needs that analog touch, that craftperson's touch, to get the desired results.
This was my first start-to-finish use of the vacuum former as part of the build of a prop. This is the oxygen mask for the pulp "space" helmet. And as usual, half the techniques were chosen because I wanted to learn more about those techniques. And half the remaining decisions were forced by time and availability of materials (I'm trying not to spend much on this particular prop!)

I reinforced the first try with plaster bandages, and when they started to dry out and come apart, paper towels dipped in white glue. It was heavy and didn't look right and I abandoned it half way through the modeling process.


The selection of air-hardening clay at my favorite store was poor, so I tried Sculpey for this project. It will never replace FIMO in my heart.

Which was an adventure on its own. I used a toaster oven rescued off the street. Those things do not have precise temperature control, and my first cook was a little cold. My second cook burned the material, and because the additions expanded slightly, it cracked the surface. A little Bondo repaired that, but that made sanding an even more onerous task. I'll use clay next time!

Oh, yes -- and after taking this shot, I re-thought how the inlet should work, and built up a different shape on the finished sculpt.

But I was able to repair the buck with sandpaper and some quick spot putty, and it held up for the pull to the left without collapsing. So it was a good mistake; now I know more about the limits of the material.

Today I picked up webbing and d-rings. Not quite right; I'd like some nice hardware and leather straps, but the only place for those seems to be Tandy, and I'm eager to get this thing out the door. And keep the expenses down on it, too.
In the meanwhile I made a plaster mold from the bits of carved foam and apoxie sculpt I carefully pressed into the eye slits. The mold looks horrible and I'll be lucky to have one good pull from it. I'll be pouring clear acrylic into it tonight.
I have several different approached to the insignia on the painting table. The only other major bit for this prop, then, is to create substitutes for the vintage oxygen canisters (which are chemical oxygen generators that we almost certainly do not want to open up). I've been measuring soup and oatmeal cans but it looks like I'll have to fabricate these from scratch as well. There might even be a little vacuum forming for the distinctive top (or I might do as I did for the insignia; heat it up with hot air gun and press it over a form with my fingers).
I need this project to complete and clear the decks. My holocron just got a mention at Adafruit, there's interest at the RPF and the Jedi Master is getting closer to purchasing a half dozen or more for his students. And the "Tiki" raygun needs to start machining before the end of the month!
Dear Google...
Another round up of quick answers to search phrases that ended up on this blog:
compressor setting for stage theater
I like a light touch on the body mics, especially for good performers. You want the natural dynamics of the performance to come through. Which means, unfortunately, there's no decent substitute for a skilled hand riding the faders. Compressor settings won't help you with the actors who speak most of their dialog softly but scream one line, and they won't get you through the kill zone of romantic duets (in which each person is singing far too close to the other's mic, leading to huge excursions in sound level and a horrible flanging effect as the two signals combine out of phase).
My default starter setting for the musical is 1.7:1 For children's theater, I start at 2:1 or perhaps 2.5:1 For hand-helds, especially when used by choreographers, I default to 4:1 with a huge bass roll-off and an extremely fast attack (choreographers tend to eat the mic as they start screaming at the dancers).
On the LS9, my default attack is 50 and release 200.
how to make a mic belt
For some reason everyone lands on the first post I wrote, not the more detailed one with better pictures.
kids should wear mics in plays
I don't think so. Unfortunately, there seems to be no way around it in the current clime. People want to put extremely young actors without vocal training on stage, and playwrights are making musicals that have heavy underscores and choppy, "pop" phraseology. And the audiences want to hear everything. So we mic them. Which is additional time, expense, and discomfort to the young actors involved, and furthermore tends to become thought of as a panacea; as if once you get those mics on, all those elements of poor arrangement and writing and lack of vocal training magically don't matter any more. The discussion changes from "Is there some way we can slow this song down?" to "Why can't we make the mic louder?"
qlab powerbook g4
I'm about to do it again. I've run QLab (version 1) on as low as a Powerbook G3; my old Wallstreet powerbooks, in fact, did several shows. In my experience, the white G3 Powerbook is about the lower limit for decent performance. A good G4 -- titanium or aluminium Powerbook -- will run most shows, up to 6 layers of simultaneous stereophonic sound.
Higher versions of QLab, I can't say, but I believe the limiting factor is going to be the minimum OS version that it will run under. I think there needs to be either continued availability of QLab 1 for applications where it is fully appropriate and the larger, heavier, more expensive versions are not, or someone needs to write a new one.
sound design for stage
Yes, there's a few entries here. Some posts are collected on their own link page.
create body handles poser
There's more detail in the "How to rig a Poser Prop" set of posts, but here it goes in simple form; Children Affect Their Parents. If you add a child to a body part, by manipulating that child you will manipulate everything within the influence zone of the corresponding parent part.
For me the simplest way to do it is not in the Setup Room or even within Poser itself, but in text. Within the CR2, if you add just two short entries, Poser will figure out and add all the rest of the part the next time you load the figure. So make two short edits in text, load the figure, adjust the influence zones, and save the new figure.
Here's where to look; right at the top, where the geometry is specified for each actor;
actor hip:3
{
storageOffset 0 0 0
geomHandlerGeom 13 hip
}
And at the bottom of the cr2, (just above the materials) where the hierarchy is specified:
addChild abdomen:3
hip:3
adafruit perma-proto mint tin
Yes indeed. A wonderful little board -- the entire perma-proto set is a work of genius -- and not only that, Adafruit will sell you the tin, too!
Subscribe to:
Posts (Atom)