One week into the new job. Full-time work, but currently through a temp agency; they are all talking about keeping me for as long as I want to stay but until I see a regular employment contract I can't trust that I'll still have work a week from now.
And of course I'm right now in that wonderful tight spot you get when you've started a job but the first check hasn't arrived yet...and unfortunately, all those expenses of commute and meals away from home and so forth aren't going to wait. I'm not down to the wire, but I am low enough to where I can't afford to smog and register my car before the registration deadline arrives.
I also have a show I previously accepted that is going to be a pain to fit around my new work schedule.
So. In the long term (if there is a long term) this should help my finances. In the short term; if I hadn't taken the job, I'd right now have the equivalent of 3-4 weeks wages in my pocket. And enough time to do some much-needed car repairs before Dreamgirls goes into tech.
And more time to complete current prop orders. I went into the shop yesterday and am going again today, but I'm still a little tired after that first week (hot days, physical labor, and overtime hours as well). I'm hoping that once the hot weather cools down a little and we catch up a little with the backlog at work so the days aren't quite as crazy, that 6 am - 2:30 pm schedule they have me on will permit making a run out to TechShop in the late afternoons, and thus continuing both the prop work and the utility of that membership.
Which is also why I'm going out today to do more lathing, despite a desire to stay in and put my feet up for one day at least.
Sunday, August 30, 2015
Tuesday, August 25, 2015
Amazon Puppies, Wild Rovers, and Paleotech.
Was reading comments on Charles Stross' blog in re the basic failure of the Puppies (Sad and Rabid) to achieve any more at the Hugos other than general obstructionism. The point was raised that the puppies might have a valid complaint if, indeed, story-telling was being sacrificed on the altar of proselytizing on a feminist/socialist/egalitarian/whatever agenda.
I'm going to avoid the easy snark that the only books I've had to put down for heavy-handed messages getting in the way of the story have been libertarian. And yet, there is at least one libertarian, climate change denier, and general crazy who still tells a heck of a story while beating on those drums (Hogan) and I still enjoy his books.
Instead, the direction I want to explore is why I am not driven away by, why in fact I (an educated, straight, white male) am more attracted to books that go beyond the standard model of heroic white male military man/engineer/two-fisted scientist having rousing adventures and a little between-the-chapter-breaks hetero sex.
It isn't because those can't be good reads. It is that I've already read it. I've done the standard model. And this is why I mention Amazon above; I can see the benefit of being able to find something exactly like that which I already know I enjoy. But I don't require that it all be like that. I don't even require that the majority be like that.
This is where I so easily part company with the fears of the Gamer Gaters and Puppies alone. Medal of Honor games are still being put out every year. Baen Books is still publishing standard-model military sci-fi. These show no signs of going away, and there's enough to slake the thirst of anyone who isn't retired and helpless to find anything else to do with the endless hours of their day.
When I go to a deli, I like to order the named sandwiches. I already know what a sandwich made "my" way tastes like. I've made it before. I want to see what someone else can dream up. And if I like it, then even if I am hungry and in a hurry and just want something I trust to eat, the list of foods I already know and trust will be a little longer.
So I like reading a story with different aims. Different kinds of characters. And even if it appears to be the standard model, when you open the field up to people who have proven capable of writing about other experiences, they are also going to discover new insights and new angles in the standard model.
So, no, I don't think you lose the "Just a plain adventure story with rocketships and dinosaurs and white male heroes with rayguns clenched in their tan burly fists" if you allow other stuff to get written and read and, yes, win some Hugo awards. You get new tools and tricks that filter across the field, so even the most reactionary of the old guard (assuming there is one!) can write the kind of story the puppies were asking for...and make it even better at the things they want it to do!
Meanwhile I've got a new job. Back on full time for the first time since...well, it's a couple decades back. Too early to say if I'll be working full time long enough to make changes in how I do things. If I do less props, give up my TechShop membership, or whatever. Waaay too early to say any of this, because I have yet to complete a full week. The most consecutive days I've worked so far is...two.
Today was more stripping old carpet off dollies and putting fresh carpet on them. Plus getting into a long-range modification of the dollies they've been putting off for months due to lack of labor/time to do it. Which meant a big chunk of the day was in the very cool little "wood shop." Which has the basic tools for wood working, but is really more of a machine shop. Including mill and lathe, pretty much the same series as the ones I've been using at TechShop.
All is not high tech in my life, though. I ran out of ground coffee one morning and did a cup of slip-joint; used a pair of pliers to crush coffee beans one by one. It was laborious, but I got my morning cup out of it. The most paleo-tech exercise was folding boxes for recycling; I guess I've been reading enough about neolithic culture and technology I finally realized that the gravel in the recycling area has pieces with enough of a flaked edge to be used to slash tape. And the last low-tech improvisation was matching the old elastic of a pair of vintage goggles by tea-dying (actually, I brewed up black coffee, threw in an equal amount of roibos tea, and simmered the material in that for an hour to reach a half-decent reddish tan).
Saturday, August 22, 2015
Tomb Raider on "hard"
I decided I was going to stay away from the 2013 game until I made my Mac upgrade; with luck I'd have forgotten enough of the details to make it fresh again, plus I was going to play it on the "hard" setting. And oh yes...turn up the graphics a bit.
Well, the first and last didn't work so well. Oddly enough, except for some glitches, running the PC version in Wine appears to get as good a framerate, maybe even better. Well...part of what I'm seeing is possibly an intentional wandering reticule imposed by the "hard" version.
In any case, "hard" actually corrects some of the ridiculousness of the game and perhaps even a bit of the strong ludonarrative disconnect. Lara is in a rather more realistic amount of danger. You can get killed with one or two swipes of a blade, and a machine gun will kill you in a fraction of a second if you let yourself get caught out in the open.
Regenerative health is slowed way down, to the point that injuries you take in a battle essentially are your problem in that battle. And in the close confines of the game levels, with smart, pursuit-oriented AI, you really have to work to break away enough to get any recovery. All in all, it feels a lot more like catching your breath for a moment; effectively, you are still hurt and going to die if they hit you again, and you can't just hide behind a rock and wait until your hit points are back to full.
Meanwhile the enemy regenerates, and as fast (or faster!) than you do. They can take a lot more hits than you can, and if you don't concentrate on putting them down for good they will recover and come back after you in very short order.
So cover becomes a lot more necessary. Furthermore, "hard" introduces a flinch status effect; if you get hit at all, you reel and drop target. So no more standing out in the open taking calm headshots. You really have to use cover, and pop your head up for brief moments only.
Oddly enough, though, I was able to play to the end getting killed at about the same rate I was used to. Partly because I'd been playing through just the combat sessions most recently and trying stupider and stupider things (like using only the pistol, or by trying to get through the big fights on almost entirely melee). I was able to get through the set pieces by making my decision cycle just a little faster (aiming quicker, finding cover quicker), and increasing my situational awareness (really staying conscious of incoming dynamite, enemies with ranged attack, and also keeping an eye out for environmental options.)
Oh, yeah. The flaming barrels also do less damage to the enemy, so you can't rely on them as much. Or, rather, you have to use them as a stun effect and follow up.
Starting a second run, I was feeling comfortable enough with "hard" setting to indulge in some melee again. This was tougher, as the enemy ranged fire is a lot less distracted by your running around, and the melee AI is a lot smarter about reacting to an early dodge. I got killed by ONE samurai half a dozen times before I finally figured out how to demonstrate to him that ancient steel katana against aluminium alloy ice axe wasn't as one-sided as he thought it was.
Discomfitingly (but quite realistically) the game believes the proper technique in many of the larger set pieces is to select the automatic rifle and hose. In the final showdown against the Oni (about a hundred samurai) it works just fine to re-enact the Battle of Nagashino; only instead of putting lacquer armor against volleys of arquebus, you are relying on the devastating firepower of a modern assault rifle with underslung grenade launcher.
You can actually get through a lot of the battles with not particularly much trouble by hosing with the automatic rifle, using the plentiful ammo the game has made available for that one weapon. It is a lot harder on "hard" to cherry-tap with just pistol or bow, as both do significantly less damage with each shot in this mode, and the game still doesn't see fit to distribute their ammo quite as copiously. I actually had to go through my old routine of allowing melee opponents to close so I could whack them with the ice axe then go through their pockets for reloads for my preferred weapon!
Oh, and as is the wont for cover-based games, the cover mechanism itself gets you killed a lot. Get too close to a crate and Lara will hunker down despite being in a pitched melee battle at the moment, and despite being on the side facing the machine gun at the time. And as you try to maneuver her around to the side which actually provides some protection, the seek-cover AI makes her cling to the damned thing instead of moving nimbly, as if the damned thing was covered in rubber cement.
On the good side for the game, the AI is smart, and will toss grenades in after you as well as sending flankers. It is pretty much impossible to camp and snipe. You have to keep moving. And that too is realistic.
So, yeah. It feels a lot less like you are invincible, and even bows and arrows a lot more credible a threat. Automatic weapons are properly terrifying; you have to prioritize those and give them no chance to hit you at all. Because even a couple rounds or a fraction of a second caught in the open will kill you.
And that makes Lara's cutscene reactions a little more plausible (although why, particularly after the game's little Japanese history lesson, it insists on having her arm herself with her weakest weapon in every cutscene instead of just pulling out the automatic rifle...)
Of course, it would still be a better game it Lara had options other than fight her way through everything, if the big set-pieces weren't so egregiously insistent on being arena-style combat against a massed and alerted enemy (which only emphasize how appallingly silly it is that Lara survives them), and if tombs and puzzles weren't given such a grudging and even patronizing treatment (a very "Oh, very well, if you have to have these things...")
I've said it before. She's a climber, she's smart, she's an archaeologist. And she has the usual "hero" angle of winning through because they are desperate enough to try something spectacularly foolish and dangerous. But none of this is utilized by the game. She doesn't get the chance to do a risky climb over their heads, or find something cool and exploitable in her environment, or read an ancient inscription to find a secret way. Instead she fights face-to-face (even hand to hand) and wins because the player's mouse hand is just a little faster at lining up the reticule than the AI is.
That doesn't support the character or the underlying story, and it doesn't feel real either. And at the end of the day, for every bit of accomplishment you feel, there is an accompanying bit of frustration in how the game is manipulating you and/or taking the play out of your hands entirely.
At first blush the experience is cinematic, but the more you play, the more conscious you are of just how much work went into coldly and cruelly patching every possible hole to ensure that no player, no matter how good, could possibly take the tightly scripted vehicle off the rails for even a second.
And once you realize that, you can't help but squarely blame the creators for completely failing to realize the story they are trying to present is poorly thought out to the point of being schizoid. That their meticulously crafted combat sections have damned-all to do with the story of the young archaeologist trapped on this demon-haunted island.
Friday, August 21, 2015
New Instructable
I put up an Instructable on the raygun, mostly to collect the basics of the build in one place. And it got an editor's pick.
I'm of two minds about that. My first reaction is the world is being unfair in my favor. I look at the other work people are doing, and I look at all my mistakes and my sloppy, unhelpful Instructables, and I'd say pick someone else to honor.
But then I did a search for other people doing AVR projects. And a lot of good work, but it is odd that so far every single LED fader project I've seen continues to use power darlingtons as switches (well, sometimes MOSFETs), and usually resistors as current limiters, and the clock-cycle hog of Arduino's digitalWrite() function when doing software PWM (instead of direct writes to the port). And nary a one of them includes a gamma function.
Okay. I've seen a better gamma; I'm using a crude, hand-drawn look-up table. I've seen someone who calculated it properly -- and if running on a fast enough processor, you can do the calculation on the fly. My current gamma table is also hand-optimized for "Piranha" RGB's and doesn't look right on the 1- watt-and-up "cree"s.
Also, I'm probably the only person crazy enough to calculated fractional changes using a long INT, allowing a single gradual fade from one specific color mix to another. (Which makes the key line a rather daunting "if (gamma[BYTE(long INT)] == PWM_clock)) ...")
Wednesday, August 19, 2015
Buyer's remorse
I haven't even started the new job and I'm already having loads of it.
To make myself available I turned down a show I wanted to do (which was also going to pay twice what this new company is offering!) This week has been entirely waiting around for them to finish paperwork and decide when I will start. Rather like being on-call for Jury Duty; I can't make other obligations because I can't tell from day to day when they might actually call me in.
So they finally are having me come in on Thursday. And now...almost two weeks later...it's all about their schedule and their needs. You Will Be Here, period. Of course that's when UPS is going to show up with the new metal (you guys couldn't wait even a half-day longer?) And I could have put three days in -- heck, I could have put the week in at the show I turned down and not hurt this new company any. Oh and right...I actually do have Jury Duty, early next week.
Oh, and just to add insult, the one working lathe at TechShop is booked up all day today, so I can't run in to get a little more work done on those M40 orders. Grr. I feel all sorts of energy today. Don't want to waste it sitting at the computer drafting in Fusion 360.
So, best case (for the job), they like me, I stay on for months. That's still a measly $13/hr (I was getting $18 to $25 for some of my theater work). And they don't seem at all flexible about giving time to work shows, which means all the contacts I've built up over the past year are going to waste; at least three companies that want me back to design something next season (not counting the painting job...)
And my new TechShop membership also less useful -- less time to devote to it, and more of the blocks I'll have available are evening when the commute is longer and the access to the machines is significantly less. The only possible positive angle is they were talking up a 6 AM start time, which would give me a little more time in the early eve for other things.
Oh, yeah. And losing most of this week, means instead of getting paid (for painting) on the 28th, I'll get something like a quarter as much some time in September. Which is shaving it really close for paying my rent, and pretty much is going to make it impossible to renew my auto registration before I have to pay a fine on it.
So so far, all I've gotten out of this new job is a nice tour of a fancy shop floor. The rest of it has been frustration, and it is going to get worse...slogging at long hours without quite enough money for lunch and no assurance that it won't end as suddenly as they want to start it.
Seriously. I should have stayed with Aida.
Sunday, August 16, 2015
Mavericks
No, still not this guy.

Nor is it this:

But, in fact, a long-delayed OS upgrade. And no...I don't really want to go to Yosemite yet. There's no clear evidence that it breaks any of my production aps, but there's also no good evidence that it doesn't.
Mavericks, though. So far...everything works! I'd heard of some minor audio issues so I started by testing Audacity, QLab, and Vox. All worked normally. Tried Scrivener. Tried Steam, Wine, and Steam Wine, and played a little Dead Space (a PC game). Then played Tomb Raider 2013 on the Mac side -- and it looked nicer than it had on the PC emulator (better color balance, basically).
And Fusion 360. Which was the main reason. Autodesk had pushed through a basically mandatory upgrade to Fusion, and the upgrade wouldn't run on my previous OS. And since the upgrade either stalled or required me to quit, the only recourse I had to finish the Raygun project was to take the computer off line every time I needed Fusion. But with it off line, it could not import, nor could it open the "cloud stored" (really, I have no idea where they are stored) other projects I wanted to work on. Like this:

I stil have yet to test Eagle, Cura, Arduino, Reaper...

Nor is it this:

Mavericks, though. So far...everything works! I'd heard of some minor audio issues so I started by testing Audacity, QLab, and Vox. All worked normally. Tried Scrivener. Tried Steam, Wine, and Steam Wine, and played a little Dead Space (a PC game). Then played Tomb Raider 2013 on the Mac side -- and it looked nicer than it had on the PC emulator (better color balance, basically).
And Fusion 360. Which was the main reason. Autodesk had pushed through a basically mandatory upgrade to Fusion, and the upgrade wouldn't run on my previous OS. And since the upgrade either stalled or required me to quit, the only recourse I had to finish the Raygun project was to take the computer off line every time I needed Fusion. But with it off line, it could not import, nor could it open the "cloud stored" (really, I have no idea where they are stored) other projects I wanted to work on. Like this:

I stil have yet to test Eagle, Cura, Arduino, Reaper...
Saturday, August 15, 2015
Change, my dear. And from the looks of it, not a moment too soon
I've almost never gotten a job I applied for. But I've gotten a lot of work that has called me.
A company just dusted off an old resume I turned in a couple months back and called me up about a completely different position. I interviewed yesterday and they want me in as soon as possible. They have a couple people out and desperately need someone right now, but the long term prospects are completely up in the air. If they like me, they'll try to keep me longer.
Which means there's a good chance I'm looking at full-time work for an indeterminate time.
I could fault the timing. I was hyped about painting "Aida" (the chance to paint a bunch of hieroglyphs was pretty cool), I accepted another order of grenades and the props work seems to be picking up, I'm already on for a sound design in about a month...and oh yeah, I already paid for a year's membership at TechShop.
(In fact, following the last push on the raygun, I was rather looking forward to a couple weeks out in the sun doing summer stock, then take a few weeks doing prop work before 'Dreamgirls" spools up).
So this may blow over. It may be that I get a week or two in (at a surprisingly low hourly, too) then it's back to freelancing for a while.
Or I may find myself on salary in a more-or-less regular job...slowly paying off my debt and repairing my infrastructure, but having less time for prop-making and theater work.
Friday, August 14, 2015
Got into his APC and rode off in all directions
Spent yesterday on the couch recovering from the last push on the raygun.
And now I've turned up the gas on half-a-dozen older pots. Confirmed new orders for Aliens M40's, working up a new aluminium order, and ordered another box of red caps. Still trying to figure out a way to make custom caps...best I can figure right now is injection molding, but vacuum-forming has potential.
Started communication about PR rounds as well. Sent an IM or two, got a bag of bullets coming. And if that wasn't enough USCM fun, I'm moving closer to designing up some of the alternate grenade loads.
Plus I'm borrowing a luger today and messaged the person interested in a Commando Cody flash hider. I haven't been able to properly dimension the CAD for that, but eyeball estimate says that a 2" billet of aluminium will work and that's affordable. And lathe-able.
Unfortunately, I haven't gotten confirmation on Aida -- I don't know if I'm going to be painting a set Monday (and for the next two weeks). Worse, I've got an interview at another company today, who sorta want someone in "right now" to cover for an employee on vacation. Bad timing. I risk ending up without either job, and I spent a lot more than I intended during the last couple weeks of raygun build. I've got rent covered, and I've got a show at the end of next month, but I'd like to have a better margin than that and a week or two of painting would really help.
The Cody has been on my "promises made" list the longest. Next longest is the holocron. When I see what kind of time I actually have I'm pulling the parts out of the box to evaluate just what I need to do to make a sample I am happy with, and identify the files to make a run.
I'm confident enough in the new circuit plan I can fire up Eagle at any time.
Of course, I'm overdue on deliveries to my usual client. Need to take a good look at the top of that list and see what can move forward...
Thursday, August 13, 2015
Raygun: moving forward
There's been no interest yet in having a second raygun made. But if there was?
 The larger part of the labor on this one was doing the CAD, writing the software, and of course experimenting and problem-solving. Since I know how to best prep the material now, and am willing to spend a little extra for such niceties as ordering "polished" instead of the raw WSF, I think painting and assembling a new one could be done over a long weekend.
Once the prints arrived, that is -- and I'd want to make some minor changes to the CAD in any case -- so about two weeks lead time in addition to the assembly time and time for paint to dry.
Done this way, I'd make the following modifications to CAD-for-print; dimension all the holes for sheet metal screws (instead of bolts or threaded inserts), make the pot strap integral, dimension the inside of the nozzle for standard acrylic stock, add locator pins for the side greeblies, and fix a couple errors in the CAD (such as the grip cutout being 1/8" too large on one side).
I'd also make a few aesthetic adjustments; add the same locator/seam hider ridge to the grip as is on the main body, and chamfer the outer edges to better show off the assembly seam.
 Of course, I am unhappy with the performance of the electronics. I believe a normal speaker would work better than the surface transducer, and it also should have some sound holes added to the CAD. The LED is a question -- I don't know at this time why it seemed so dim when finally assembled, especially after the great performance I got from an RGB on the desktop. It may be a software issue, a battery issue, an issue with the LEDs I ordered...
Okay; just tested and I learned one thing; the pink acrylic reacts strongly to red (my first test rig) but the "pink" (rather, purple) LED I got on eBay doesn't illuminate it quite as nicely. And the old wattage problem is still there; I was running two 350ma circuits in parallel, but it takes 10x the power to read twice as bright to the human eye. So what I really needed is a 10W red LED, and mod the driver to that.
 Which brings up another change I'd want to make to manufacture -- well, really any of them. And that is to make a dedicated fork off the "duckNode" designed specifically for this gun. Cutting and re-routing traces was more fiddly than I'd like to do.
(A second experiment: the "pink" LED does a good job lighting up a well-frosted clear acrylic. Still doesn't answer if it lights up properly on the lower voltage and amperage of the lithium polymer cell).
In any case, these modifications add a day or two of experimentation but basically can be accomplished within the framework of the existing files, CAD and software.
 Sure, there are alternatives. I could re-design the print (or merely fill everything in with clay) to take molds, and do resin casting. I'm not set up for foam casting. I would have to mod the prints -- possibly destructively -- to make vacuum former bucks. But either is probably the way to go if I wanted to make dozens of the things. The cost of a dedicated print is somewhat less than the cost of all the molding compound I'd need, and the savings in bulk wouldn't really show up until I hit at least a dozen.
It would probably need a re-design to make the functional trigger, though -- something like a printer or even laser-cut drop-in trigger group.
In any case, there aren't any orders for these things. There are orders for grenades. There is interest in all-metal firearms at the RPF. And there's interest there in the holocron as well.
 My next firearm, however, will be a little different. You see, I took the class on the CNC "Shop Bot" router more than two weeks ago, and I really need to run a project through there before what I learned in class completely escapes my memory. (It is already enough of a chore remembering the controls and sequences on vacuum former, laser engraver, 3d printer, and CNC mill when I run in to do quick jobs on those).
The only practical part of this thing will be a spring-loaded trigger. The rest is a test in fast, high-efficiency fabrication; CNC routing of the basic shape, glue, sand and paint.

Once the prints arrived, that is -- and I'd want to make some minor changes to the CAD in any case -- so about two weeks lead time in addition to the assembly time and time for paint to dry.
Done this way, I'd make the following modifications to CAD-for-print; dimension all the holes for sheet metal screws (instead of bolts or threaded inserts), make the pot strap integral, dimension the inside of the nozzle for standard acrylic stock, add locator pins for the side greeblies, and fix a couple errors in the CAD (such as the grip cutout being 1/8" too large on one side).
I'd also make a few aesthetic adjustments; add the same locator/seam hider ridge to the grip as is on the main body, and chamfer the outer edges to better show off the assembly seam.

Okay; just tested and I learned one thing; the pink acrylic reacts strongly to red (my first test rig) but the "pink" (rather, purple) LED I got on eBay doesn't illuminate it quite as nicely. And the old wattage problem is still there; I was running two 350ma circuits in parallel, but it takes 10x the power to read twice as bright to the human eye. So what I really needed is a 10W red LED, and mod the driver to that.
 Which brings up another change I'd want to make to manufacture -- well, really any of them. And that is to make a dedicated fork off the "duckNode" designed specifically for this gun. Cutting and re-routing traces was more fiddly than I'd like to do.
(A second experiment: the "pink" LED does a good job lighting up a well-frosted clear acrylic. Still doesn't answer if it lights up properly on the lower voltage and amperage of the lithium polymer cell).
In any case, these modifications add a day or two of experimentation but basically can be accomplished within the framework of the existing files, CAD and software.

It would probably need a re-design to make the functional trigger, though -- something like a printer or even laser-cut drop-in trigger group.
In any case, there aren't any orders for these things. There are orders for grenades. There is interest in all-metal firearms at the RPF. And there's interest there in the holocron as well.

The only practical part of this thing will be a spring-loaded trigger. The rest is a test in fast, high-efficiency fabrication; CNC routing of the basic shape, glue, sand and paint.
Wednesday, August 12, 2015
Raygun Postmortem
So what have I learned from this project? How did it go, overall?
In overview, the original commission was much simpler. I talked the client up to more than I should have asked them for, and brought it into new methods which I knew going in were untested. What I hadn't anticipated or evaluated properly is the constraints of grinding poverty through critical parts of the build; being unable to afford components or tools and having to spend weeks at a time unable to work on the project (either waiting on parts, waiting on money to get those parts, or working to earn that money).
In overview, the original commission was much simpler. I talked the client up to more than I should have asked them for, and brought it into new methods which I knew going in were untested. What I hadn't anticipated or evaluated properly is the constraints of grinding poverty through critical parts of the build; being unable to afford components or tools and having to spend weeks at a time unable to work on the project (either waiting on parts, waiting on money to get those parts, or working to earn that money).
Raygun XV.I
Raygun is shipped. Fatigue is already hitting.
I was on schedule enough to try for some of the stretch goals. Made two out of three, more or less, of the revised stretch goals. The original stretch goal was to hand it over early enough so "friends" would see it and order their own. When the CAD went long, there was no longer any way of achieving that window (I didn't have any techniques fast enough to make dupes in the time that would remain).
An idea that came at the last minute was to add pouches and stuff to the belt, Science Patrol style. Not enough time. It was that close to the wire; I could make those up in one morning.
But I did have the leisure to make the belt itself -- aka it was a stretch goal to make a belt for the holster -- and I even dared to make the alternate buckle design, the "Radio Box" buckle.
I have no progress pics for the latter. Not a single one. This was sort of the ultimate in micro-fab. I finished the holster at 11:15 this morning, discovered there was a one-hour slot available on the otherwise totally reserved out laser cutters, jogged down to BART, and did the Inkscape files on my laptop on the train. Ran the vacuum former and raced back home.

What was the build? Took an Altoids tin and pulled (aka vacuum formed) a duplicate out of PETG. Laser-cut an acrylic plug for the back, glued that up, and spray-painted it chrome silver. (Ride Eternal, Shiny and Chrome!) Laser-cut a faceplate from 1/8" white acrylic including all the component mounting holes and a speaker grill, screwed some random indicator lights and switches into the holes and hot-glued a bit of interesting metallic fabric behind the speaker grill. Glued the face-plate on with Loctite Plastic Bond and stuffed small wood screws into the corner holes, each held in with a dab of wood glue.
The reason for the vacuum-form step was to avoid having to cut holes in the Altoids tin (which is sharp and metal and not fun to be poking around inside. The screws in the corner are dual-purpose; both decorative, and if I'd had time they would have actually held the faceplate, so I could cram some basic electronics inside the box.
The belt, I also didn't take pictures of. The buckle is a chunk of CNC'd aluminum, with a decorative "button" in laser-cut acrylic. Unfortunately file transfer between Fusion 360 (stl files) and Illustrator (for the laser cutter) is difficult. I roughed in the button by eye but it doesn't look quite right.

Incidentally, that shape...large gentle curves in profile, and rounded corners, turned out to be a bit of a pain. So many of these methods and sources, they want to add more. Extend the curves, smooth everything, add details. It is tough to get the very clean lines of cartoons and certain design periods (like Atomic Age, for instance).
I ran short of time to find bolts that were short enough, so instead of tapping the holes I just rammed sheet metal screws in. I can always drill out and tap some day in the future, right? The "ears" were also just undersized; they hold the belt exactly as designed, but they are too tight to allow the velcro end to pass.
But I'm getting a little ahead. I came very close to just hemming two sides, but at last did the belt the traditional fabric belt way; stitched a tube, turned it inside-out, then ran a line of stitching on both sides a half-presser foot from the edge to help it maintain its shape (since you can't iron pleather, at least not well).
And oh yeah. Turning a 2" wide, 40" long pleather tube inside-out? Not fun. It took me about forty-five minutes to finally wriggle the thing through. (Not helped by the fact that I'd stitched the velcro before making the tube, so that the stitching for the latter wouldn't show).
And thus we come back to the holster. Remember the problem? The gun has this 2" dish on the front, meaning if you make the holster big enough to clear the dish without difficulty, the gun ends up rattling around once in.
So I added padding. I had a big hank of white cotton-linen I'd purchased for pants pockets. No batting, and the fabric stores didn't open until 10 am. So I used cotton balls.

I literally shredded cotton balls until they didn't wad up, then carefully stuffed those into the "coffin liner" shape I'd made. I'd pretty much had it with fabric glues and epoxies, so I hot-glued it inside.
And, yes, this was largely to cover the visible (and ugly) inside. I also tore out the previous glue job and wrapped the pleather around the PETG frame instead of where it had been. So now everything is properly hidden; all that is exposed are all my gaping hems and ripped-out mistakes.
The thing that really keeps the gun snug is thicker padding right around the opening. Since it is flexible, and the gun can be angled to clear the dish, it can be made tight enough to grip the gun decently. So that was yet another fabric tube, with quilting passes done by eye (as an aside, I've always loved that look of ribbed quilting in certain sorts of science fiction costume. In this case, it was strongly functional; it kept the stuffed fabric tube from buckling in an unsightly fashion.)
That, too, was hot-glued in place. And there was no more time or the inclination to tear out more stitches in order to work in a keeper strap, despite the 3d printed Element Tikium snap covers I'd made up.


I was on schedule enough to try for some of the stretch goals. Made two out of three, more or less, of the revised stretch goals. The original stretch goal was to hand it over early enough so "friends" would see it and order their own. When the CAD went long, there was no longer any way of achieving that window (I didn't have any techniques fast enough to make dupes in the time that would remain).
An idea that came at the last minute was to add pouches and stuff to the belt, Science Patrol style. Not enough time. It was that close to the wire; I could make those up in one morning.
But I did have the leisure to make the belt itself -- aka it was a stretch goal to make a belt for the holster -- and I even dared to make the alternate buckle design, the "Radio Box" buckle.
I have no progress pics for the latter. Not a single one. This was sort of the ultimate in micro-fab. I finished the holster at 11:15 this morning, discovered there was a one-hour slot available on the otherwise totally reserved out laser cutters, jogged down to BART, and did the Inkscape files on my laptop on the train. Ran the vacuum former and raced back home.

The reason for the vacuum-form step was to avoid having to cut holes in the Altoids tin (which is sharp and metal and not fun to be poking around inside. The screws in the corner are dual-purpose; both decorative, and if I'd had time they would have actually held the faceplate, so I could cram some basic electronics inside the box.
The belt, I also didn't take pictures of. The buckle is a chunk of CNC'd aluminum, with a decorative "button" in laser-cut acrylic. Unfortunately file transfer between Fusion 360 (stl files) and Illustrator (for the laser cutter) is difficult. I roughed in the button by eye but it doesn't look quite right.

Incidentally, that shape...large gentle curves in profile, and rounded corners, turned out to be a bit of a pain. So many of these methods and sources, they want to add more. Extend the curves, smooth everything, add details. It is tough to get the very clean lines of cartoons and certain design periods (like Atomic Age, for instance).
I ran short of time to find bolts that were short enough, so instead of tapping the holes I just rammed sheet metal screws in. I can always drill out and tap some day in the future, right? The "ears" were also just undersized; they hold the belt exactly as designed, but they are too tight to allow the velcro end to pass.
But I'm getting a little ahead. I came very close to just hemming two sides, but at last did the belt the traditional fabric belt way; stitched a tube, turned it inside-out, then ran a line of stitching on both sides a half-presser foot from the edge to help it maintain its shape (since you can't iron pleather, at least not well).
And oh yeah. Turning a 2" wide, 40" long pleather tube inside-out? Not fun. It took me about forty-five minutes to finally wriggle the thing through. (Not helped by the fact that I'd stitched the velcro before making the tube, so that the stitching for the latter wouldn't show).
And thus we come back to the holster. Remember the problem? The gun has this 2" dish on the front, meaning if you make the holster big enough to clear the dish without difficulty, the gun ends up rattling around once in.
So I added padding. I had a big hank of white cotton-linen I'd purchased for pants pockets. No batting, and the fabric stores didn't open until 10 am. So I used cotton balls.

I literally shredded cotton balls until they didn't wad up, then carefully stuffed those into the "coffin liner" shape I'd made. I'd pretty much had it with fabric glues and epoxies, so I hot-glued it inside.
And, yes, this was largely to cover the visible (and ugly) inside. I also tore out the previous glue job and wrapped the pleather around the PETG frame instead of where it had been. So now everything is properly hidden; all that is exposed are all my gaping hems and ripped-out mistakes.
The thing that really keeps the gun snug is thicker padding right around the opening. Since it is flexible, and the gun can be angled to clear the dish, it can be made tight enough to grip the gun decently. So that was yet another fabric tube, with quilting passes done by eye (as an aside, I've always loved that look of ribbed quilting in certain sorts of science fiction costume. In this case, it was strongly functional; it kept the stuffed fabric tube from buckling in an unsightly fashion.)
That, too, was hot-glued in place. And there was no more time or the inclination to tear out more stitches in order to work in a keeper strap, despite the 3d printed Element Tikium snap covers I'd made up.

And maybe it's just me, but it looks so much like some sort of Apollo hardware I immediately dubbed it the "A7L Raygun Holster."
But here it is in full function (the last pics I managed to take before everything went out the door);


Tuesday, August 11, 2015
Raygun XV
Raygun is assembled. For all the effort I went through to make it loud and bright, it is a severe under-performer -- as weak as a typical toy. Not sure all the reasons why, but a big part can be traced to the undersized battery.

Today was pretty much all spent (as was yesterday) trying to make a holster. And basically, this thing doesn't holster well. That big fancy dish at the front end means the holster has to be big at the top end, and that means it rattles around.

I started my experiments with soft holsters. I had purchased some clear vinyl for that (as seen on trial #3 above). But soft-side holsters had two fatal flaws; it was difficult to get the dish in, and it was difficult to get the dish out. Even with two hands it tended to hang up.
So I moved to a hard-shell holster. Built out a shape in cardboard and duct tape around my prototype gun, checking frequently to see that it moved correctly. Then slathered up the form with Bondo.

This was a very fast way to rough up the form, and I knew it would stand up to the rigors of the vacuum forming machine. The downside to this sort of additive layering is the dimensions are increasing; if you want a snug fit, you need to reinforce on the inside of the form, then strip away the skin. If I'd had a bunch of plaster, and the time to let it cure, I would have gone that way instead.

A coat of primer for luck, and my new secret weapon; baby powder. I was able to get three clean pulls and got the buck back in one piece, too.
But then the nightmare ensued. I spent hour upon hour trying to fit white pleather around the shell I'd made. On the pleather side, you can't iron the seams to make them lie flat, every stitch leaves a permanent hole (so you can't baste and rip out), and it seems indifferent to many adhesives.
Worse for the PETG. But fortunately I had an epoxy that seems to get a decent bond on it.
While various glues were setting I took a quick file and sandpaper to the CNC'd buckle. I will probably be using that. I had a fun idea to dress up an Altoids tin with some of the various odd indicator lamps and knobs I have lying around, but I got far too hooked on the idea of using a laser-cut faceplate; that would save me from having to punch through the Altoids tin (which never goes well) and also would let me do a cute speaker grill.
But, alas, the lasers are booked solid. And that's too many cuts to want to by hand. So at least the glues finally dried:

Pity the holster is just too loose. Oh, and another smallish problem; the prototype had a shorter emitter. But the way it rattles around in the bucket, it hardly matters. Well -- tomorrow (we've moved final delivery to 5:00 tomorrow) I'll make another run to the fabric store for some batting, and do a quick quilt on the inside of the holster.
And maybe there will be enough time to finish the buckle, and stitch a length of belt. And if I for some reason had more time than that...I thought of putting gear pouches on the belt as well for that full Space Patrol look. Which would be simple boxes stitched up out of the remaining pleather.
With Atomic Tiki buttons -- because I did waste the time running a half-dozen of those off on Sunday night when the 3d printer become mysteriously available despite all expectations.
Oh, yeah. And here's a silly video with the various behaviors illustrated. Perhaps one day I'll make a proper recording of the sounds themselves...

Today was pretty much all spent (as was yesterday) trying to make a holster. And basically, this thing doesn't holster well. That big fancy dish at the front end means the holster has to be big at the top end, and that means it rattles around.

I started my experiments with soft holsters. I had purchased some clear vinyl for that (as seen on trial #3 above). But soft-side holsters had two fatal flaws; it was difficult to get the dish in, and it was difficult to get the dish out. Even with two hands it tended to hang up.
So I moved to a hard-shell holster. Built out a shape in cardboard and duct tape around my prototype gun, checking frequently to see that it moved correctly. Then slathered up the form with Bondo.

This was a very fast way to rough up the form, and I knew it would stand up to the rigors of the vacuum forming machine. The downside to this sort of additive layering is the dimensions are increasing; if you want a snug fit, you need to reinforce on the inside of the form, then strip away the skin. If I'd had a bunch of plaster, and the time to let it cure, I would have gone that way instead.

A coat of primer for luck, and my new secret weapon; baby powder. I was able to get three clean pulls and got the buck back in one piece, too.
But then the nightmare ensued. I spent hour upon hour trying to fit white pleather around the shell I'd made. On the pleather side, you can't iron the seams to make them lie flat, every stitch leaves a permanent hole (so you can't baste and rip out), and it seems indifferent to many adhesives.
Worse for the PETG. But fortunately I had an epoxy that seems to get a decent bond on it.

While various glues were setting I took a quick file and sandpaper to the CNC'd buckle. I will probably be using that. I had a fun idea to dress up an Altoids tin with some of the various odd indicator lamps and knobs I have lying around, but I got far too hooked on the idea of using a laser-cut faceplate; that would save me from having to punch through the Altoids tin (which never goes well) and also would let me do a cute speaker grill.
But, alas, the lasers are booked solid. And that's too many cuts to want to by hand. So at least the glues finally dried:

Pity the holster is just too loose. Oh, and another smallish problem; the prototype had a shorter emitter. But the way it rattles around in the bucket, it hardly matters. Well -- tomorrow (we've moved final delivery to 5:00 tomorrow) I'll make another run to the fabric store for some batting, and do a quick quilt on the inside of the holster.
And maybe there will be enough time to finish the buckle, and stitch a length of belt. And if I for some reason had more time than that...I thought of putting gear pouches on the belt as well for that full Space Patrol look. Which would be simple boxes stitched up out of the remaining pleather.
With Atomic Tiki buttons -- because I did waste the time running a half-dozen of those off on Sunday night when the 3d printer become mysteriously available despite all expectations.
Oh, yeah. And here's a silly video with the various behaviors illustrated. Perhaps one day I'll make a proper recording of the sounds themselves...
Raygun XIV.V
Not the final post, not yet. Raygun "ships" today. I might be able to sneak in a Wednesday night delivery if I really have to but the client is packing that night for an early Thursday departure to the land of Tiki.
Deep in to agile micro-fabrication. Went in to the shop yesterday with one hour before I started machining -- and I didn't even have a CAD file. Designed, drafted the thing in plenty of time, but the CAM software was being weird; the computers upstairs were all in use or out of service (I wasted a perfectly good ten minutes trying to find missing keyboards and restore any of them), and the computers in the lab weren't remembering tool settings.
And, yeah. I went in really needing one part. I couldn't get the CAM software to play nice and generate G-code for it. But I could get the software to generate G-code for a part that was a luxury, thought-of-it-at-the-last-minute and if-I-have-time-I'll-make-it. So of course I spent three hours at the CNC mill making that. And barely had the energy left to jump over to the manual mill and do the part I really needed that way instead.
Yeah. So much for the joys of computer-aided manufacturing. The lasers were all booked solid through the next several days (up until Burning Man, basically). So my "this is simpler" is actually more complicated; thirty minutes of CAD drafting and ten minutes of cutting is going to turn into three hours of hand-cutting plastics if I still chose to go down that route.
I lathed the nozzle on Sunday, which was a delight. The acrylic flexed a lot even when I re-ground my custom lathe tool (bought a blank of high speed steel at Grainger and ground it to the profiles recommended on a couple sources for acrylic). And the compound slide was jamming; I couldn't line it up at the five degree angle I needed to cut the taper.
So I pulled out a bastard file and profiled my piece by hand. Applied 220 and 400-grit by hand, with the lathe still turning...and it looked good just like that so I kept it. Wanted to give myself some options so I chucked in the clear acrylic I'd bought but that piece shattered when I tried to lathe it down. Next time, I'll figure out how to make the pieces work with standard stock dimensions!
I would have made more progress with the holster on Sunday but I was a buck short. By at least an hour. Monday morn, I continued working to finish the vacuum form buck, and that was the last thing I did before crawling back to BART. And fortunately I got two clean pulls in PETG.
This morning's first exercise was to see what of the glues I had on hand would actually grip PETG. Loctite Plastic Bonder seems to grip decently (Zap-Gap failed immediately and Weld-On #16 doesn't feel strong). So now I just have to figure out how the various fabric pieces are going to work, then stitch up a belt and finish building a buckle if I have time. And I'm still tempted to make a run down to the fabric store to add some silver edge trim.
Oh...and I have yet to put the last couple screws in the gun. Or glue the flashes on the side. Or upload the new "power up" code I just wrote for it. Or take some pictures before it goes out the door.
No pressure!
Deep in to agile micro-fabrication. Went in to the shop yesterday with one hour before I started machining -- and I didn't even have a CAD file. Designed, drafted the thing in plenty of time, but the CAM software was being weird; the computers upstairs were all in use or out of service (I wasted a perfectly good ten minutes trying to find missing keyboards and restore any of them), and the computers in the lab weren't remembering tool settings.
And, yeah. I went in really needing one part. I couldn't get the CAM software to play nice and generate G-code for it. But I could get the software to generate G-code for a part that was a luxury, thought-of-it-at-the-last-minute and if-I-have-time-I'll-make-it. So of course I spent three hours at the CNC mill making that. And barely had the energy left to jump over to the manual mill and do the part I really needed that way instead.
Yeah. So much for the joys of computer-aided manufacturing. The lasers were all booked solid through the next several days (up until Burning Man, basically). So my "this is simpler" is actually more complicated; thirty minutes of CAD drafting and ten minutes of cutting is going to turn into three hours of hand-cutting plastics if I still chose to go down that route.
I lathed the nozzle on Sunday, which was a delight. The acrylic flexed a lot even when I re-ground my custom lathe tool (bought a blank of high speed steel at Grainger and ground it to the profiles recommended on a couple sources for acrylic). And the compound slide was jamming; I couldn't line it up at the five degree angle I needed to cut the taper.
So I pulled out a bastard file and profiled my piece by hand. Applied 220 and 400-grit by hand, with the lathe still turning...and it looked good just like that so I kept it. Wanted to give myself some options so I chucked in the clear acrylic I'd bought but that piece shattered when I tried to lathe it down. Next time, I'll figure out how to make the pieces work with standard stock dimensions!
I would have made more progress with the holster on Sunday but I was a buck short. By at least an hour. Monday morn, I continued working to finish the vacuum form buck, and that was the last thing I did before crawling back to BART. And fortunately I got two clean pulls in PETG.
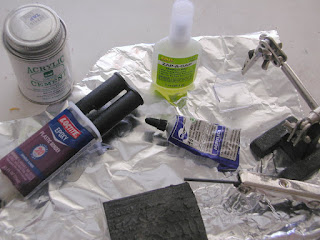
This morning's first exercise was to see what of the glues I had on hand would actually grip PETG. Loctite Plastic Bonder seems to grip decently (Zap-Gap failed immediately and Weld-On #16 doesn't feel strong). So now I just have to figure out how the various fabric pieces are going to work, then stitch up a belt and finish building a buckle if I have time. And I'm still tempted to make a run down to the fabric store to add some silver edge trim.
Oh...and I have yet to put the last couple screws in the gun. Or glue the flashes on the side. Or upload the new "power up" code I just wrote for it. Or take some pictures before it goes out the door.
No pressure!
Sunday, August 9, 2015
Raygun XIV.IV
Programming is done and wiring harness completed. I'll add a pic once the paint on that side of the clamshell dries.
And here's the pic. I decided against adding a connector to allow detaching the grip; it is hard-wired now (the LiPo, of course, pops out on a spring catch.) That's another "gotcha" that will catch you up some times; the sheer volume of the wiring can make the difference between everything fitting in a tight prop, and not being able to screw down the lid.
(And this also illustrates why I didn't use a sound board, even though Adafruit has several wonderful ones. There's no space!)

On the downside, the volume was lower than I'd been hoping on 5v -- it is even lower running on the LiPo. But on the upside -- it runs, everything works, and the sounds are basically the same. Also on the downside, the silver paint takes fingerprints a bit. I noticed that when testing to see if the clamshell would close properly on the completed wiring harness.
I'm pretty much over the delights of synthesis on the AVR. It is so sensitive to program flow, even when you have access to multiple timers, that even RTOS programming doesn't quite help you. The last trick I did before I closed it up was program the all-the-way-over knob position. Which plays a clave rhythm (I wanted to program a bar of "Garota de Ipanema" but with the cobbled-up synthesis framework I'm using it would have been a huge pain.)
Some of the sounds were fairly nice. One of the few small advantages to getting old. I've spent time in the trenches doing synthesis, all the way back to programming on FM (hardware!) synthesizers. Never worked with any of the really old-school stuff but read enough about the theory so I grok ADSR envelopes, VCOs, and all that. Which is to say; I have some sense (between that and a lot of sound design doing manipulation of samples with other tools) of how to achieve certain effects.
So I was able to get an okay clave sound.
The effect I'm most pleased with, oddly, is the knob. The "Set Atomic Ray to Stun!" knob is a simple linear-taper potentiometer with a hardware switch that breaks the main power lead. Something I learned from on the Morrow Project CBR!
The code does an anti-jitter routine by not reacting unless the current analog read off the knob is 2% or more off the stored value. When this increment is detected, it goes to the PWM timer that is outputting to the speaker and commands a single square wave. This makes a "tick" sound. So as you turn the knob, it clicks softly as it turns.
As certain preset bracketed values are entered it does a similar routine to see if it is already in that state, if not, it sets a new state (playing State Machine here) and plays a short beep using both timers (the PWM out giving the voltage and the second timer setting the frequency via an ISR -- Interrupt Service Routine.)
The continuous beam settings are all warbling tones anyhow, so the functions are written open-ended so at each pass through the tone and light generating function, the program flow goes back to check the knobs-and-switches status again.
The "zap" settings are handled differently; each enters a function with a single timed loop in it, and a toggle is set that requires the trigger be released before the function can be triggered again.
And, yeah, based on this, I'm definitely going to fork the DuckNode project. One fork will be a simple 3-channel (or perhaps four) Cree driver with minimal hardware connections for simple adjustments (aka tuning in a color on the fly). And that means I can do it with an ATtiny45.
The other I'll jump up to the more popular ATtiny2313. Or something. Eventually I'm going to have to learn to solder larger SMD chips. And learn how to manipulate the USB stack properly. And find a cheaper radio solution than the XBee.
So tomorrow, or Monday, I'll lathe up the nozzle. And start on the holster (I'm waiting on client approval for the design of that item). Dunno if I'll have time for the Disintegrating Pistol, though.
(I'm also wondering if it is worth making a quick "buck" to form the clear parts of the holster around. One of these days I want to fire up the CNC wood router, but -- as in so many other things -- I need to find time to create the computer files as well.)
Lathe reserved. In the meanwhile, got a start at making the holster. First stage; working up the shape in successive mock-ups:

Saturday, August 8, 2015
Raygun XIV.III
In any project, one of the nicest places to arrive is where a cut-out is possible; where you can go to a simpler plan, finish it up and put it in the box.
I took one of these a while back when I dropped the machining to have most of the gun printed. But I'm choosing not to take two others; to go with "good enough" on the programming, and to accept the results of the Rub 'n Buff experiment.
The latter first. I did several pieces in Rub n' Buff before discovering that although it generally wears well, it was coming off the sharp edges. Such as on the grips, with the decorative grooves. So I've gone back to Krylon Premium Original Chrome. Over the black epoxy enamel I'd sprayed earlier (for strength, mostly.)

Paint on the left, Rub 'n Buff in the middle. The trigger guard is real metal; CNC'd aluminium with my M40 Grenade-tested treatment of 220 then 400 grit wet-dry paper, a buff with 0000 steel wool, then a protective film of sewing machine oil.
The picture is a little misleading. The Rub 'n Buff looks better at a distance, and the aluminium piece is at the wrong angle to the light to catch highlights here. And I can see some typical orange-peel in the paint (like a lot of metallics, it doesn't achieve the really good shine unless you put it on heavy enough for it to self-level).
But it works. And, yes; this is another huge advantage to all-metal construction; you can ding that stuff up pretty badly without scratching the "paint." (Would have also helped in some of my mechanical connections -- the e-cell catch, for instance, was really designed around metal-on-metal contact, and it also suffers from the larger footprint required of brass thread inserts over the original plan to tap the aluminium.)
The final details are coming together. I spent another day at the 3d printer. TechShop finally got a second printer working -- which they gave to the classes, but at least that gets those out of the way of making a reservation. And they have at least four of the Zim machines being prepped now. So in the long term printing there will be less of a chore.
Speaking of which. Someone had run nickel-powder PET through the machine I logged into, and perhaps because of that or perhaps because the bed is increasing warped (Type A Machines really need to look into a better print bed) I could not get my prints to adhere. Spent a good hour messing around with the settings (and adding more and more glue to the print bed) until I finally started getting clean prints.
Also oddly -- I set up the first print using the Cura v.15.06 they had loaded on the machines at Techshop, but the subsequent prints I sliced with my own copy of Cura v14.12. And whether it was the software itself, or the possibility that my own tweaked settings had been saved to my copy, but I got nicer prints and a better printing experience with those.
My original idea was a Starburst; a typical Googie design element I really wanted to incorporate (just as the design consciously includes boomerang shapes, jet nacelles, tail fins, etc.) But a last-minute suggest from a friend was another famous bit of Atomic Age design; the atom.

The top is the Starburst idea, but that side is actually where the power setting knob will be. The Atom will be on the other side. And, yes...it should have had three orbits for a proper Bohr atom (which would be Lithium, right?) but I was modeling at warp speed while sitting at the printer with the minutes on my reservation running low.
While I was trying to figure out how many electrons I wanted I had the inspiration to make this the element Tikium, atomic number 12:8 -- with a tiki head for a nucleus. Which is a little easier to see in the Cura display (where I tried and tried to put the quick Carrara model into the quick Fusion model, and after crashing Fusion multiple times finally gave up and did with two prints and some superglue).

Besides re-painting -- and painting up the fresh elements -- the only physical task left on the gun is to lathe out the emitter. Which with luck I'll get to on Sunday.
And finish the wiring harness. All the electronics are mounted now, but it is a good thing I left some of the wiring loose because I had to make several adjustments in how things were wired. I've really fallen out of love with the ATtiny84. I picked that chip for the DuckNode as a compromise between the tiny footprint of the ATtiny45 and the greater number of I/O ports. But there really aren't a lot of ports anyhow. I'm sharing ones I'd rather not share, and at some point I'll be in that ugly little round of having to disconnect the ISP in order to test a pin function properly.
It also only has two hardware timers (not including the watchdog timer, which I'm not about to get into. So my program has ended up taking on certain aspects of RTOS programming again. I have to really watch the operations I perform (modulus is an ugly one on the smaller AVR's -- even though they have a math co-processor it takes them 15x longer to run a modulus calculation than it does to run an "if" statement.)
So within the loops I have to program exceptionally lean. Because the program has to step through everything fast enough to be able to run a software PWM of the light (in order that I can fade it smoothly), and fast enough to not put too much jitter into the audio. And the timing is hyper-critical to where the sound only sounds right with the right number of delaying elements in the loop; meaning there's at least one spot where I have to use modulus just to get the timing to come out right!
Yes, more discoveries. The Arduino "delaymicroseconds" function leverages a timer. So I can't call it without messing up my own timers. And for some reason changing the system clock prescaler on either of the timers makes the "delay" function either run slow or not at all. Don't understand what's going on there.
More so, it appears my stick of ATtiny84's shipped with, instead of the 8 mHz internal oscillator ATmel promises they are supposed to default to, but the 128 kHz low-power oscillator selected! Fortunately, "burn bootloader" from the latest Arduino IDE -- patched with various third-party AVR-duino packages -- reset the fuses. Because I'm not up for trying to remember how to use the avrdude chain right now. (No doubt discovering a broken instal somewhere along the way!)
Thing is, in this kind of micro-computing one doesn't write a program. One writes a "sketch." The idea is you aren't trying to make something bulletproof, and test it before uploading to production. You just throw together whatever pile of code gets the project of the moment working. If Larry Niven's Pak Protectors programmed, this is how they'd do it.
Hence my current code-in-development, a horrible hybrid of Arduino macros and register directives written down so close to the metal they might as well be in Assembly. And of course lots of lines commented out, magic numbers everywhere, a few scrawled notes here and there, function calls done entirely so I can see where I am in the program flow, etc. Sure, your code might look like this when you are coming up with ideas, but I'm quite literally testing this in production; uploading it in real time to the hardware to see what happens.

But with any luck, I won't need to make any more hardware layer alterations, and I can finish the wiring harness and close it up. Today, I'm hoping. I just need to finish writing the Power Selector Knob routines, a nice Continuous Wave setting, and if I get ambitious a Power On hum for when the system boots and a "Phaser on Overload" for when you twist the control knob all the way over.

That is, assuming all the paint has dried by then. I may have to wait until Monday to bolt everything back together (it was all bolted together for the test assembly so I know that part is all good). And switch to working on the holster instead. Picked up a couple yards of white pleather and clear vinyl to play with...
Thursday, August 6, 2015
Wavetable Synthesis on the ATtiny84
Yes, it is actually possible. I wouldn't recommend it; the built-in 8 mHz oscillator is slow enough that even Interrupt calls take enough clock cycles to be heard as "grit" or "chatter" in the sound.
But I've got a code hacked to the point where I can control frequency, volume, and get an audible difference between sawtooth and square wave. (Haven't plugged in the wavetable for a sine wave yet...but hopefully that will sound a little purer).
I figured it out from Jon Thompson's excellent article over at Make. Although it took quite a lot of mental struggle before it all became clear! Thus this post; I'm going to attempt to explain what it is I figured out in the almost certainly quixotic hope that someone else will find my fumbling explanation easier.
Wednesday, August 5, 2015
Hardware/Software
That's the lovely thing about embedded computing; the software and hardware layers are so intimately entwined.
On the one side, since the software is controlling physical processes (like servo motors, ultra-bright LEDs, etc.) a software error can "crash" the hardware. I've bent a servo shaft more than once due to getting a line wrong in the code I was testing.
And on the other side, the hardware can make for a less than pristine software environment. I was struggling this whole evening to get tone generation via timers to work sensibly. And as it turns out -- even though the amp I'm using was designed to be attached to Arduino clones, when I sent a full-strength pin signal to it, it crashed the chip and caused it to reset.
The reset is FAST on AVRs. Fast enough that the result was actually in the audible domain; the chip would crash and reset as fast as 400 times a second.
I finally clued in to what was happening when I realized I couldn't write a time out function that worked. And a single slim resistor before the amp seems to have solved that issue.
So good thing I got into this now. Would have been even more of a pain to debug when I had trigger switch and LED and so forth connected as well.
And now I'm comfortable enough again with the hardware timers on the AVR to make another shot at software synthesis. I found a cute little article on waveform lookup tables on the AVR and although I don't really need the waveform per se, I do want the ability to make complex tones that would be difficult to achieve with the Arduino tone() library.
So the raygun is more or less on schedule. I didn't finish the electronics assembly (preferring to leave parts out until I'd figured out which pins were best to drive the speaker with). But that's solved, and finishing the harness is maybe another hour. The biggest chunk of time left on this project is the programming, and all in all I made a good start at it today.
Oh, yeah. And now one of the companies I called asking for work calls back to see if I can drop in for a week or two to cover a guy who is on vacation. And it's a company I do not want to turn down...
Tuesday, August 4, 2015
Raygun XIV.II
Took longer than I wanted, but all the assembly work is done. Everything fits (except the nozzle -- I'll be lathing that this week). Made several hardware store runs to get the appropriate bolts and so forth. Still shy the 4-40 setscrew to hold the barrel assembly (but it is a tight fit anyhow).

So now all the pieces are cycling through the paint stages. They've all been wiped with superglue and sanded with 220. I'm progressively priming, wet sanding with 400 grit, then spraying on the epoxy black. Which takes 24 hours to cure completely, so only the back of the dish (my test piece) is actually finished.
Mildly annoying, because I kinda need the right side housing to complete the electronics work:

Trigger and switch is working great. Setting knob works. And the e-cell seats nicely and with the new spring, is a lot easier to extract from the handle. The picture below is from before it was modified to plug directly into the gun:

Tonight's task (assuming I have any energy left) is to solder up the CPU and constant-current PWM driver for the LED, using one of that first run of "Ducknode" boards I got made at Osh Park.

And I've been reading about wavetable synthesis. It's a bit much -- but I can probably handle creating a white noise burst. Not sure how to combine it with the tone generation, though. One handy thing; I don't have to do any clever things with interrupts. The way the functionality of this gun works, it runs through a complete "pew!" sequence before it bothers to poll inputs for control changes.
The last main task will be to create the holster. I've pretty much narrowed down the design in my head to a wide belt worn snug at the natural waist, holster depending from it for ease in draw, decorative buckle. The holster itself stiff, shaped, and clear but edged with the same white vinyl as the belt.
And I hope there's enough time left for the Disintegrating Pistol. There certainly isn't time for jetpack or bubble helmet!
Monday, August 3, 2015
Raygun XIV.I
TechShop is sort of bugging me. One lathe is still busted. Still only one printer, and not only is that reserved most of the time, it keeps getting dragged off to be used in some sort of afterschool outreach they are running. And today...the bandsaw was busted (and like the lathe, the parts may take weeks to arrive, if ever... apparently Jet Tools is not the best at support).
With no bandsaw, I made do with file, hacksaw...and mill. Was actually able to use the mill to cut the pieces I wanted to width and length, then used grinder and file to do the final shaping.
My CNC parts went okay. I seem to have forgotten which corner needs to be set to properly zero the various steps; my G-code had the cuts way off in space. So I eyeball zeroed the CNC mill to where the cuts would land on my stock -- lots of air passes to make sure I was getting it right.
After I broke my old end mill that other day, I've been a lot more conservative in my G-code. So much so I was able to dial up to 100% machine speed over-ride (aka, running the G-code as written) and the mill sounded just fine. 8 ips, by the by, step-over of 30%, and a plunge depth of .04" on a .25" end mill.
V-Carve Pro is not the most complicated software out there, and I didn't want to play with trying to face my stock. So I faced on the manual mill, and exported only the contour cut-off path from V-Carve. That worked fine...but facing with a 1/4" end mill takes a while! If I had really gone through with making the raygun all metal, I would have had to break down and purchase a face mill (well..you can get one for under a hundred bucks on eBay).
Clean-up was the other reason I chickened out on all-metal. There were several notches in the parts I ran off today that the end mill couldn't reach, and I spent a good hour with a file working on that. And these were simple outlines; the main parts with all their compound curves are giving me a hard time just with sandpaper and the soft plastic I got back from Shapeways!
(And, yes, there are several errors in the CAD. I've been having to cut into the plastic in various places, as well as add more material with scrap plastic and superglue. The revised e-cell connector took even more than that; I assembled that with Apoxie Sculpt.)
Well, the metal parts fit. The sound board is a lot smaller than I thought, but jammed up against the housing and fed a strong audio signal from my computer, it seems sufficiently loud anyhow. But that means that, more and more, assembly is bleeding into electronics assembly/final assembly. And that means I have to finish most of the painting.
And painting is currently waiting for the trial piece in epoxy enamel to finish curing so I can evaluate if all the pieces are going to get that treatment. At this point, it looks like the combination of superglue seal on the plastic and epoxy enamel as final coat will give the tough shell I need, and Rub 'n Buff will give a metallic sheen that will look appropriate and last a while.
And oops. Before I put on the final coats of paint I really need to print off the "swooshes" for the side. If and when that last ailing 3d printer at TechShop even becomes available again!
Sunday, August 2, 2015
Raygun XIV
My short bit of summer stock -- painting sets in the hot sun -- is done for now and it is back to the Raygun with a week and a half remaining before the deadline.

The Shapeways parts arrived earlier in the week and I'd started sanding them down. This weekend, I moved to the next step on that; painting them with Superglue to seal them, then spraying them with primer.
Experimented with a couple different paint treatments on the mockup.

The leading contenders now are rattle-can chrome (Krylon Premium Original) or Rub 'n Buff. The former is shinier but I'm not sure I want that, and the latter may have better wear characteristics (but also might stain). I also didn't like the OSH-brand black gloss, and am experimenting with an epoxy enamel now (for greater strength).
The other big task was making sure everything fit together correctly. The original design was for tapped holes, but the plastic print didn't stand up to that well. Some of the parts will be held in with sheet metal screws into the plastic, but both for ease in multiple assembly/disassembly, and for the look of the original bolts, I added threaded inserts.

And it turns out getting inside the grip to unhook the battery cable just wasn't working. So I spent a big chunk of today coming up with a revised approach. Because, after all, I'd gone through all the effort to make the e-cell removable, and it seemed a shame to lose that.
Tomorrow is the first machine reservation I've been able to make since I started summer stock. With luck I'll be able to CNC the guard, trigger, the strap that holds the potentiometer, and the sounding board the transducer presses against to make sound.
All the pieces are basically sanded and primed, and I'm already moving into electronics and functional parts. So I have pretty good hopes of finishing up this week. And I can start on the holster over the weekend.

Experimented with a couple different paint treatments on the mockup.

The other big task was making sure everything fit together correctly. The original design was for tapped holes, but the plastic print didn't stand up to that well. Some of the parts will be held in with sheet metal screws into the plastic, but both for ease in multiple assembly/disassembly, and for the look of the original bolts, I added threaded inserts.

And it turns out getting inside the grip to unhook the battery cable just wasn't working. So I spent a big chunk of today coming up with a revised approach. Because, after all, I'd gone through all the effort to make the e-cell removable, and it seemed a shame to lose that.
Tomorrow is the first machine reservation I've been able to make since I started summer stock. With luck I'll be able to CNC the guard, trigger, the strap that holds the potentiometer, and the sounding board the transducer presses against to make sound.
All the pieces are basically sanded and primed, and I'm already moving into electronics and functional parts. So I have pretty good hopes of finishing up this week. And I can start on the holster over the weekend.
Subscribe to:
Posts (Atom)