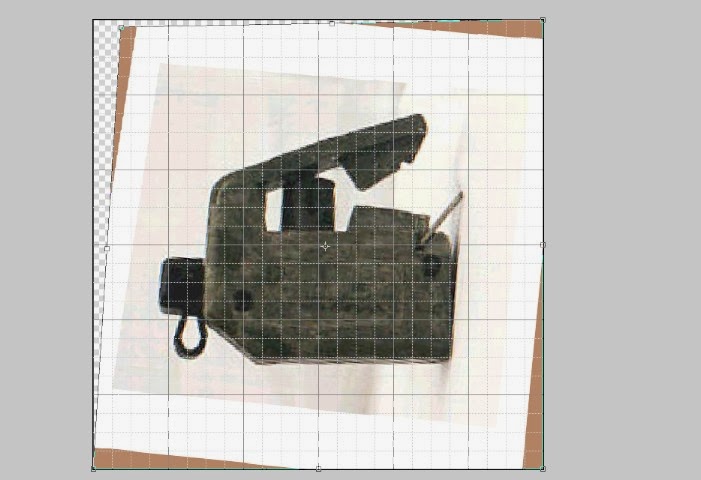
In the example below, an M57 "Clacker," Box Modeling seemed the simplest way to approach the desired shape.

First step for this model was importing a reference photograph. Here it is in PhotoShop being aligned to the grid and pulled around a little to be less distorted.
The model starts with a square primitive. I add vertices to frame out the shape I'm after.
Edge tools help here; I select an edge and extract it to form the sides of the internal box there, then use the Add Vertex tool in Constrained mode to divide it up, then I drag the edges around until they are in roughly the right places.
I've also added two copies of a primitive circle, again from the Add Object menu, and stuck them close to where I need some holes cut.
Adding holes to a mesh is challenging in Carrara. Booleans are of course out. The simplest method turns out to be to move the "hole" out of plane; then Carrara will let you loft or bridge between the shapes. When you are done, flatten the mesh and delete the center polygon.
Extrude or Add Thickness and now we really have a box. I've selected an edge loop here and extracted it to subdivide the box. I could have achieved the same effect by extruding more than once.
Now that I have one loop cutting the box in two, I can use Quick Bevel or other edge tools to duplicate it, and move the resulting loops around as needed for the next step.
Sub-face extrusions here; taking the new edge loops, dividing them further, and extruding selected faces to create some of the details of the shape. Be careful in these stages of the integrity of the mesh; it is a little too easy to construct edges that appear to weld but do not (due to a different number of vertices).
Beveling the edges. I had intended to use Subdivision to smooth the object once the basic were in place, but on this mesh it didn't work so well: partly, because there are a number of odd transitions in the real object between rounded edges and squared-off edges.
So instead I'm using the Easy Bevel tool over and over, turning the rough corners into smoother corners.
Carrara's auto-triangulate tools are a mess, so I've manually triangulated most of the mesh -- or, rather, added edges in order to eliminate most of the n-gons. This requires a certain amount of creativity in making transitions from higher detail (such as the now more circular holes), to less detail.
There are as I said a variety of subtle intercuts and plane changes in the original object!
The handle starts with a cylinder primitive instead (it is hard to get a smooth cylinder by eye by adding vertices to a box. So you start with one instead).
A group of faces is extruded from the cylinder.
Back to the reference plane, and the extruded polygons are shaped. As I extruded, I made sure to add edges where the other elements are going to be extruded.
(In Carrara, you can have a reference picture in any orthogonal view. Go to the "Global" tab to import the reference image).
And as before, subdivide the surface, extrude selected polys, subdivide those, drag the edges around to form the desired shapes.
The final mesh. To the two meshes detailed above, I've added screw heads, text, the switch boot, terminal and cap (all vertex objects) and the safety bail -- which is a tube created in Carrara's Spline Modeler.
To fit these together, I opened up the preview pane as far as it would go while inside each instance of the Vertex Modeler, and adjusted the mesh being worked on until it fit properly into the complete model.
UV check.
This is a lecture all on its own. Maybe several! This pic shows a checker texture applied to the entire model to confirm that the UVmaps are clean and proportional to each other (aka, you don't want one part of the model to be scaled much larger in UV space than another).
Imported into Poser and rigged; altGeom to open or close the terminal cover, JCM on the switch boot driven by the handle, and ERC-driven safety bail as well.
I'll go into detail on that if someone comments requesting it.
Not textured yet; these are stand-in block colors instead.


Do you think I can get the file
ReplyDeletefirst amazing job, i'm used to use solidworks but with it it will be almost impossible to start from a photo so complicated. i'd like to get the file for make a remote for a prop, is it possible?
ReplyDelete