Next one. This one is only good enough now to slap a coat of paint on. Besides -- there's plenty of mistakes to make in paint, plenty of experiment there.

Painting steps below the fold:
First step was Krylon "Hammered" finish silver, to give it some texture and hide the seams and repairs. Only the broad areas got the hammered finish; smaller spots were shot with ordinary silver metallic spray.

Next is the "rust" coat. The was acrylic paints, applied with a brush into all the crevasses and nooks, and sponged off. A mixture of yellow ocher, burnt umber, and a little carmine red, with just a little tap water to help it flow.
When that had dried, Pelican black ink painted into every crack and seam, and also sponged off with a clean dampened sponge.
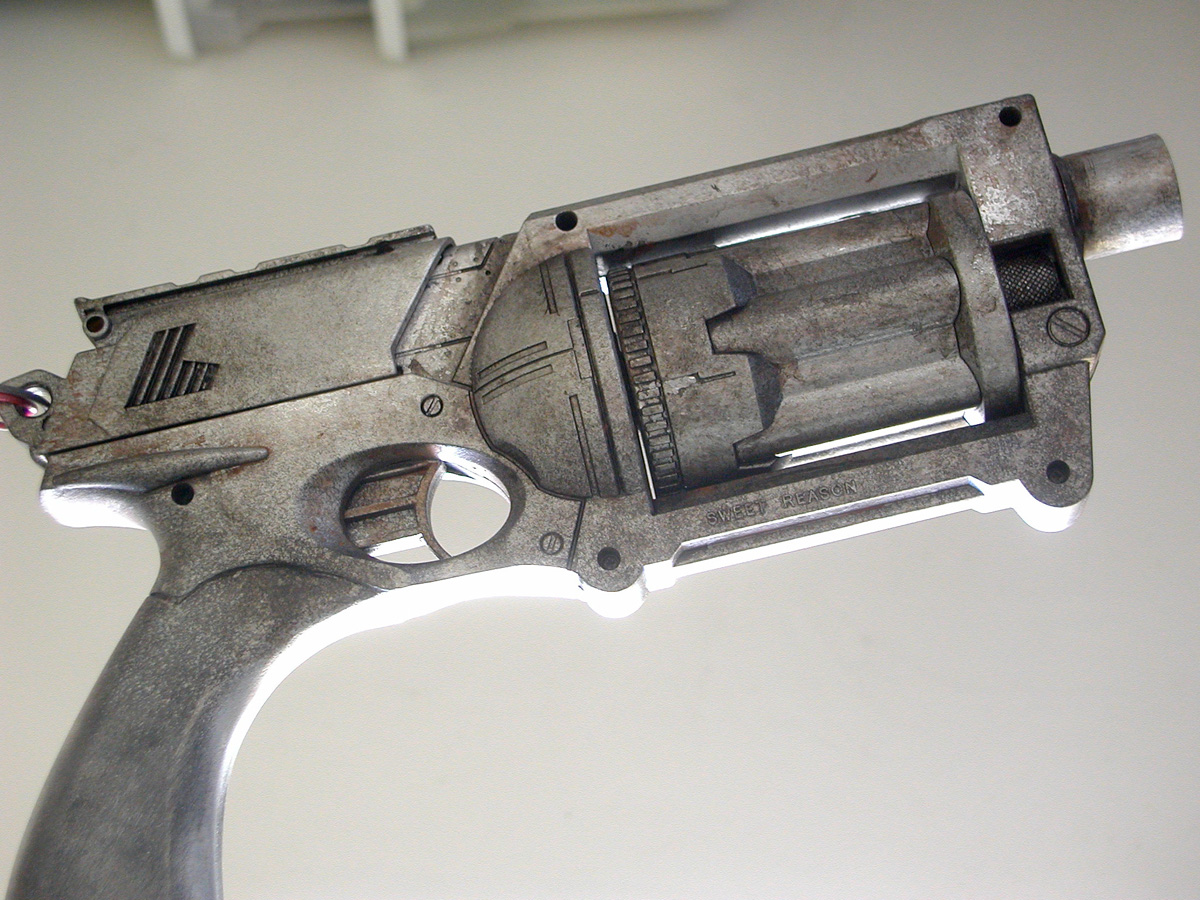
The intention was to blend it in a little by misting silver metallic back over it; this would blend in the rust tones to make it more like clean metal with a lot of history. That worked, more-or-less. It looked great, but it also looked just too silvery. A little too bright and a little too artificial.

So I knocked that down a bit in turn with black spray paint. It had been my intention to put a little black in anyhow to model the shape some -- to mist it into the deeper parts of the mechanism. But doing this sort of thing with rattle cans is a bit an exercise in finesse, mess, and often frustration. The black, in particular, had a nasty habit of spattering. Also, it took a heavy coat of black to pull the silver down towards something realistic -- and by that point, much of the color was getting hidden.

Next pass was, then, to silver back up. But in this case, with dry-brushing. I sprayed silver metallic on to a scrap of tinfoil, dipped a chip brush in it, wiped it clean on newspaper, then vigorously rubbed that across all the raised edges and sharp edges.
Had I patience, I'd come back around with a fine brush to clean up the more obvious spots and puddles, and work a last little bit of detail into the corners and deeper cracks. But it looks okay for this prop. Time to move on to wood.

Taped off the parts that were supposed to be wood. Then on to the "Star Wars Modeler" method. First, a fresh coat of black. Then, using another chip brush, lightly wiped off-white latex paint -- making sure to leave lots of black streaks.

The next official step is to mist with light brown, then a darker brown. All I had available was a mixed bag of whatever Krylon in any sort of brown that was at Orchard when I went by. And rattle cans don't mist that well. So one pass of light brown and that was enough for that.
In lieu of more brown, brought out the spotty black again (Tamiya -- you'd think it would be better behaved) and darkened the wood towards the ends, where wear would be less.
When that had set, brought out the last can from Orchard, this a reddish-brown helpfully labeled "Redwood." That was an overall mist.
Of course the Redwood hid too much of the black, and when I'd brought the black back, I lost even more of the original grain (the eggshell-over-black undercoat). But close enough. When that had all dried, follow with a couple of coats of Krylon crystal-clear.
In the morning, pulled off the tape, and did a very slight re-paint of the "metal" frame between the wood halves of the grip. Unfortunately that part seems to have missed the general spray-down, because it really should be more dark and grimy. I thought I had sprayed a lot of black in there just for that reason, and to emphasize the groove between wood and metal, but when I pulled tape it was bright silver. Oh well.
After a test patch -- and after taking the top picture there -- I gave a coat of the only non-gloss clear I have around; Blair Matt Spray Fixative. Hopefully that won't interact with the paint any because delivery of the finished prop is in.....twenty minutes.
How much will you charge to create one or two for me for my son?
ReplyDeleteI dunno how you are going to know I replied to you! Try at the RPF if you really want to contact me -- they have an internal site mail that works...
DeleteAnyhow...I'd be interested, and I'm cheap, but I'm going into Poppins right now and things are going to be a bit tight for a few weeks. If I had to get something mailed out before Halloween I could push and make that deadline, tho. Still -- I gotta honestly point out that there are people on Etsy who do NERF repaints All the Time. And they work in bulk and scour salvation army for old toys so they can be really, really cheap.
Plus they are fancy. What my circle liked about this one (and what I like) is the simplicity and utility. It doesn't have a lot of random gears glued on it. If I did another -- or a pair, even -- would probably go off the Rev6 (because they have them at Wallgreens right now), and in addition to the new grips remove the p-rail, reshape the hammer spur, add blade sights, extend the barrel to a 2". And since I'd need a pair of mavericks, a couple new cans of paint to replace the ones I've now used up, and postage for a larger package than usual, I'd want something a bit north of $100.
Seriously, consider your own repaint, tho. Is fun!