And now the Maker Faire rant.
Bay Area Maker Faire (this weekend in San Mateo) was hot and crowded. Neither are the fault of Make or anyone else. To a certain extent "crowded" is a feature; it means tickets were sold, and Make is having trouble financing the Faire already. The heat is by itself not a problem, but combined with crowds you get a lack of access to shade and water that makes the Faire more difficult to endure (especially for those of us who are getting a little older -- or for the many who are bringing little children.)
And it is a given that economics drives the event. Sales (and booth rentals) are what covers the costs. But sales pushes the Faire to be about presentation. And, as with so many things, offering distraction for kids to bring in those parental dollars gradually takes over from any other goal. Maker Faire always had an element of spectacle and an element of hucksterism, but the desire to attract crowds and to have something to offer that will cause parents to bring children means these are eclipsing other aspects.
Aspects like sharing, education, information, trading, and networking.
The rest of the rant/Open Letter below the fold:
Showing posts with label geek. Show all posts
Showing posts with label geek. Show all posts
Sunday, May 21, 2017
Thursday, June 16, 2016
Crisis (on) Infinite Tombs
If you got the joke above, you are too much of a geek to need the explanation following.
Still hopeful to have a prototype new-model Holocron up by the end of the month. I revamped the shell design again and I really, really like the "stolen" design (aka, design inspired by one of the few holocrons to actually appear in a film or animation). I cringe to think of how much time I wasted trying to get other shell designs to work properly, when I should have just gone straight to doing this one right.
But work is tiring this week. Maybe a mistake listening to fan covers of game music instead of the history podcasts I usually listen to while I'm sanding wood and sorting scrap. Means I have more CPU cycles spare to dream up more ideas I don't have the time and energy to implement.
Such as: it would be a fun challenge to try to create the title track to a Tomb Raider game that never was.
Hence the reference above to DC Comic's famously flawed attempt to sort out their canon. There are essentially four unique Tomb Raider canon. Start with Core Design. In 1996, this game company released Tomb Raider. They followed it up with five more games, with 2003 seeing release of the polarizing Angel of Darkness. But in the end the sales figures, and some behind-the-scenes creative differences, sounded the end of that sequence.
Already there are two phantom games here; Core Design saw Angel of Darkness as the first of a tightly connected trilogy. In any case, although the earlier games in particular are rather casual towards any attempt at establishing an internal canon, as the games progressed they became progressively tighter-woven.
In the meantime the two movies with Angelina Jolie came and went. Core Design and Eidos (the parent company) thought the movie tie-in would help flagging sales but alas, neither property did as well as hoped. The two movies are consistent to each other, but have sharp differences with any other Tomb Raider canon.
(It is, of course, more...complex...than that. Winston has been a constant in every game but in the movie was replaced by Hillary. Yet, the Abingdon Estate of the movie became, quite clearly, the model for the manor in the Crystal Dynamics games. And so on and so forth.)
Crystal Dynamics took over, but gave some appearance of floundering with three games of markedly different character. Legend was the first, with a cheesy title sequence and more emphasis on the action-adventure aspects. Then Anniversary, which was a remake of Tomb Raider I...Natla, the T-rex, and all. Their third offering, Underworld, surprised everyone by making both previous games canonical with each other, and tying elements of both together into a single overarching plot.
Leaving aside a parallel Game Boy title as insufficiently memorable, 2010 also saw a new console set of top-down, cooperative-play games that appear to generally agree with the Crystal Dynamics trilogy. There had also been a comic book and a few books of debatable quality.
Finally, there is the 2013 game by Crystal Dynamics. This was the first time the series saw a complete reboot, a fully conscious and intentional change to the character and her back story and the style of the games. This is a darker and more psychological turn; the confident, independently wealthy adventuress who crosses the world with twin pistols blazing is replaced by a shy young archaeologist who has to find her inner strength after a shipwreck on a rather nasty little island.
Tomb Raider (2013) was followed by Rise of the Tomb Raider and a licensed comic book kept carefully within the framework established by the company. There are also plans for at least one movie; this marks the first time the series has clearly established a canon -- a brand, really -- and made sure all available materials stay in agreement with it.
So, right. A lot of background there. My idea, such as it was, is that there was a fourth Crystal Dynamics game building on what they had done before. I'm calling it Tomb Raider: Legacy. Fresh from the events of Underworld, Lara has at last achieved closure after her encounter with the remains of her vanished mother in the Norse underworld. She has returned home to the ruins of Croft Manor.
But it turns out another figure from her past is not as dead as everyone thought. Werner von Croy, her one-time mentor, and time has not mellowed him in the least. He is as dangerously obsessed as ever, and he leads her into discovery (in the usual exotic locales, particularly the Giza Plateau, the Bolivian jungle where her father vanished, and much nearer home; Stonehenge) of some particularly dark secrets of her own family. And betrayal is sure to follow.
Just like with Anniversary and Underworld, this game would have brought elements from some of the first games -- particularly Tomb Raider: The Last Revelation -- back into canon. It also would both reproduce the "Teen Lara" section from Legend and the legendary Revelation tutorial level by having you play as Von Croy's young student.
This is yet another direction, as the game would be deeper psychologically, generally slower and rather more role-playing in style; like Angel of Darkness you'd spend a lot of your time above ground in the everyday world interacting with people.
And Troels Brun Folmann is back again for the musical chores. This is an orchestral score like Underworld but with a lighter touch; more of a chamber orchestra sound, with the ethnic instruments of Legend -- except in this case, often referencing English folk music.
Every Tomb Raider game has had a unique theme, but usually close to or otherwise audibly referencing the original haunting melody Nathan McCree composed for solo oboe. A large part of the fun of this project would be to see if I can develop a theme and treatment that seats itself within the real history of the scoring for this franchise.
So I actually turned on the Behringer this evening and spent a few minutes trying to work the kinks out of my hands. I've never been even a "good" keyboard player -- on my best day I might achieve "passable," and I'm rusty now. But it does seem to still be there.
Maybe once the holocron is finished I'll have some more time to play....
Sunday, June 12, 2016
Rudimentary what?
If a lathe can build a lathe, it makes total sense that there are scads of people upgrading their cheap T962 reflow ovens (used to solder surface mount components)....with new circuit boards filled with surface mount components. (Well, the first thing I printed with a borrowed M3D 3d printer was a spool holder for itself).
I'm already unhappy with some aspects of my new board. I plan to drop down to 0805 chip size, for instance, and (having carefully read the Design Rules at OSHPark) narrower traces packed closer together. I can probably shrink the board by half! But I'll wait before I change anything. I expect to learn quite a bit when I solder up the first prototypes, and more when I try to program them and put them in Holocron kits.
Already I have grand dreams, of course. Given one of various audio chips and a socket for micro-SD, I could actually make a "talking" holocron. And of course if some of the ideas on the new board pan out, I'll be one step closer to actually having the DuckLite marketable. Oh, yes. And back to Wraith Stone as well (already I'm wondering...can I do capacitive touch sensing if it is hung around my neck?)
Also burned a CD for dad. He probably knows very well that video games passed the chip-tunes barrier roughly the time they stopped using vector graphics. But I'm not putting together a "greatest hits." The original conversation was about amateur covers, so I've tried to pack in a good spectrum of skill levels and a variety of approaches, from people recording themselves on a camera phone messing around on the piano in their front room, to professional-level production numbers like the work of Lindsey Stirling.
The first video I saw from Lindsey, she did a nice cover on violin of themes from the Zelda series. The production values really raised the bar; exceptional recording and mixing and professional-level backing tracks that are almost seamless. And the video is of her traipsing in gorgeous scenery, with her violin and with equally gorgeous outfits based on characters from the game. But what really nails it is how lively she is, sawing away at her violin, leaping about, all with this fantastic grin on her face.
Oh, yes, and there was one of those Oh My God moments. You know how it is when you've just learned about something new, something you are just getting into, something you want to share your excitement of with friends? And you open the wrong door and suddenly there's this massive conference room absolutely jammed by people who are into the same thing and know it more deeply and more expertly and are more passionate about it than you will ever be.
Yeah, all of this discovery of amateur covers of music from video games has been like that. Well, I knew they were out there. I didn't realize just how many, how good they really were, and how popular they are. The moment that really informed me was a video from a concert of game music (with a professional orchestra and band) at the Symphony Hall in Boston.
So soloist steps up and starts singing. Giant cheer as the crowd recognizes the number ("Still Alive," of course, from the breakout hit Portal). But that's not the worst. They start singing along. A huge, symphony-hall sized audience, and every one was a better fan than I'll ever be. I recognize the tune. They know all the words.
(There's another moment in the same video that perhaps needs some setting up. The lyric is "Maybe Black Mesa? That was a joke, haha, fat chance." Well, the soloist stepped back and let the audience sing that part. And I can't help thinking that there was a certain bitter humor in their voices. Because "Black Mesa" is the location of the first game in the Half-Life series, games created by the same company who made Portal, and the long-awaited third and final game of that series is now considered by fans to be the gaming industry's greatest piece of vaporware. "Haha, fat chance," all right. There is no longer a "maybe" about Black Mesa.)
So anyhow. Tried to select a number of piano covers, and made a conscious effort to bring back some of the same themes (in the way a concerto might) by showing off different covers of material from the same games. And I tried to focus in on games I've played myself but not only aren't there a lot of offerings there but that would leave off some of the great stuff like Skyrim, the Final Fantasy series, and of course Zelda. And I shuffled and shuffled to get a good flow, building up tension and relieving it, contrasting styles while maintaining certain continuities to help one track follow another.
Tried, too, to include some of the contexting. To show the penetration of game music into church choirs and high school marching bands, the intense fan interest, the stature of acoustic instruments and vocalists and life performance and the cross-cultural world community (as contrast the possible stereotype of nerdy white guys tinkering up music tracks in MIDI). And show too the social networking, the recording and collaboration and jam sessions that take place through the online world.
What I really wish is a little more space than a CD. I have five hours of the stuff already on my hard disk (I auditioned twice that many before making even that selection, and that's barely a quarter of what turned up in my rather basic searches). But then, dad will probably turn off around the middle of the second track anyhow.
So now I just need to find the Ukulele music I promised...
Saturday, August 2, 2014
Drum party in the tomb
Random thoughts over the (loooooong) closing weekend.
We had another sub in the pit, and a couple of technical issues, and this underlines: there is something systemically wrong about how music is done in music theater. Our Music Director calls it a problem of musician culture.
Musicians are called for a "service," which works out to pretty much the length of a performance, plus whatever bare minimum to get their butts into their seats and unpack their instruments. This is why it took three weeks to get the musical to start sounding like a musical instead of a bunch of uncoordinated noises. There's no time; no time for rehearsal, no time for brush-up or warm-up, no time for sound check -- not even enough time for notes. I don't even see the orchestra until five minutes before the house is opened. It took us two days just to add a ukulele to the pit, and it would have taken a week more to get it integrated into the score.
With these sorts of time constraints, reinforcing a pit orchestra is not like sound check for a band. It is more like working at an open mic. The band walks in and they start playing, and if the mics and monitors aren't right, then oh well. And the audience suffers along with everyone else, because there's no time available to fix it. Not in tech, and not during the run.
Drummers. I think I know where our current drummer is. He's got a good balance when he tries; between the different elements of his kit, and between him and the rest of the band. But I think he is feeling constrained, if not put upon, while doing this. It isn't easy to play with control and play softly, not without practice, and since most music directors have simply given up on even asking they don't get that practice.
(After many, many poor experiences, I don't bother telling drummers they are too loud. Telling them never fixes it, and often makes things worse).
So since this is unnatural (in his mind) he's welcomes the moments -- louder songs -- where (again, in his mind, and only in his mind) he can relax and play the way he is used to.
Which sounds like shit, by the way. Not just too loud for the mix, and too loud for the space, but poorly balanced internally. His cymbals overwhelm everything else, and don't even sound like they are in time. So it is just a wash of white noise with very little musical content, and practically none of the good tone his kit has available.
I suspect to him, these are the moment when he is actually "allowed to play drums" and the rest of the show, he is putting up with something he considers wrong and awkward because he doesn't want to lose the gig.
Which means there is no hope in hell of him internalizing the necessary lesson, and no point in anyone trying to educate him. And the pity is, over three quarters of the drummers out there get the same free ride borne of the people around them just plain giving up. Leaving only a few rare ones who see themselves as members of a band.
(I really, really expected him to cut loose on closing night, because I've had that happen before. He didn't. Oh, he came up a little overall, but he was already playing close to peak in other moments, so the impact wasn't bad. And I made it a point to break my rule and thank him after the show for not going there as so many have before.)
Another cast get-together at night, at a noisy ice-cream place. And, sure, I'm missing the networking by being there. People hire people they know. Having your face out there, being seen out at the parties and opening nights and so forth, that's a job skill. But it is one I'm poor at, and I suspect a lot of techies are poor at.
Because conversation in a crowded room is a specific skill. It requires wit. You need to be able to adjust quickly, think on the fly. It is social skills, not language skills. And techies don't cultivate grooming skills. They cultivate knowledge, and knowledge can't be communicated in tweets. When techies size each other up, it isn't done with a couple of words and looking each other in the eye. It is done with a flurry of challenges and concepts and thought problems. Techies socialize over blueprints.
Different skill set. Different interests. Different comfort level. I should probably still do it, but there's an equal chance all I'd communicate to possible employers is, "Uncomfortable around others." If not an absolute bore (the kind of talk a techie likes, is the kind of talk that at a party is the guy who corners you to talk about their bird feeder for twenty minutes.)
Yes, I'm ragging on Tomb Raider 2013. And, yes, I'm in a sister industry and I understand how a lot of design decisions are not carefully weighted, carefully discussed, deliberately taken options. I understand how history can weigh on a project ("This isn't right, but we spent half our budget on it and there's not enough time before opening to re-do it.") And similar sorts of extraneous and often invisible forces that caused certain choices to be made.
I've also studied enough game design (was a Gamasutra member, read the trade mags for a year or two, and a handful of books on design as well) to understand there are subtle trade-offs being made. And, yes, what I think I'd want to play, may not be what the good and careful marketing research and playtest groups showed is what the larger customer base wants to play.
That said, more ragging.
I've been doing some skulking on my "Role Playing" pass through the game. The one where I try not to game it, but try to react as I think Lara should be reacting at every moment. Which includes running pell-mell into tight situations when Sam is in immediate danger, rather than take proper care.
But anyhow. I've been making an effort to bypass, or to talk to, the random encounters with smaller groups of Solarii. I've also been listening to their conversations more. I've yet to find a group I can actually bypass completely. The developer who said you aren't forced to fight them -- he was a total liar. They WILL spot you, and if you try to run past, they will shoot you right off your zip line.
And as for listening...
It's great that they have all these little stories. I can't fault the variety of the NPCs, especially given that they are specifically a limited selection pool; fit and physically tough, amoral and brutal men who were picked out by Mathias (and could survive his selection process). There is a surprising variety in voices and models despite this.
However. About half of the conversations end with them moving to where they have you in sight, if not surrounded. If you insist on listening to the entire conversation, you are much more likely to get killed. Once again, the gameplay is at odds with the story-telling. From a story-telling point of view, what they have to say is important. From a gaming point of view, you should kill them the moment they are in range.
Friday, June 6, 2014
The OTHER Kind of Theater Person
I was just reading the rehearsal notes from last night and, yeah, sometimes it bugs me that I don't know all these theater references (and pop culture references). I've never seen a show on Broadway (or the West End) -- heck, I've only seen a show at the Curran once or twice. I don't follow the Oscars, or the careers of famous actors or designers. I don't have the slightest what is being written today, unless I happen to get hired to work it.
And sure, some of that is just not being that interested. But it is also that there are only so many career-related hours in the day. To work technical theater, I have to spend at least an hour every day studying the ever-evolving technology map, plus constantly improving my understanding of acoustics, psycho-acoustics, music theory, electronics, information theory, etc., etc.
But the divide is of course more basic. You could see it back in high school; the techies would be the small group in the back of the cast party, still wearing crew blacks and not talking to anyone else.
Actors are generally in for a longer haul but with a smaller time commitment per interval. This means they need to be networking through the rehearsal process (and can often take on multiple simultaneous commitments). Techs and designers are on for a shorter haul with longer days. Every hour spent in tech rehearsal is a second hour of work that needs to be done before opening. For me, at least, that means I don't network during a job, or do anything other than work and sleep (and not a lot of the later, either).
Which is a good fit to what seems the archetypal character; actors are social, egregious, popular -- and they know the mainstream culture well. Techies are loners, outcasts, and geeks -- and what they know is technology.
The Venn diagram has intersect, but between the norm of each group there is no meeting of minds.
Wednesday, August 14, 2013
The Geek Cred Check
Yes, it happens. Male geeks do it to each other constantly. It's part of the fun (for at least some of us.) The problem is when it is used to be exclusionary.
And I think this is a venue thing. Makers Faire? Not cool. It doesn't matter if the person you are talking to has never held a soldering iron or a Dremel, or is Harrison Krix. Don't do it. Don't exclude. Don't assume. Don't talk down.
Same thing for anyone -- for everyone -- at a convention, be it Dungeons and Dragons, Comic Books, or whatever. They paid the price at the door, they made time on their weekend to come out? Then they are part of the club. That is what that venue is there for. It is for everyone to enjoy, regardless of whether they can name more than one Green Lantern.
But way off in another corner, there is tech. It is one thing if you are sizing up someone just because they happened to mention Arduino in a social setting. But it is another thing entirely if you are working, and the quality of the show may depend on that person actually knowing what it is they claim to know.
Every place I've done audio, or theatrical lighting, I've had to play the lock antlers game. I've been the one defending myself just as often as I've been the instigator, too (I tend towards a lighter touch when I'm probing a co-worker's abilities.)
I need to say more here. I've been on a job more than once when a hotshot has tried to take over, shunt me aside with a, "Since you obviously don't have the l33t tech skillz I do, we're going to do it my way." And that's when I go into full riposte, pulling up tech specs and factinos and, if I have to, cutting them off at the knees in the process.
And, yeah, my ego is what causes this, but I also have a belief that I know my stuff and know what works in my theater, and it would be bad for the show for someone who is only trying to show off to go around changing what works, fixing what wasn't broke, and basically putting us in a place where we can't get the show up on time.
Especially when the antler game reveals a deep and entrenched Dunning-Kruger on the part of the person who is convinced the best thing to do is rip it all out (without even looking at what is already there) and start from scratch the "right" way.
And, yeah, this sort of locking antlers can be fun sometimes. I've done it over tech, over science, over the few SF or comic book properties I'm actually interested in (not that many, really). And even over history -- my best friend is a history buff with an incredible memory and I just HAVE to throw in a, "The world wonders?" every now and then just to show I'm active in the conversation.
As I'm thinking about it, I think part of the deal is that geek cred in a specific subject is not the same as having basic geek creds. It's like a one-point skill versus the 10 point all-skills. And the problem is, if you are a white straight guy who isn't too obviously into sports, you pretty much get the basic cred for free.
I can cheerfully admit I stopped reading Marvel just about when Power Pack moved to NY, and to me Jean Gray only came back once (as the Phoenix). I can ruefully admit I don't grasp object-oriented, and I only do a little bog-standard C. I can own up to never having hooked up a ribbon microphone, and having no time in a real studio. But none of those admissions make me not a credentialed geek. They just mean I don't get credentials in that specific genre.
And this wouldn't be the same if I were female, a person of color, or some other convenient "other." Where the assumption of geekitude isn't default, and I'd have to do the antler thing just to be accepted as having an expertise in something.
And then, of course, since the entire point of the exercise is exclusionary, sorting the us from the them, were I that "She's one of them fake geek girls!" person failing even one of the spot checks is counted as failing the entire exercise. As that pre-supposed other, I would not be allowed to shrug off a question with, "Never read DC, never got into MLP, but I know the Whoniverse up down and sideways."
And, you know, I'd like to think the tech and Maker communities are better than this. That we could instead embrace the diversity. "You don't solder, but you know how to sew? Hey...maybe I could learn something from you."
But it has to start with not doing the credential thing anywhere other than on the shop floor, where power tools are spinning (or on the grid when a show is opening in three hours).
Or, rather, not doing it in a, "Prove yourself to my standard or I'm going to kick you out of the club."
Tuesday, February 19, 2013
Back to Processing
I'm moving away from hardware MIDI.
9/10 of the time, the MIDI signals generated by my various gadgets are going into a laptop anyhow. And as I gain confidence in programming, I think it is easier to write client-side software than to try to do everything on the embedded processor of a black box.
This seems like it is going to be the form of my DuckNodes. On the Node end, LiPo battery and charge circuit, monitor/feedback LEDs, XBee. On the master end, Xbee node with FTDI adaptor plugged into a USB port -- and the rest is software.
 Sure, I could dress up the receiver with some indicator blinkenlights. I'm also tempted to make it in the form of a Diesel-Punk USB stick. The first show I did using software at the receiver end, I stuck the receiver XBee inside a rubber ducky -- a yellow plastic bathtub duck -- to protect it.
(That's the actual hardware in the picture there; one Xbee inside the television remote, one inside the duck, with the latter connected by USB cable to the Processing sketch visible on the desktop.)

This is a bad time for me to be buying parts. So this will have to do to construct the prototype DuckNode; a Modern Devices accelerometer, XBee (not XBee Pro), and AAA batteries. I need to read up on the chip, though, to find out the voltage tolerance and so forth. But for the nonce I'm working on the software layer, and for that my XBee-equipped Easy Button is sufficient.
9/10 of the time, the MIDI signals generated by my various gadgets are going into a laptop anyhow. And as I gain confidence in programming, I think it is easier to write client-side software than to try to do everything on the embedded processor of a black box.
This seems like it is going to be the form of my DuckNodes. On the Node end, LiPo battery and charge circuit, monitor/feedback LEDs, XBee. On the master end, Xbee node with FTDI adaptor plugged into a USB port -- and the rest is software.

(That's the actual hardware in the picture there; one Xbee inside the television remote, one inside the duck, with the latter connected by USB cable to the Processing sketch visible on the desktop.)

This is a bad time for me to be buying parts. So this will have to do to construct the prototype DuckNode; a Modern Devices accelerometer, XBee (not XBee Pro), and AAA batteries. I need to read up on the chip, though, to find out the voltage tolerance and so forth. But for the nonce I'm working on the software layer, and for that my XBee-equipped Easy Button is sufficient.
Monday, July 30, 2012
Run, Robot
Consider this post a re-visit of my "Theater Should not be a Hackerspace" rant.
I'm in the middle of the run of a very complicated show that was thrown together too fast on too small a budget, by a company that has fallen in to a pattern of doing that. The props and effects, some of the costumes and set dressing, and other basic technical elements are held together with gaff tape and hot glue.
My robot is one of these elements. Although I spent the money and did the research for a robust chassis and control linkage, what we had time for is a $40 R/C car chassis carrying the lightest extruded-foam body I could build on top of it. Even a fiberglas shell would be too heavy for the undersized motor -- and at that, I had to tighten the suspension with a few strategically-placed zip ties.
It has managed to survive running into scenery a few times and being kicked by actors more than once. It only failed to make an entrance once in the run -- due to the antenna on the transmitter being snapped off thus limiting control range to about two feet. That required a last-minute frantic repair with brass tube, epoxy, and a quickly-soldered wire to bridge the gap.
The lights also failed once -- in the same performance the projector douser failed -- and this is exemplar of what I was talking about. There is a real difference between a "hacked" solution that will last for a quick shoot or the first day of a convention, and an engineered solution that will work reliably through a five-week run.
The best thing I can say about the douser is that it was already built. I had to rip off the flag and epoxy up a new one to fit the particular projector, and I had to modify the software to use an external switch instead of an external button, but that took under an hour. The rest of the servo housing and power supply and software and so forth was already built.
If nothing else, this proofed the concept of having ready-to-go solutions. My Duck Remote is the same; the XBee solution was already built and programmed and all it took to get to technical rehearsal was cramming the electronics into a different housing. (On the other hand, I did spend several days making a different software solution so as to simplify the hardware end -- and that only partially worked). But as robust as my devices are, they still fall short of the reliability I desire.
I don't at this point know if the douser fouled, overheated, or if the servo needs to be lubricated, but it failed once and the servo is visibly and audibly sticking at one point in its travel. Probably, if I simply swap out the servo for a new one it will make it to the end of the run without further failures, but that underlines the point. I simply can not trust it to keep working for an indeterminate amount of time. And I lack knowledge on how it failed, thus I can neither change it so it doesn't fail, or even predict mean time till the next failure.
In the case of the robot, I do not know why the lights failed. In establishing communication with the onboard Arduino to interrogate it over serial monitor I reloaded the software. And it started working again and hasn't failed since. So I don't know what happened. The only suspicion is that somehow the software got corrupted. But it is also possible that it doesn't always boot up correctly, or that there is a loose connection that fixed itself while I was jiggling the unit to get access to the USB port.
Again, I don't know, so I don't have any way of either fixing it or predicting when it will break again.
On the gripping hand, of course, commercial devices fail all the time. We have a gobo rotator in the show which has failed in most performances. One of the bubble machines already quit. So for all the jerry-rig aspect of my robot, it has shown to be doing a more complex job in a more reliable way.
And of course all these devices are leveraging existing commercial modules. XBee modules and the Zigbee protocol and the underlying 802.15.4 standard. Servo motors, with gear trains and position sensors already integrated. Arduino, of course; that artist-friendly open-hardware, free software embedded computing solution. And even the lowly chain-store R/C car, building on decades of experience building playable remote-control toys.
As I implied earlier, the costumes are coming apart, set decorations are peeling off, props are breaking...my electronics are nowhere near the least reliable elements in the production. But in a larger perspective, all of these are also hacks. Making costume pieces with unusual and often untried materials, making props with re-purposed materials, and so forth. Theater is always about making things work outside of their usual context, and replacing what can't be afforded (or carried, or whatever) with something else.
Every kingly palace with marble floors and gilded throne is of course cunningly painted plywood. The jewels are resin-cast, the swords pot-metal, the armor is vacuuform plastic reinforced with medical cast material (aka celastic). The rocks are made of expanded polystyrene foam.
What the key lesson is, is that it isn't about the technology; it is about the process. Too much in a production like the one I'm currently mixing depends on guesswork about poorly-understood materials and processes, and risk-taking that these elements will function from night to night.
Theater does not need fewer hackers. What it needs is more engineers.
(It also needs to schedule the time to apply an engineering process. As an area set designer once put it, if whatever improvisation you've done makes it through dress rehearsal, the show will close with it. There is never time or energy or money to come back to something that works -- even if poorly -- and rebuild it. But engineering a solution requires a cycle of development and testing. The only way this really happens in theater is over the length of a season, or a career; what worked once, is refined and improved for the next show down the road. What is lacking, though, is still the analytical approach to finding out the parameters of why it worked when it did and describing the envelop of where it won't work. To do that you need more than simple empiricism.)
Wednesday, July 18, 2012
The Man Who Mistook His Mic for a Hat Stand
I'm using a mic for a hatstand. Sm58 in a straight round-base stand. Works pretty well. The PA just came back from a gig and there's no room in the closet to store all of it.
Doesn't help that the robot worktable is still set up and I have carving foam, paint, plastic bits, and of course electronics strewn around. I really need to move some projects from "in progress" to "done and can be put on a shelf out of the way."
Lacking the time and space for that, I'm putting more things in boxes today. So at least the half-done project has all the essential parts collected in one place. One such (large) box is filled with vacuumform Lewis Gun. Which spills over into another box, which also contains grenade spoons and other parts to build some prop smoke grenades.
On the table is the camera head we didn't use for the robot. I'm half-tempted to keep it. And instead of pulling out the mini servo, program an AVR to do random moves.
Actually, if I was doing random robotics that had any connection to the show I just opened, I'd be putting proximity/movement sensors in a basic servo to build a couple of what the BEAM community calls Head-type Squirmers. And then I'd put a big foam-core cube on the servo and paint it up like a candy. Which is to say; I'd be building some "Square candies that look 'round."
It is awfully tempting. I have all the hardware here. If I skipped active tracking and just had pre-programmed behavior linked to a simple IR proximity sensor.....
Argh! My goal for today was actually to log hours in element repair. I'm getting paid for that, at least. And I need some spares for the weekend. The other goal before the next weekend of the show begins is upgrades to the robot. And with my Vex apparently dead I was going to leverage the two new XBee nodes I just picked up.
The second test was going to be -- hopefully still will be -- trying out direct mode for control of a servo. I've seen it done as a demonstration at Makers Faire. Apparently the PCM output of the analog pins is close enough to drive an un-modified servo. And all you need for the transmitter side is a potentiometer. Of course, adding a couple trim resistors/pots would be smart.
I still prefer -- especially for something as fragile as my robot -- to set the servo limits in software. And this also means that if you are transmitting power on/power off signals to the lights and wireless camera (which draws power from the 7.2 nicads in the chassis), you can transmit a single "toggle" command instead of having to depend on continuous transmission of either the "on" command or a "kill" function. Plus, the eyes were wired with six high power LED's each in 3 colors, and with a micro somewhere in the signal chain you could command these to color mix or to chase.
All I really hope to get done by this weekend's shows is adding a camera and light kill switch, though. Which I can probably do with no more than my existing XBee nodes and the "Really" (aka "Relay") board I purchased from one of the Kowloon-based electronics suppliers via eBay.
The coolest way to do it is, of course, with full serial. Although I/O line passing on the XBee nodes is near-transparent and simple to set up, establishing a serial link gives a more robust link and a practically unlimited command set. Plus, of course, having client-side intelligence means you can program the thing to operate autonomously between commands. On the server side, set up an Arduino/AVR and wire that to buttons and switches. Or write an application in Processing and put in virtual buttons and switches/monitor keyboard and mouse.
This is more of the sort of thing I taught myself about "naked" AVRs for, so I didn't have to waste a whole $28 Arduino on an embedded application. But I'm not fluent and practiced enough with them so I can quickly write some serial data routines for the built-in UART and upload it to a 45-cent chip. It might only be basic C, but straight C is worlds away from Wiring (aka Processing/Arduino) wrapped inside that handy IDE. When you are programming for micros, you lose much of that layer of abstraction between you and the metal -- "Serial.print ("hello, world");" begins to look a lot more like "PORTB |= (0 << 2);"
Well. Maybe if I can get stuff boxed and the table cleared and XBees show they have the right firmware and the servo responds...I might hook up the IR proximity detector I have and see how fast I could make a "square candy that looks 'round."
Tuesday, July 17, 2012
Vexing
Ah, the joy of embedded computing -- when you are debugging you can never be sure if it is really a software error or if it is a hardware problem instead.
The two worlds blend into each other, too. Often the simplest "test circuit" is dashing off a quick program that will interrogate the inputs or run through a preset motion on a servo. So you find yourself working at both ends at once; with breadboard and alligator clips and double-stick tape on the desktop, and a couple feet away, similar commented-out and patched together boilerplate code running on a laptop.
I have three gadgets in performance right now. My XBee, in a new housing and with a new software interpreter, is in a children's show. Amusingly enough, the Easy Button it used to be in is in another show, sans electronics. My MIDI-controlled projector douser is in its first show, and is a visible lighting effect. The MIDI circuit is being bypassed, though, making it basically the world's most complicated solenoid. Good thing I included a quarter-inch jack for direct control (although I had to tweak the software to use it for this show). And the R/C robot with wireless camera is also in a show.
And it needs work. The transmitter is barely strong enough. The wheels and motors are so weak I'm scared it is going to stall out in the middle of a performance. And I could really use remote switches for the lights and camera. The latter, at least, I could hack up pretty fast with one of the new XBee nodes I just ordered. Pretty much a button and a Darlington transmitter and that old friendly pin echo mode would do it.
Which I may need to. I spent today trying to get the Vex transmitter I purchased to communicate with an Arduino. At this point about all I am sure of is that the receiver is getting power, and seems to put out at least one pulse distinct enough to trigger the Arduino's interrupt. Other than that, no joy.
For the first time in the two years since I got rid of it, I could use that old oscilloscope. I can't confirm that the receiver is actually working correctly, or seeing the transmitter.
The alternative (outside of ordering a second one and seeing if that one works better) is to delve a lot deeper into the Arduino PCM capabilities. Basically, write a series of sketches to confirm that the receiver is actually sending something like protocol. And then either go back through the code I've been trying to use, or write new code from scratch.
And I still don't know if the other end -- interfacing with the Futaba ESC and the steering servo, or even interfacing with the LED controller darlingtons -- will be as easy as hoped or will bring yet another software/hardware debug.
There isn't THAT much time this week. I have to re-do some sound cues and repair a whole bunch of microphone elements, plus I should really make some new mic belts. And I have a multi-track mixdown to do. And, after all that is done, it would be very, very nice to do some work I'll actually get PAID for!
Looks like it was a hardware error after all -- and not on my side. I hooked up a speaker and I don't seem to be getting regular tone bursts. I hooked it up to the Vex CPU and the Receiver Status light doesn't light. Still not as good as hooking up an oscilloscope, but I'm willing at this point to drop the $40 on a replacement receiver. Except that I am flat broke again (the current design is paying in installments) so I can't do that until the end of the month. By which point the show will be almost over.
Tuesday, February 14, 2012
Testing, Testing
I enjoy language. So here are a few more bits and phrases I've found useful -- these ones on the subject of testing.
Smoke Test: This is when you turn on the power and see if it smokes and catches fire. If you are really unsure if you configured things right (such as, perhaps you reversed the polarity on the power leads) the more refined trick is to turn it on for just a moment, turn it off before the magic smoke can leak out, then gingerly touch the most sensitive components with a bare finger to see if they are heating up.
A smoke test won't tell if you if the circuit works. But it will tell you if the circuit is broken. But please remember to always mount a scratch monkey!
Sanity Test: more commonly in the form of a sanity check (and I'm sorry to say, but there ain't no sanity clause), this is any sort of trivial throughput check or checksum or order of magnitude calculation; instead of the painstaking check of every line of code or engineering calculation, this is taking the simplest and most obvious check that will reveal that all your elegant math foundered when you multiplied instead of dividing in step 2.
This is why smart DIYers don't spare the blinkenlights. A few LEDs (or a few serial.print comments in a code) can tell you that what you intended certain parts of the circuit to do, they are actually doing.
In sound, a sanity test is done by ignoring all the nice microphones and nifty speaker processors and all of that, and just seeing if you can get a simple CD to play through the house speakers. If you can't, you shouldn't be wasting time setting up delay chains just yet!
Plugs-Out Test: I first ran into this phrase in regards to a terrible accident in space history. But let that not stop us from the idea of removing the umbilicals, and seeing if the device will still run on its own internal battery, without the connection to the ISP, and with the cover of the enclosure screwed down.
Proof-of-Concept: Not usually called a "test," this is similar often misunderstood by those who observe them. The proof-of-concept is done entirely to prove the plausibility of the idea -- it is in no way a test of the actual hardware. Indeed, you substitute, you breadboard, you mock up; whatever you have to do to get the thing to work, even for just a second or two before the tape falls apart.
Solderless breadboards, alligator clips, double-stick tape are your friends here. Simulated signals, simulated outputs. It doesn't matter what it looks like; it matters that it works, even if it only works once.
Coffee Test: This is the test of whether you are awake enough to write code or operate machinery; can you make coffee without doing something mind-bogglingly stupid? I grind the beans, brew hot water in a teapot, and pour it through a gold filter to the mug or flask for the day. This provides plenty of chances to prove I'm not awake yet. Today, I put on the water, cleaned the filter, and ground the beans. I finished just as the water began to boil so I quickly rinsed out the travel mug...then proceeded to carefully fill it with boiling water.
Other times, I've skipped the filter or the coffee entirely. The best day of all, though, was when I was still living in the Haight-Ashbury. I carefully filled a clean mug with milk, then proceeded to add coffee grounds to it. I remember watching the black flecks slowly sink in the full mug of milk and wondering what exactly was wrong with that picture.
On a more serious note, there are a couple more test concepts that are worth adding.
Test-in-Place: Especially with RF gear, funny things happen in the actual location where you mean to use the thing. So it isn't properly tested until it is in the room it will be used in. Better yet, it should be in rehearsal, or in as close to performance conditions as you can manage.
Acid Test: This is when you create a worst-case scenario and see if the thing survives it.
Test to Destruction: Unlike the above, this is when you intentionally fail the unit to find out just what it takes to break it.
The Big Easy
I am still throwing around ideas for dedicated Qlab control surfaces, music performance controllers, and linkage systems to allow sensor-driven sound effects, cue-driven servo events, wireless connectivity, etc.
Many of these options currently exist commercially (or semi-commercially, as in open-source kits), but they generally have two flaws; expensive, and fiddly. I'm thinking about robust dedicated systems; things with few visible controls and sealed enclosures that can be handed off to Stage Managers or percussion players or actors.
The trouble with figuring out the functions, and the form factors, of said things is the applications themselves haven't been adequately explored. There are so few options now for controlling sound effect playback from the orchestra pit, or linking a door opening sound to the physical door, or triggering a mechanical effect from a software cue package, that experiments aren't happening.
The design team is unaware of the tools the digital revolution makes available, and before someone like me gets a chance to say "I've got an Arduino-based gadget that can do that," the effect has either been semi-solved with traditional methods, or abandoned as being too difficult.
By the time you get up there and tell them the clock on the wall could easily point at a specific hour via a servo triggered by the lighting cue that is already taking place in that scene, everyone has become so adjusted to the idea that there is no practical way for the clock hands to move they reject the idea as being unnecessary.
I not too long ago went through a hellish sequence of trying to coordinate a slide projector, lighting cues, and sound cues -- when it would have been a one-day hack to control the slides from either of the previous, using DMX or MIDI or even assigning the "advance" button to a non-dim circuit.
In the long run, what I want is plug-and-play; to define a narrow subset of functions and make a device that just does that. One of the tricks to achieving that is making these devices cheap. I can't waste a full Arduino or worse on a single button. I need to work with a bare-bones purpose-designed board with no more than a cheaper AVR on it.
But until the point that tasks have been identified and the use of a digital system tried out in production, what I need instead is more of the experimental breadboards. Or, rather, the next intermediate; things with fewer dangling wires and software peccadilloes than what I have now. Yet, at the same time, devices that have more and more test bed functions on them.
Xbee networks. High-power switches and motor drivers. Sensors.
Which puts these devices in the horrible position of being development platforms in nice boxes with bland faceplates...so less-technically focused end-users can use them and not get scared.
Still, as part of the development I just need to have more building blocks already worked out. I need experience with Xbee links. With sensor conditioning. With motor drivers and high-power switches.
At this point I've generated only two specific applications, and they are so different there hardly seems to be a way to integrate them cleanly. One is the gunshot transmitter. The other is the dedicated Qlab controller.
The former is fairly easy to parameterize. The idea is that prop guns don't normally make a sound, and blank-firing conversions or starter pistols have a host of difficulties that make them less optimal for many productions. My test case was this; I gave the actor a key-fob radio transmitter, and he hid that in one hand, pressing the transmit button simultaneous to squeezing the trigger and jerking back on the prop gun.
The form I imagine is something that would clip easily and non-destructively to almost any prop firearm and detect the motion of the actual trigger via opto-interruptor or similar. Then a transmitter with a compact form factor would send a message out to whatever sound playback software is in use.
Possibly a better form is a butt squeeze -- this could be used on props that didn't have a functioning trigger -- but that would take more calibration.
Making a transmitter small enough to clip to the gun itself without it being visually distracting would not be easy, however. So you'd want a beltpack type transmitter, and a wire running up the arm. And then you have the problem of connecting...
Actually, I just had an even better idea. The "Trigger Finger." Use a bit of flex sensor in a flesh-colored finger cot. Run the wire under the sleeve back to a belt pack. In use, all the actor does is curl his finger sharply as if pulling a trigger. The sensor conditioner detects this and fires off the signal via the wireless connection. Aka it is a one-finger, no wires version of a data glove.
Because of the wireless link this is unlikely to be a cheap system. Of course, if one had spare wireless microphone packs around one could re-purpose one by sending a DTMF-type tone through it. But I find it is simpler to stay in the digital domain. A 424 MHz radio link gives you only enough range to get to a receiver planted on stage, but it is cheap. If you built the sensor conditioner and radio controller around one of the smaller AVRs, you could have a fab house run off a through-hole board that was barely the footprint of a 9V battery.
Alternatively, an Xbee or similar, though more expensive, can be eventually part of a complete Xbee sensor network. But as long as you are putting fifty bucks of computing and radio hardware in the belt pack, plus the cost of the housing itself, you'd best add battery charging and management as well, plus system monitors. Which brings us up to a multiple-unit kit cost in excess of $100 each.
So...I was wrong. The application is well parameterized, but the solution has not been properly designed yet. And even in prototype form, way too much fun not to try to have built by the next Makers Fair.
(Actually, the show I've got coming up includes a chainsaw that won't be practical but should sound like it works. In some other universe I'd be playing around with Kinect or Wii remote ideas to make the sound follow the prop...but for the flow of this show, a canned sound effect will be just fine.)
(I almost forgot an alternate strategy. Instead of going wireless, go light. Basically make a laser tag device, only with a bigger fan-shaped beam. If you want to be really clever, squirt a coded series of pulses like a TV remote does. Otherwise just tune your sensors. The cute idea...although it is of little use in the highly-rehearsed world of traditional theater...is that the gun can trigger multiple sound and/or practical effects by aiming at them in turn. It is possible existing laser sights could be re-purposed for this.)
((And as long as you are being silly, an infrared laser finger could serve -- so could a Wii remote -- to allow a person to play Tim the Sorcerer and trigger effects as he or she pointed at them)).
Anyhow. One of my flaky-pastry-item-in-the-stratosphere desires has been to wire up a Sonic Screwdriver prop with useful functions: Radio link to fire sound effects without having to go back to the sound board (very useful for a quick listen-through, checking stage monitor levels, troubleshooting, etc.) Laser pointer for explaining to crew which speaker is which, and also for use in rough-aligning speakers (I use a crazy device I call the tri-laser now; two laser heads glued to a carpenter's framing square). Emergency flashlight, which in the nature of such things is likely to be used far too often and run down the batteries all the time. Oh, and I'd love to have an SPL meter, a polarity checker...but by this point the device would be considerably larger than a tricorder and that's the wrong TV show entirely.
The other actual parameterized idea is the dedicated QLab controller. There are twin aspects to the application; the first is that while the "Go" button works fine, jumping or repeating cues requires hunting around on the keyboard, and editing cues puts the "Go" function out of focus. MIDI is always "focused"; even if you have hidden the QLab application and are working in a different one altogether, a MIDI "Go" command will work.
The second is that often booth or sound board space is limited. You can't always put a laptop where you can reach it easily. I'm actually quite fond myself of using a keyboard -- usually a battered old Korg Nanokey -- to control Qlab without having to have the laptop within easy fingertip reach. But I think there is a bonus, especially for less technical people, in having a small-footprint controller with big hardy buttons labeled with the universal standard "tape deck" symbology.
Actually, I just thought of an answer to a caveat I've had...the problem with remote use is you really, really want to see the computer's screen and know you are about to fire the right cue. However, nothing says you couldn't hack in a simple character LCD display showing "next" and "playing" cues. Since Qlab doesn't normally care about that, you'd have to leverage something like the MIDI or DMX functions and spend the time to add and write out special "invisible" cues that would send messages back to the remote console. So not really that elegant a hack!
A more complicated but satisfying routine might be to install a full graphic LCD...but then you'd have to both get that to be recognized by the laptop's video out, and drag the right items on to the resulting window.
Anyhow.
Today, I am going to stop by Staple and purchase one (or more) of their "Easy" buttons. This will be my next proof of concept. I have already a few options in arcade buttons and the like, but I'd like to try wiring up this as a big red "Go" button. Or a "fire the sound" button for orchestra pit.
In the development form, just use an Arduino to spit MIDI or MSC. Or use my AVR-USB development board to spit out an HID-standard "space bar."
In the next ranging, figure out how to do MIDI on a naked AVR, or even bit-bang MIDI on one of the ATtiny's with no UART (which is really just an exercise in clever...there is no good reason not to just use an ATtiny45 instead). And then, figure out how to do MIDI-over-USB....HID is relatively easy (or so I am told!) but MIDI-over-USB is a tougher trick.
The ultimate controller form would be USB-powered and USB-linked, with some degree of feedback (at least lighted buttons) and a minimal display to allow entering program mode and changing the system defaults (such as, switching to MSC protocol).
Anyhow. Swartzbrot awaits. I'm off to run errands.
Friday, July 1, 2011
Running on (Soldering) Fumes
I'm a bit under the weather this week. Did get a lot of soldering done, though; repaired...
Two laptop computers
A power supply for same
A pair of headphones
A half-dozen wireless microphone elements
A portable heater
Just got some more parts in the mail and the next half-dozen wireless microphone elements are on the table. If I can find time around making microphone bags, creating sound effects, setting up speakers, programming the sound board...
As I struggle to make the new novel move foreword, I realize the DIY philosophy is important to me, and is going to be a part of it. Heck...the protagonist of my first novel was a machinist, and even though it wasn't that kind of story she managed a couple of nice hacks (including a McGuyverish improvisation at the climax that almost got her killed but ended up saving the day.) And this works in with my desire to show some of the Bay Area, where I live, and some of the circles of people that interest me. Maker's Faire. The Crucible. Boutique stomp-box makers. Luthiers and Early Instrument builders. Experimental music.
Theater is after all my vocation and there has always been an element of improvisation and re-purposing and dumpster diving in it. It is not at all unusual to have to do something that properly belongs in a trade or craft -- bending wrought iron, painting in oils, running plumbing, making hair appliances, etc. -- and not having the funds to get a professional. So we end up being self-taught stitchers, electricians, welders, woodworkers, and so on. And not infrequently a show will bring you in contact with new materials and new skills you have to pick up (usually quickly!)
I am not up to writing an essay on the DIY philosophy right now. I've got a cold, collapsed on the sofa after a meeting and only woke up because I am starving. I have until the saffron rice is ready to write this.
But let me try to share a couple of things you should have to be a Maker.
1) A careful confidence. You start with assuming the thing is possible. That you have the mind to learn the skills, that your fingers are sensitive enough to carry them out. The more different kinds of things you learn to do, the more this confidence that you CAN pick up a new skill will grow.
2) I said "careful" for a reason. You also need humility. You respect that there are people with skills and you commit to learn from them. You also must have a healthy doubt in your own ability. Recognize your limitations, recognize your comfort zone, and more than anything else be aware that many of these things can maim or kill you. It is not saying too much that you must assume there are hidden dangers you haven't even imagined, and you treat the process with respect and look for mentors to try to show you where those dangers are.
3) Look forward to failure. Many people never attempt things because they don't want to fail. Many people will hang on to a broken thing, never daring to try to fix it for fear they'll make it worse. Word; if it don't work, and it's too expensive to take it to the shop, YOU CAN'T MAKE IT WORSE. You can't get less than useless. At the absolute worst case you will still learn something from opening it up (even if the thing you learn is "Hey, those things can't be repaired, can they!" Be aware of failure, be prepared for it, intend to learn from it. Maybe the first throw will be awful. If you studied why it went bad, the next throw is merely bad. And, eventually, you either make a pot you like...or you realize pots aren't for you, but in the process you've added more general knowledge and manual dexterity. Which brings us to:
4) The more you do, the better you get. You will never be perfect. You will never know it all. Start small if you can, work up. With each project you will not only get better, you will become a better judge of how big a project you can attempt.
And this essay is already longer than I intended, but some examples from this week:
The power supply. It had a loose wire. It sometimes worked if you jiggled it. It was long out of warranty, and expensive enough to be worth investing a few hours trying to repair. The fact that it sometimes worked meant that, in all probability, it was all in good working order (except for the one loose connection.) So the first step is, as with all repairs, crack the case and look inside.
I don't think that case was supposed to be opened. But since it was broken already, I couldn't make it worse. I took a razor saw and cut it apart. Inside, the problem was nicely obvious; the plug wiggled, and there was a nasty black mark of the sparks from a loose connection. Clean with some emery paper, re-solder, squeeze the case back together along the cut line, and drip CA glue into the crack. It may not look quite as nice, but it works as well as if it just came from the factory.
Actually, better. While I was inside, I slapped a meter on it and verified it put out 24 VDC in operation. Looked up the right ballast resistor and purchased a bright green LED. Soldered up the LED and confirmed you could see it through the case when lit. And soldered it inside before sealing the case. Now the power supply has a light to tell me if it is plugged in or not.
Headphones. One muff stopped working. Manipulated it, and it worked for a moment then stopped again. Again, obviously a loose wire. Plugged them in, turned up the volume, and carefully felt along the entire exposed wire that went from one side to the other. The bad spot was inside a swivel. Fortunately, I have a bunch of scraps of similar wire around from repairing all those wireless microphones. The only issue was feeding the new wire through all the little plastic parts.
Heater. Stopped giving heat, but the fan still works. Had a three-position switch; fan only, low heat, high heat. Pulled it apart. On visual examination the heater element looks fine. No loose wires, no discoloration. Traced the circuit; the thermostat and safety switch are "upstream" of the fan. That is; there is nothing specific to the heater element that might be broken. Except for the switch. So as an experiment, cut the wires and wired the element in parallel with the fan. It works. So went back, spliced the heater on to the first switch position (I don't need a "fan only" setting anyhow) and boxed it back up.
Laptops. My working laptop went dark suddenly. Tried to restart, wiggled the power cord. Magic smoke came out. This is not a good sign. The thing about the laptop is, I worked my way up to it. I did RAM a long time ago -- that's easy. Getting to the HD is a little tougher; you have to open up the back. Swapping the optical drive was next; that's even more connections you have to remove. Each time, you see, was a small step beyond my current comfort level.
Popped the keyboard and, yes, a nice scorched area on the motherboard and several of the SMD components are toast. This is not going to start again. Assuming the HD and other parts are still good, I went on eBay and found a "stripped" laptop of similar model (no HD, no RAM, etc.)
Swap the parts over, including my good optical drive. Lights up, goes into boot cycle but can't find the drive. Hrm. Stick a boot CD in. It boots. Drive is still invisible. Pull the drive, stick it in an external case. Drive reads good. Just for a lark, see if the laptop will boot from the external drive. It does. Stick it back in. No boot. But now there's an error message, and the system profile has an unknown device on the SATA bus.
Pry the drive out again. And THIS time I notice the other side of the connector, on the new mobo, is loose.
So I tried to re-solder it (and I am NOT set up for soldering SMDs). No joy, but remember...it doesn't work, and I really can't make it worse at this point. So back to eBay, order a new mobo, and stick the drive back in the external case again to boot from that and rescue some files I needed to work on.
New mobo shows up. Now I'm really out of my comfort zone...have to pull and swap a laptop motherboard. But as it turns out, it is just like a drive....just even more screws, even more connectors, even more little things that get caught and have to be carefully wiggled free. The boot CD is still in the drive and when I power up, it boots from that. But still no HD!
At this point I'm firmly in repair mode, though; I booted with the back off, half the component still uninstalled, and bits of sticky tape holding it together in lieu of putting all those fumbly little torx screws back in. So...the one thing I haven't swapped recently is the bit of cable that leads from the HD to the mobo. I swap this. It boots! Finish the smoke test, box it back up.
And since I've got a pretty good idea what's going on now, I stick the mobo from the second computer (the one with a busted SATA connector) into the original laptop (the one with the charcoal-colored motherboard from which all the magic smoke has leaked). Stick a spare HD I have lying around into the external case...and after some struggled, convince the boot CD to install a clean system on to it. I promptly christen the reborn laptop "Ood Laptop," as it is now carrying its brains outside its head, on the end of a gray USB cable.
And it is now time to eat.
Wednesday, March 16, 2011
It's Alive, ALIVE...!
Well...at least it has a pulse.
I made a little more progress with AVR programming; now I can run a timer in hardware mode, without a single line of program code (even an interrupt). Right now one of the last of my working chips is pulsing an LED; Timer0 is hardware driving the pin directly in PWM mode, but a routine running in the main() program loop is incrementing and decrementing a value to smoothly brighten and dim the LED over time.
But I'm not going to talk about that. I'm going to back up, because I realize I skipped over some of the basics of programming an AVR.
Start with the Arduino.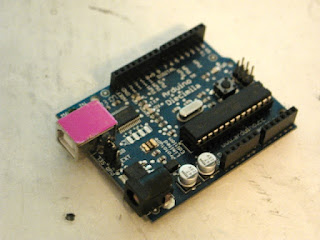
The Arduino is the artist's micro. It is very much non-geek. You can use an Arduino without picking up a soldering iron. You can use one without knowing really anything about programming!
On the hardware side, most Arduinos and clones come pre-assembled and tested. A naked Arduino isn't that interesting to a non-geek, though. All they normally have is a single LED just so you can upload the "hello world" program and confirm the thing is working.
But this is why there are shields. Many shields also come already assembled. There are shields with MIDI jacks on them. Shields with LCD displays and buttons on them. Shields with relays on them. Shields with motor drivers on them. Shields with full-color touchscreens and tiny joysticks on them. Shields with Xbee wireless links, Ethernet jacks, MP3 chips, lithium batteries with charge circuits, even NTSC television output on them.

It is literally as simple as taking the shield and seating it on top of the Arduino. Sticking new RAM in a computer is much harder than that.
Oh, yeah, and you can make your own shields...as scratchy as the perf-board shield I posted in a previous entry, to slightly nicer assemblies on pre-made proto-board as on the right, to professional printed PCBs made by one of the various mail-order fab houses that have sprung up over the last few years.
The point is, the Arduino is designed to get you up and doing what you need to do; remote data logging or adding a startup chime to a motorcycle or controlling a music synthesizer from a wii remote. The heavy lifting has already been done for you. And the same is true of the software.
You can "program" on an Arduino in Script Kiddie mode, in Magic Spell mode; knowing nothing about how the software works or even (especially if you are using library functions) what it looks like.
If you can install a computer game, you can get an Arduino working. I've had a remote control on an old television that was harder to figure out.
Not to disparage the Arduino project, of course. Much of what makes it so easy to do so much now is because of other users; users who started out as total beginners and figured out how to do something, then took the next step and made up a library or a shield and put it back out into the community under the same open-source, open-hardware rules.
And if you want to geek out, there are plenty of places to geek out. Starting with assembling the kit yourself. Sure, you only save a couple of bucks, but it does give you a nicer sense of accomplishment.
It isn't that easy for me to get a good perspective on some of this. I've had a soldering iron in my hands since I was six. I used to cobble up all sorts of basic tricks with LEDs and strobe lights and audio-frequency oscillators -- especially when I was hanging out at Star Trek and science fiction conventions. But I was basically cheating...never did learn much of basic electronics. Even today I have to look up Ohm's Law. Most of the stuff I did then was pretty much Magic Spells; wire up the 555 the way Forrest Mims drew it, and if I was lucky, it worked.
Perhaps another way of putting this is it is recipe-based cooking. When you first cook from a recipe, you are scared to change a single ingredient. Later, you are out of eggs, you substitute oil for butter for health reasons, and you don't bother to measure an exact teaspoon but just toss in a pinch that looks about right.
In electronics and programming this is a good way to get acclimated. Take a working code, or circuit, and tweak some values, mess around with substitutions. You are trying to get a sense of what the different parts are doing by replacing them or taking them out. Most of it will be trial and error.
But at some point you need to move on to grasping the underlying theory. And I am a great fan of manuals. I say -- play first. Get your feet wet, mess around, get creative. THEN hit the manual hard to try to figure out why taking out that one capacitor made the amp stop working, or why changing "A = 2" to "A = 3" made the LEDs chase in the other direction.
At various points, take the time to dig down and read the whole manual (or datasheet, or tutorial, or whatever) from top to bottom. You can still skim over the parts you really aren't grasping, as well as the parts you are sure you know by now, but try to at least skim them. It is there that most of the "Ah hah!" moments come...as you stop at last on something you'd glanced over before, and realize the solution to Why It Isn't Working Since I Changed It is in that chapter.
Enough digression.
I've mentioned that the heart of the Arduino is a chip made by ATmel. That it is a computer-on-a-chip; everything but power regulation and the actual buttons and displays is already included. Again, the heavy lifting has largely been done for you; Atmel's engineers have made a very robust machine full of options, with all sorts of cute tweaks that makes it harder to break in ordinary usage.
 Getting into the chip through the Arduino IDE requires nothing more than a USB cable and a free bit of software. All the complexity of the process is being hidden from you. Install the software, which is as easy as installing a game -- make that, as easy as installing a game on a Mac -- plug in the USB cable, the Arduino powers up. Open the Arduino software window, click on the library to load an example program, and press the "upload" button to put that software on the chip.
Getting code onto a naked AVR is a little more exposed.
There are perhaps a dozen ways of doing it, including bootloaders, especially if you include such esoteric options as high-voltage programming. But I'm going to talk about just one, the first one I picked, the one I use now, and the one that works so well for me I see no reason to change it.
 First in order of creation is the software itself.
I am using Project Builder, because it is there (free on the Mac, included I believe with the Developer Tools package). Possibly a more powerful editor would be easier to work with, but I don't use half the functions of this one. Really, for the kind of programs we are talking about, typing them up in Wordpad is usually good enough.
More important is what to write! I am writing for compiling in avr-gcc and my main reference is the avr libC manual.
I am also making frequent reference to the datasheets for the AVR I am writing for -- which can be found as simply as by typing the name of the chip into Google -- and reference both to .pdfs found at Atmel's home site and at the sprawling chaos of AVR Freaks.
(I feel a little stupid supplying these links...if you can't Google up a company website, what the heck are you doing reading about how to program an AVR?)
 Reading datasheets is an art. But the intent of this particular entry was not about the software per se, it was about the process of getting the software from the desktop into the AVR chip.
For that, my hardware tool has been the USBtinyISP from Adafruit. This easy-to-assemble kit connects your computer (via USB cable) to your AVR (via standard ISP header). It also supplies power to the AVR from you computer's USB port.
Adafruit has a very good introductory tutorial on how to install the toolchain and get the programmer working. The principle is In-System Programming -- as long as the demands on the shared pins are not too electrically strange, you can connect up the six-pin header and program a chip that is already installed into the final circuits it will be controlling. This makes the process of debugging and tuning go a lot faster!
 Or you can use a separate programming or "target" board, which is what I am doing; my board design is pretty much based on the one from Evil Mad Scientist Laboratories, and is nothing much more than a piece of veroboard with a DIP socket, a six-pin header, and an LED wired to the power bus to let me know that at least the target board is getting power. Oh, and a "hello world" LED.
The rest is all software.
I am using avr-gcc as the compiler. That is the software that translates the high-order language I wrote the software in (C) into the actual opcodes stored on the flash memory of the AVR. (Non-volatile flash, did I mention that? The AVR will store, depending on the model, upwards of 32K of program that will last for 20 years with the power turned off. And boot up and run the moment you apply power again.)
GCC stands for GNU Cross Compiler (it used to stand for GNU C Compiler but grew in sophistication). GNU is the open source project (and operating system) that itself stands recursively for "GNU's Not UNIX." (Although UNIX is not, oddly enough, an acronym, but merely the preferred case for a name originally derived from "Uniacs".)
The AVR LibC is a large C library for AVR chips, similarly free and open source. If you wrote using LibC functions, and you have a copy of LibC where the compiler can see it, avr-gcc will make a clean version of compiled code that will run on your AVR of choice. The last two necessary bits are AVRDUDE, available from ATmel themselves if you can't find it elsewhere, and make, the family of utilities originally seen in UNIX, that makes an executable (aka turns formatted Assembly Language into a binary form that a computer can run.)
Up until this point everything I've said applies equally to your OS of choice; OSX, any of the various flavors of Windows, and many of the distros of Linux. The last part of this is, however, Mac-specific.
The best package for the AVR user is the Crosspack for AVR from Objective Development. This free package has everything; avr-gcc, AVRDUDE, and I think it even includes make (although I also installed the "Developer Tools" package that Apple distributes for free and includes on disk with purchase of their operating system).
In all likelihood the latest version of the Crosspack installer will put everything where it needs to go. But you may need to go into the UNIX core of your Mac and move a few things around -- or, rather, tell UNIX where to look if it can't find something in the directory it is looking in.
Yes...Crosspack AVR is composed of Command-Line Tools.
I'd screen-shoot an example but I'm writing this on the desktop and currently programing on the laptop. It isn't that exciting to look at, anyhow. (And, yes, I have my Terminal set to a nice old-fashioned white text on black background. The truly retro green was a little hard to read in room lights. Did I mention the first computer I owned was a green-phosphor screen 8-bit Kaypro?)
The point is, you have to use the Terminal application (or something similar) to navigate to where you located an ASCII text document named "main.c," and use the make command to compile it based on the preferences in your Makefile (also a text document).
Don't worry; the process is thoroughly documented in several excellent tutorials, including the one at Adafruit, and an exceptionally well-commented Makefile is included with your Crosspack AVR package.
You will want to make sure the Makefile has the correct model of AVR in it, as well as the programmer you are using. Leave the rest alone, however! (I blew up a couple of ATtiny45's by monkeying with fuse settings). The default settings work just fine -- or, rather, the suggested settings (there is an example for both with external crystal and with internal oscillator).
Make, guided by the preferences in your Makefile, will call up avr-gcc, which in turn will check your code for syntax. It won't find errors, but it will find bad or uncompilable code and tell you what line it was on and why it stopped compiling there.
Assuming you manage to make a clean compilable, the next command-line call is on AVRDUDE. I find the instructions given by Adafruit were extremely clear, but then again, just by typing "avrdude" in the Terminal window it will list out the programmer options. This is usually enough to jog my memory if I've forgotten the syntax.
For most of the time I've been typing something a lot like: avrdude -c usbtiny -p t13 -U flash:w:main.hex
Pretty easy to figure out. Each "-" suffix (which can be typed in any order) tells AVRDUDE what the following text refers to. When prompted, AVRDUDE will print out a list of viable names for programmers it recognizes and chips it recognizes. The last part is the actual upload; pointing to the name of the binary executable make created, and telling AVRDUDE to write it into the non-volatile flash memory of the AVR chip.
Of course, even someone of my limited skill could wrap all this up into a nice macro or script or even a baby program with a cute little big-button GUI. But I like having access to all the command-line options to do stuff like reset fuses (well, maybe that option would have been better not to have!) and I like the old-school feel of working in the Terminal window. Besides, it all works, and it isn't something I need to change right now.
If all goes well, there will be a moment of flashing lights on programmer and whatever you've attached to the chip, some text scrolls past in the Terminal window, and you now have a working "hello world" on an AVR. Or a 32K video character generator program with accelerometer inputs. Because at this point, its all in the coding.
I made a little more progress with AVR programming; now I can run a timer in hardware mode, without a single line of program code (even an interrupt). Right now one of the last of my working chips is pulsing an LED; Timer0 is hardware driving the pin directly in PWM mode, but a routine running in the main() program loop is incrementing and decrementing a value to smoothly brighten and dim the LED over time.
But I'm not going to talk about that. I'm going to back up, because I realize I skipped over some of the basics of programming an AVR.
Start with the Arduino.

The Arduino is the artist's micro. It is very much non-geek. You can use an Arduino without picking up a soldering iron. You can use one without knowing really anything about programming!
On the hardware side, most Arduinos and clones come pre-assembled and tested. A naked Arduino isn't that interesting to a non-geek, though. All they normally have is a single LED just so you can upload the "hello world" program and confirm the thing is working.
But this is why there are shields. Many shields also come already assembled. There are shields with MIDI jacks on them. Shields with LCD displays and buttons on them. Shields with relays on them. Shields with motor drivers on them. Shields with full-color touchscreens and tiny joysticks on them. Shields with Xbee wireless links, Ethernet jacks, MP3 chips, lithium batteries with charge circuits, even NTSC television output on them.

It is literally as simple as taking the shield and seating it on top of the Arduino. Sticking new RAM in a computer is much harder than that.
Oh, yeah, and you can make your own shields...as scratchy as the perf-board shield I posted in a previous entry, to slightly nicer assemblies on pre-made proto-board as on the right, to professional printed PCBs made by one of the various mail-order fab houses that have sprung up over the last few years.
The point is, the Arduino is designed to get you up and doing what you need to do; remote data logging or adding a startup chime to a motorcycle or controlling a music synthesizer from a wii remote. The heavy lifting has already been done for you. And the same is true of the software.
You can "program" on an Arduino in Script Kiddie mode, in Magic Spell mode; knowing nothing about how the software works or even (especially if you are using library functions) what it looks like.
If you can install a computer game, you can get an Arduino working. I've had a remote control on an old television that was harder to figure out.
Not to disparage the Arduino project, of course. Much of what makes it so easy to do so much now is because of other users; users who started out as total beginners and figured out how to do something, then took the next step and made up a library or a shield and put it back out into the community under the same open-source, open-hardware rules.
And if you want to geek out, there are plenty of places to geek out. Starting with assembling the kit yourself. Sure, you only save a couple of bucks, but it does give you a nicer sense of accomplishment.
It isn't that easy for me to get a good perspective on some of this. I've had a soldering iron in my hands since I was six. I used to cobble up all sorts of basic tricks with LEDs and strobe lights and audio-frequency oscillators -- especially when I was hanging out at Star Trek and science fiction conventions. But I was basically cheating...never did learn much of basic electronics. Even today I have to look up Ohm's Law. Most of the stuff I did then was pretty much Magic Spells; wire up the 555 the way Forrest Mims drew it, and if I was lucky, it worked.
Perhaps another way of putting this is it is recipe-based cooking. When you first cook from a recipe, you are scared to change a single ingredient. Later, you are out of eggs, you substitute oil for butter for health reasons, and you don't bother to measure an exact teaspoon but just toss in a pinch that looks about right.
In electronics and programming this is a good way to get acclimated. Take a working code, or circuit, and tweak some values, mess around with substitutions. You are trying to get a sense of what the different parts are doing by replacing them or taking them out. Most of it will be trial and error.
But at some point you need to move on to grasping the underlying theory. And I am a great fan of manuals. I say -- play first. Get your feet wet, mess around, get creative. THEN hit the manual hard to try to figure out why taking out that one capacitor made the amp stop working, or why changing "A = 2" to "A = 3" made the LEDs chase in the other direction.
At various points, take the time to dig down and read the whole manual (or datasheet, or tutorial, or whatever) from top to bottom. You can still skim over the parts you really aren't grasping, as well as the parts you are sure you know by now, but try to at least skim them. It is there that most of the "Ah hah!" moments come...as you stop at last on something you'd glanced over before, and realize the solution to Why It Isn't Working Since I Changed It is in that chapter.
Enough digression.
I've mentioned that the heart of the Arduino is a chip made by ATmel. That it is a computer-on-a-chip; everything but power regulation and the actual buttons and displays is already included. Again, the heavy lifting has largely been done for you; Atmel's engineers have made a very robust machine full of options, with all sorts of cute tweaks that makes it harder to break in ordinary usage.

Getting code onto a naked AVR is a little more exposed.
There are perhaps a dozen ways of doing it, including bootloaders, especially if you include such esoteric options as high-voltage programming. But I'm going to talk about just one, the first one I picked, the one I use now, and the one that works so well for me I see no reason to change it.

I am using Project Builder, because it is there (free on the Mac, included I believe with the Developer Tools package). Possibly a more powerful editor would be easier to work with, but I don't use half the functions of this one. Really, for the kind of programs we are talking about, typing them up in Wordpad is usually good enough.
More important is what to write! I am writing for compiling in avr-gcc and my main reference is the avr libC manual.
I am also making frequent reference to the datasheets for the AVR I am writing for -- which can be found as simply as by typing the name of the chip into Google -- and reference both to .pdfs found at Atmel's home site and at the sprawling chaos of AVR Freaks.
(I feel a little stupid supplying these links...if you can't Google up a company website, what the heck are you doing reading about how to program an AVR?)

For that, my hardware tool has been the USBtinyISP from Adafruit. This easy-to-assemble kit connects your computer (via USB cable) to your AVR (via standard ISP header). It also supplies power to the AVR from you computer's USB port.
Adafruit has a very good introductory tutorial on how to install the toolchain and get the programmer working. The principle is In-System Programming -- as long as the demands on the shared pins are not too electrically strange, you can connect up the six-pin header and program a chip that is already installed into the final circuits it will be controlling. This makes the process of debugging and tuning go a lot faster!

The rest is all software.
I am using avr-gcc as the compiler. That is the software that translates the high-order language I wrote the software in (C) into the actual opcodes stored on the flash memory of the AVR. (Non-volatile flash, did I mention that? The AVR will store, depending on the model, upwards of 32K of program that will last for 20 years with the power turned off. And boot up and run the moment you apply power again.)
GCC stands for GNU Cross Compiler (it used to stand for GNU C Compiler but grew in sophistication). GNU is the open source project (and operating system) that itself stands recursively for "GNU's Not UNIX." (Although UNIX is not, oddly enough, an acronym, but merely the preferred case for a name originally derived from "Uniacs".)
The AVR LibC is a large C library for AVR chips, similarly free and open source. If you wrote using LibC functions, and you have a copy of LibC where the compiler can see it, avr-gcc will make a clean version of compiled code that will run on your AVR of choice. The last two necessary bits are AVRDUDE, available from ATmel themselves if you can't find it elsewhere, and make, the family of utilities originally seen in UNIX, that makes an executable (aka turns formatted Assembly Language into a binary form that a computer can run.)
Up until this point everything I've said applies equally to your OS of choice; OSX, any of the various flavors of Windows, and many of the distros of Linux. The last part of this is, however, Mac-specific.
The best package for the AVR user is the Crosspack for AVR from Objective Development. This free package has everything; avr-gcc, AVRDUDE, and I think it even includes make (although I also installed the "Developer Tools" package that Apple distributes for free and includes on disk with purchase of their operating system).
In all likelihood the latest version of the Crosspack installer will put everything where it needs to go. But you may need to go into the UNIX core of your Mac and move a few things around -- or, rather, tell UNIX where to look if it can't find something in the directory it is looking in.
Yes...Crosspack AVR is composed of Command-Line Tools.
I'd screen-shoot an example but I'm writing this on the desktop and currently programing on the laptop. It isn't that exciting to look at, anyhow. (And, yes, I have my Terminal set to a nice old-fashioned white text on black background. The truly retro green was a little hard to read in room lights. Did I mention the first computer I owned was a green-phosphor screen 8-bit Kaypro?)
The point is, you have to use the Terminal application (or something similar) to navigate to where you located an ASCII text document named "main.c," and use the make command to compile it based on the preferences in your Makefile (also a text document).
Don't worry; the process is thoroughly documented in several excellent tutorials, including the one at Adafruit, and an exceptionally well-commented Makefile is included with your Crosspack AVR package.
You will want to make sure the Makefile has the correct model of AVR in it, as well as the programmer you are using. Leave the rest alone, however! (I blew up a couple of ATtiny45's by monkeying with fuse settings). The default settings work just fine -- or, rather, the suggested settings (there is an example for both with external crystal and with internal oscillator).
Make, guided by the preferences in your Makefile, will call up avr-gcc, which in turn will check your code for syntax. It won't find errors, but it will find bad or uncompilable code and tell you what line it was on and why it stopped compiling there.
Assuming you manage to make a clean compilable, the next command-line call is on AVRDUDE. I find the instructions given by Adafruit were extremely clear, but then again, just by typing "avrdude" in the Terminal window it will list out the programmer options. This is usually enough to jog my memory if I've forgotten the syntax.
For most of the time I've been typing something a lot like: avrdude -c usbtiny -p t13 -U flash:w:main.hex
Pretty easy to figure out. Each "-" suffix (which can be typed in any order) tells AVRDUDE what the following text refers to. When prompted, AVRDUDE will print out a list of viable names for programmers it recognizes and chips it recognizes. The last part is the actual upload; pointing to the name of the binary executable make created, and telling AVRDUDE to write it into the non-volatile flash memory of the AVR chip.
Of course, even someone of my limited skill could wrap all this up into a nice macro or script or even a baby program with a cute little big-button GUI. But I like having access to all the command-line options to do stuff like reset fuses (well, maybe that option would have been better not to have!) and I like the old-school feel of working in the Terminal window. Besides, it all works, and it isn't something I need to change right now.
If all goes well, there will be a moment of flashing lights on programmer and whatever you've attached to the chip, some text scrolls past in the Terminal window, and you now have a working "hello world" on an AVR. Or a 32K video character generator program with accelerometer inputs. Because at this point, its all in the coding.
Tuesday, March 15, 2011
We Interrupt This Blog...
I'm spending a quiet week repairing broken microphone elements, learning AVR libC, and recovering from the illness that struck me down during an already brutal tech and opening weekend.
I know, this blog is starting to look like an electronics blog. It all does get back to theater eventually, I promise. As will I. Now that I've remembered that you can put pictures here, I'm going to be moving some older posts about lighting design from a previous blog. I have photographs from some of my old designs I think will help explain the points I make so badly otherwise.
Plus at some point I'll scan in some of the actual paperwork used for shows and designs; cue lists, stage plots from actual bands I've mixed, typical marked-up script pages, and so on.
For the moment, though, I'm still going on about learning AVR. This is as much for me as for anyone else; in attempting to explain, perhaps I understand what I'm trying to grasp just a little bit better.
Interrupts go way back in the history of computing. One of the greatest examples I can think of is the Apollo Guidance Computer. The AGC was purpose-built; it would be not be too much to say the chips were built around the software tasks, rather than the other way around. And the internal architecture was nothing if not interrupts.
Ah, but I'm going to have to interrupt once again. Let's go to the very basics of a program. Programs are linear. In a complete computer environment, due to such tricks as multi-tasking, multi-threading, multiple cores, math co-processors, and of course interrupts, many things may be happening at the same time. (Or at least, give the appearance of happening at the same time.)
For a single, simple program, the flow starts at the top and, although there may be calls and jumps, it continues along a single pathway.
AVRs are single-purpose machines. They aren't intended to run a program then stop. They are intended to start running when booted and keep running until power is cut off. So whereas an endless loop with no possible break would be anathema in any other program, it is standard in the AVR world.
If nothing else, there is nowhere to break to. If you could press "Control-Q" or type "Exit," there is no computer to exit to. There is nothing but the AVR itself, and whatever it is running.
Thus, the below is a perfectly legitimate AVR program:
int main (void)
{
DDRA = (1 << 0);
PORTA |= (1 << 0);
}
It loops endlessly, doing nothing but setting a connected LED to "on."
Perhaps not the most useful program. Let's add a second loop that actually does something:
int main (void)
{
DDRA = (1 << 0);
for (;;)
{
PORTA ^= (1 << 0);
_delay_ms(2000);
}
}
The inner "for" loop evaluates as always true, meaning when the program enters that loop, it never exits. Within the loop, the output of Pin0 of the A register is toggled. The LED blinks (with a time dependent on the actual clock setting..."ms" is not a real-time constant.)
Which is great, but there is a potential problem.
Say you have a gadget that is going to do something when a button is pressed. While waiting, it flashes an LED to let the user know it is in "Ready" mode for the button press.
But what happens when the user presses the button? Look again at the loop above. The only place to put that button routine is inside the for(;;) loop, and the vast majority of the CPU cycles in that loop are spent sitting in the _delay_ms(2000) command.
Only in those brief moments when the AVR finishes the delay, executes the LED toggle, and then returns can the user's input be detected.
So here is the Apollo Spacecraft's AGC, efficiently using up 99% of the available CPU cycles to compare the pilot's input with the actual change of position of the spacecraft as fuel mass is expended and the spacecraft's COG is changing. And then the Approach RADAR detects a potential collision.
Enter interrupts.
On the AGC, when something like the RADAR wanted attention NOW, the AGC quickly saved current status of the registers and its position in the program stack, exited and cleared, loaded and executed a different program as demanded by the emergency, then when that was done, retrieved where it was and what it had been doing and went back to it.
It did so so efficiently -- it did so in such a fail-to-safe mode -- that when a cascade of interrupts brought down the fly-by-wire to the limits of functionality during the very first landing, a smart engineer was able to recognize the error code that was flashing on the AGC's little terminal (the DSKY) and give the Mission Commander the go-ahead to land anyhow.
As it turned out, they'd left the Approach RADAR on by accident, which was convinced the spacecraft was about to impact another craft about 3474 kilometers in diameter and made of solid rock.
The point being, though, that interrupts are a way of smoothly exiting a program upon an outside trigger.
So there are two ways of dealing with the above button-and-LED problem. One is to use what in the AVR world is called a pin interrupt. Not all pins are available for interrupt use, but you could wire the button to one that is. The loop would be broken, the interrupt routine run (which could be a complex program on its own), and on completion of all code the AVR jumps back to the loop and continues running from where it left off.
Or, you could make the LED blink an interrupt. Sounds tricky, I know.
The AVRs make available several internal timers. These are registers designed to count clock cycles, completely independent of ordinary program flow. Think of it as a for(i = 0; i < 2000; i ++) routine that runs outside of and simultaneous with the Main() program loop.
Using a global interrupt, we can detect each time the loop evaluates as false, toggle the LED, reset the timer, then jump back to what we were doing. Total cost is a cycle or two of program time. Meanwhile the bulk of the clock cycles are spent where we want them; in the main body of the program.
To make such a global interrupt work, we need to do four things; we need to enable global interrupts, we need something in the timer that can be detected, we need to turn on the appropriate interrupt in the timer mask, and we need to add the actual interrupt.
Here's my current working test code:
#include &< avr/interrupt.h &> //make sure to include the interrupt library
ISR(TIM0_COMPA_vect) //this is the actual interrupt vector
{
PORTB ^= (1 << 4); //toggle the LED
}
int main(void) // the standard avr libC for the main program body
{
DDRB = (1 << 4); // set Data Direction Register pin3 = output
TCCR0B = 0b10000101; //yes, I am setting the timer flags in binary
TIMSK |= (1 << OCIE0A) //the compiler is smart enough to recognize the
// name of the flag I want to set here, and replace it
// with the proper shift when I compile.
sei(); // turns on global interrupt
OCR0A = 200; //I know, magic numbers. This is the number put in the
// comparison register B that the timer evaluates for. Another
//way is to use the overflow (at 255 for the 8-bit timer).
for (;;)
{ //the "body" of the program, which is empty. It goes
} // in here and never comes out.
}
(As an aside, it is strangely difficult to put properly formatted code samples on Blogger. Something else I guess I'll have to find time to learn, if I'm going to continue talking about this stuff).
There are a few other tricky things going on here. I said the timer is driven by the CPU clock. That is not exactly true. The timer can be driven from the CPU clock or from an external clock. But before it counts a single bit the clock input goes through a prescaler. Basically, a divider.
Above, where I read in "0101" to the first four bits of the timer0 control register, I was telling it to use the internal clock, and to divide that clock by a factor of 1024. Since my chip was set in the fuses to run from the internal oscillator at 8mHz, this brings the LED flash frequency down to where I can see it.
I've actually cheated and left off several other necessary #includes, which tell the compiler to look into other avr-C libraries for functions I've called. avr/io, for one. But by the time you got to programming interrupts, you'd be used to putting them in all your programs by default.
A more important caveat is it is the AVR series. Each chip has different registers, different pinouts, different options. There really is no getting around having to download the Atmel datasheet for whatever chip you are using, and then modifying the code samples you are working with.
These are not as straight-forward as working with Arduinos!
I am reasonably confident in my ability to turn on and off pins and call interrupts. My next task, then, is to try out the direct timer output mode to the LED, which makes possible a 100% hardware blink (which is to say, once the code is run once, the AVR handles what would be interrupts internally, without ever needing to enter the main program space). Then proper PWM, which uses the same output pins and timer. That will be amusing, as I will be interrupting the hardware from within the program to change the timer values (in order to pulse the LED or slew a servo).
After that, I'll move on to MIDI. The big trick for that is not so much using the non-UART serial port, but the necessary system clock scaling to get it close to the MIDI standard BAUD. It isn't as simple as the timer prescaler, unfortunately.
But this blog, I'll probably save from more detailed explanations and just give a general progress report. And start working on some proper theater-related posts.
Subscribe to:
Comments (Atom)