Thursday, January 10, 2013

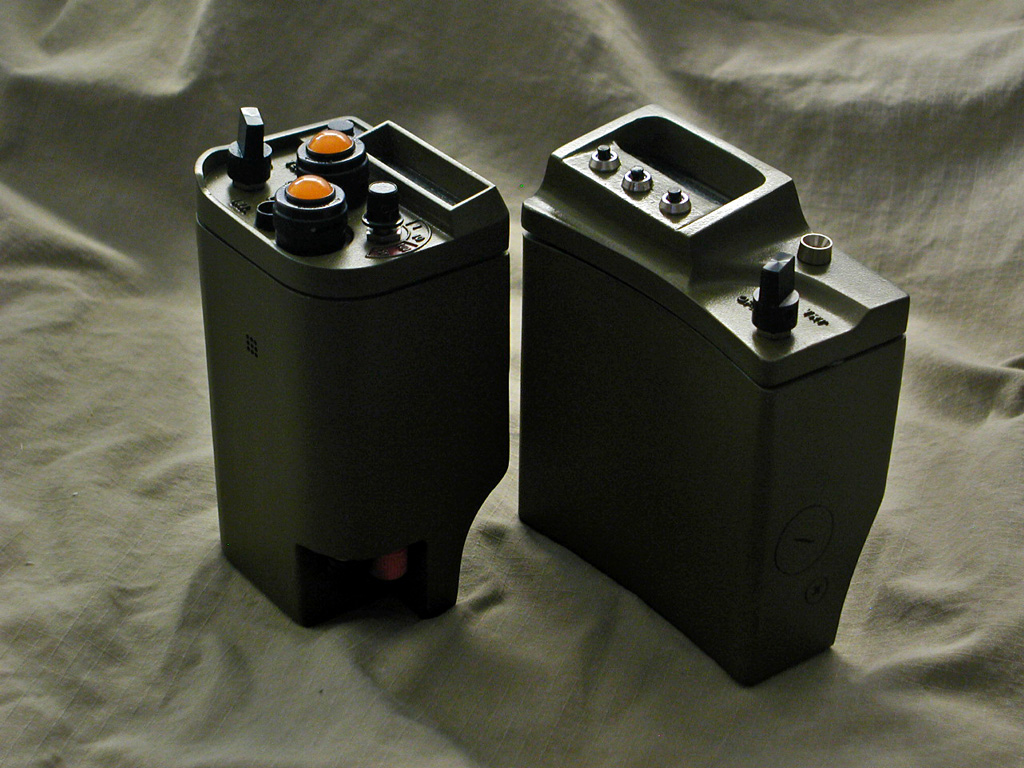
Build your own Morrow Project CBR Kit


Assuming you want to make a prop vastly similar to this one, this post assembles all the parts, links and diagrams I can provide.


Wednesday, January 9, 2013

Penultimate Morrow Post

This is the threatened "How we designed them" post.  I'm going to try to make it short with lots of pictures.

The design process was exploratory and iterative, but it was framed into two distinct sections; the "on spec" preparatory work, then a firm commitment to build.  The only late adjustment in contract was pushing the deadline back.  Of course I was consulting at every step, floating lots of sketches and renders back and forth as ideas developed.

As is usual with such things, it ends up being as much compromise and circumstance as it is art and science.  We were always aware of how things should "really" be both in the world of the Morrow Project and in the real world we pretended this project might exist in.  We chose to go in different ways not due to ignorance, but due to need.


Tuesday, January 8, 2013

Loose Ends

You know the village..it's up North, not far from Loose Chippings.

The Morrow Project CBR and Medkit are done.

I can finally put away the tools and clean up the dust and debris that's been cluttering up my work table since, well, the Wonka Robot:

Maybe it's just the paint fumes calling.  I'm feeling this odd gap now.  As I work to repair audio cables and clean up some voice-over recordings for a friend, I keep thinking I'm supposed to put another coat of Krylon Crystal Clear on, or finish sanding the latest bit of Bondo spot putty.

Well, fortunately or unfortunately, the same friend who had me build the Morrow boxes gave me a couple of other toys to play with.  There's this (a Wilco resin cast, just needs to be assembled and painted):


(If you don't recognize the prop, it is a third-party replica of THIS):

I also have a NERF "Maverick" that is wanting to get a Steampunk treatment.  But I'd love to get away from a few things that really bug me about the usual conversion -- like that ugly pistol grip.  The below is NOT a build, but is instead a PhotoShop collage -- with the base being someone else's very nice steampunk paint job (I could only hope to do one as nice):


The new grip would be carved softwood (I'm not THAT crazy), with either basswood or, perhaps, 1/4" aluminium stock as a frame.  Rebuilding the cylinder to make a hollow, Gatling-gun shape would be lovely, but I'm not sure I'm that crazy, either.

In any case, I've learned a little during the last few projects.  I can cast now, though not well, and I need very much to learn how to make glove molds with mother molds (a box mold is a waste of material for anything much larger than a pencil).

If I ever do anything like those Morrow Project boxes again, I'll remember a few things, like plan the closure in the original model, clear the lid space for controls, build insets for such things as data plates; use two-piece molds, mix pigment into the plastic...

Whatever project I try to sneak in between the cracks of the next two or three shows, though, is going to have to be simpler than the Fury Gun, my first really big prop:


(One of these days I may make an entry about the Fury Gun here.  Its got a bunch of moving parts and weighs about 20 lbs.  Involved welding steel, hot-bending mild steel with MAPP gas, 3d printing, Apoxie Sculpt, carving aluminium and brass with Dremel and files...)

All in all, I really, really want to do another project like this:


Six hours scattered over three days...and most of that was spent waiting for paint to dry!


Okay, I Lied

Like a REMF on a nice cot in an air-conditioned barracks.

Boxes are finished, and to celebrate I took some spooky pics on top of what few props I still own (having given away most of my own field gear years ago):


 I think my CCD hates me now.  These were shot with the light of a couple of LED's -- the blue nightlight from my bathroom (on the end of an extension cord), and my steampunk-modified Energizer headlamp, propped up on books and things to get the right angle.  Shutter times were on the order of a quarter of a second and I got a LOT of blown pixels which I had to touch up in PhotoShop.

Sunday, January 6, 2013

Kanobses

The latest Shapeways order arrived.  The saga of the Morrow Project boxes is almost at a close.  I intend only two more posts on the subject; one an overview of the design and development, the other, a gathering together of all the resources I can to allow someone else to make their own in the same style.


The whole basic concept of these was "green boxes with 1970's era controls on top."  But it was too much of a chore to find existing knobs that were affordable and of the right dimensions.  Thus, printing.


This was the concept; a fusion of elements from various period controls, intended to have a strong resemblance to the bar knobs of the venerable PRC-77 series military radios.


Modeled in Carrara (same place the top of the box was modeled, and that meant it was already to scale as well).


 After a check against the Design Rules for printing in high-detail plastic (which it very nearly flunked due to the small size), model is smoothed several times and exported.


(I have to export via Hexagon because of problems with the implementation of STL on Carrara.)


After a few weeks turn-around (slowed mostly by having a stainless steel print in the order), the raw knobs came back from Shapeways:


Sanding and filing to smooth out the burrs, several coats of Tamiya gloss black.  Drilled out the hex key access holes (unfortunately, I'd guessed wrong and the guide holes I included in the print were in the wrong place).  And cut apart a couple of one-dollar knobs from Allelectronics to use the pre-threaded brass insert inside them, which got superglued inside the new knobs.

Last step is the indicator line.  On the model, I'd intended to fill this with a thin strip of white styrene plastic.  But when I got the knobs in hand and saw how small they were (and how rough the slot was) I painted it white instead.  Using Opaque White left lying around from my attempts at drawing a comic book!

And this is what they look like installed:


(The sensitivity knob is off the dial because that's the only way to truly turn off the power to the box!)

Wednesday, January 2, 2013

New Pictures on the Morrow

Costello: Look, You gotta pitcher on this team?
Abbott: Sure.
Costello: The pitcher's name?
Abbott: Tomorrow.
Costello: You don't want to tell me today?
Abbott: I'm telling you now.
Costello: Then go ahead.
Abbott: Tomorrow!
Costello: What time?
Abbott: What time what?
Costello: What time tomorrow are you gonna tell me who's pitching?
Abbott: Now listen. Who is not pitching.

 No, seriously.  I have better pictures today.  I hope.  Shapeways just sent me a tracking number, though, so with any luck I'll be able to replace those stand-in knobs, stuff the final electronics inside, and fasten down the lids properly.


Incidentally, now that the cat is out of the bag, the capacitance sensor on the CBR triggers the "injector" light to pretend to give a dose of Universal Antidote (not to be confused with Universal Antibody).  There's a vibration motor in there, and in my original tests made for a nice joy-buzzer effect.  Alas, in the final configuration you can hear the vibration more than you can feel it.

The Medkit is making use of a cheap one-shot sound chip I wished I had bought more of when I saw it at All Electronics.  Like the venerable Radio Shack board, it lets you record a sample and play it back on a press of a button.  What I did for this one, is clipped a pair of leads to the microphone connection, attached the other end to my laptop, and played a sample off my sound effects collection on an endless loop.  The sound is that of a SCUBA diver underwater, and I got lucky with when I hit the "Record" button because it is a great, slightly-mechanical sloshing/bubbling sort of sound.  For whatever weird thing is actually inside that Medkit!

The chip is a 4.5v supply, the VFD requires at least 9v, so there is a pack of AA's plus a 9v transistor packed away inside there.  Plus the speaker, and the circuit board with the 555 on it.

Anyhow.  Rest of today's pics:


Tuesday, January 1, 2013

More Bad Pics

By the time I'd finished setting up, I'd lost the light.  Ah well.  I still don't have the final knobs on them (still assuming the prints from Shapeways come out okay!)