It is a nice feeling when something you got years and years ago, and has been gathering dust since, finally is of use. This being a CD full of meshes from Baument I bought over a decade ago. Many of them were too low-poly for the images I was rendering at the time, but to set up a city scene for a reflection map...they were wonderful.
I imported a bunch of his models, changed the default textures on one or two, loaded in a few raw pictures from my Germany trip as sources for tiled textures on streets and paving slabs...and built a sky dome with my hand-stitched cloud map. The scene was lit with only the sky dome and a single infinite light lined up more-or-less with where the sun appeared to be in the sky dome.
Of course, turns out Carrara runs into RAM issues when trying to figure out the radiosity effects from a giant scene-filling glow object. And as 7.2 is not 64-bit aware, it couldn't even see the greater RAM my macBook was making available. But after six hours, I had the raw render. And a few minutes later, renders of a fog layer and the sky alone for comping the final reflection map together in PhotoShop.
(I used to render a bunch of alpha layers to make comping easier, but since PhotoShop Elements can't see channels, I have to go into one of my few remaining OS 9.1 computers in order to open up the channels in PhotoShop 4.0 and export them.)
So here's the raw image; when finished it will be less saturated, and a bit sepia in fitting with the whole period-look aesthetic. Plus, you know, distance haze.
Yes; that's a render with Carrara's spherical camera, meaning a full 360 degrees both around and top to bottom. How it gets used, is plugged into "background" on a raytracing node which is plugged into the reflection channel. What it does, is fill in background behind the actual foreground objects in the scene; otherwise, every part of a shiny object that wasn't viewing an actual scene prop would render black.
Here's an example, placing the raw map on a prim sphere (with a procedural brick texture attached as a displacement map to give some surface texture and interest):
So this is why I spend time making reflection maps, and including them with my props. They make it possible to do decent metals and other reflective objects.
Of course, a lot of Steampunk props would look more at home in an interior setting. But as tempted as I am to construct a full Explorer's Club with paintings hung on paneled walls under ornate brass lighting fixtures and surrounded by overstuffed chairs...well, the result would mostly be murky and amber-colored, and that wouldn't show off the textures very well would it!
That ate up a couple of days. Now I'm back to painting up the detailed texture maps for the props. Today has been largely wrench work. Specifically, hand-painting the scratches and chips on the red handle of a giant steampunked monkey wrench.
And I had UV map problems. I'd hoped I could get away with mapping the jaws planar, but I wasn't able to ding up the corners with chips of missing paint and other scratches until I remapped them in box mode. And although all the parts of the brass piping had been pre-mapped, as used some of the maps overlapped. That made it difficult to work in a grime layer at the joints between different pieces of pipe.
So it was a dance between PhotoShop, Poser, Carrara, and UVmapper. As I said, there are advantages in having the object file external to the Poser figure file. I could update the geometry multiple times as I tested the new maps with roughed-in textures.
On two computers, networked together through the wireless modem. At one point, when both were rendering the reflection map, I added a third laptop, this one grabbing the files it needed to work on off Dropbox.
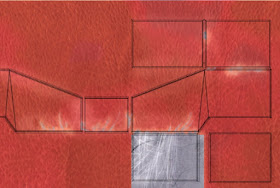
The basic texture for the paint job started as a scan of some nubby suede-like fabric. Then additional layers using the "clouds" texture function, and a lot of tweaking and layering with Adjustment Layers, folding all of these splotches and nubs together with a flat fill of basic red.
 Then the first of several layers for fading/rubbed away paint, scratches into the first layer, scratches and chips down to bare metal, a little subtle shadow edge around the chips, and some oil drips.
I'm doing this set differently; on my last few products, I combined multiple nodes within Poser and included specularity, bump, and even separate grime and diffuse value layers as texture maps (or generated within Poser using procedural textures). This time, I'm trying to bake in as much as possible. Less flexible...but it will work much better in DAZStudio.


What are using as UVmapper. That hasn't worked on an intel Mac for years???
ReplyDeleteI suspect that's another one of the programs I keep my old G4 around for. That and PhotoShop -- even 4.0 is superior for my needs than The Gimp, even if I do have to run it under OS9.
DeleteHowever, I have run UVmapper (Windows version) successfully using Wine, and that's what is on the laptop now.